How do I start and finish locking a stitch?
• You will want to make sure that your sewing machine is on a
sturdy work surface before starting any set up or maintenance
of ........................... your machine.
• Start on your material about ¼” from where you would normally
start.
• Sew to where you would normally start, then turn your material
around and sew back through the previous holes and continue on.
• When you are to the end of your stichline, lift your presser foot
and move your material back, to line up your needle with the
previous hole and then repeat.
• If you are in need of additional assistance feel free to call us Toll
Free: 866-286-8046
8
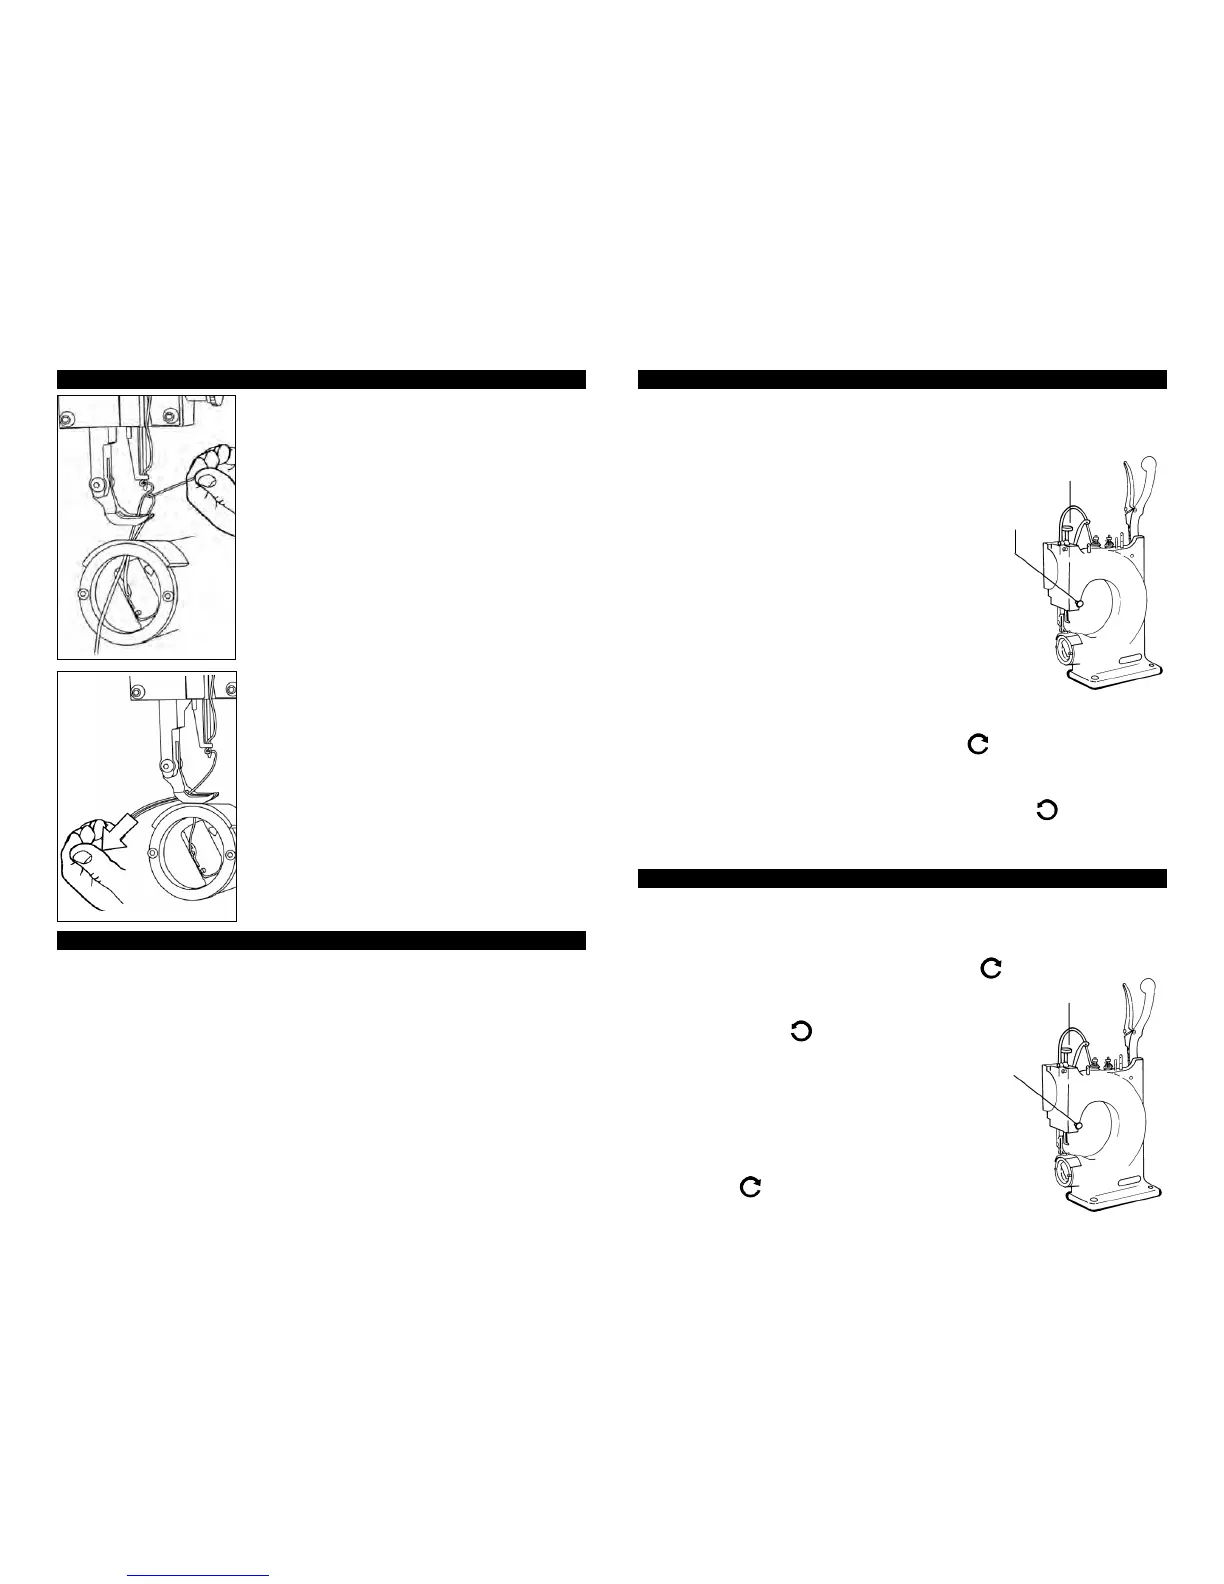
Adjust the stitch length with the Stitch
Length Adjustor.
• For a larger stitch.
Turn the Stitch Length Adjustor clockwise
.
• For a smaller stitch.
Turn the Stitch Length Adjustor
counterclockwise
.
• When the material thickness is
increased, the stitch length
shortens.
Length of stitch is proportional to thickness
of material. To maintain an even stitch
length adjust accordingly. Turn the stitch
length adjustor approximately 1/4 turn
clockwise
for 1/4 inch climb (increased
thickness).
9
The Presser Foot Adjustor adjusts the Presser Foot Pressure.
A properly adjusted Presser Foot will
advance the material without slipping.
Stitch
Length
Adjustor
Presser Foot
Adjustor
Stitch
Length
Adjustor
Presser
Foot
Adjustor
• Use a piece of the material to be sewn.
• Insert the sample material under the
Presser Foot and sew a couple stitches.
• Observe the test material during stitching.
- If the material is not advanced by the
Presser Foot, the pressure needs to be
increased.
- If the presser foot leaves a deep
impression on the material, the pressure
needs to be decreased.
To determine the proper pressure for
the material to be sewn, perform the
following test.
To increase the Pressure.
• Turn the Presser Foot Adjustor clockwise
. Re-test as before and
adjust until the material is advanced by the Presser Foot without slipping.
To decrease the Pressure.
• Turn the Presser Foot Adjustor counterclockwise
. Re-test and
adjust until the material is advanced by the Presser Foot without
leaving a deep impression.
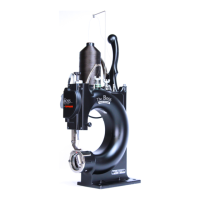
STEP 4: Aligning threads to sew.
STEP 3: Drawing up the bobbin thread.
• Lift the presser foot and pull the needle
thread up. The bobbin thread will
come up with it through the needle
plate.
• Align both threads under the presser
foot to the back as shown.
• You are now ready to sew. NOTE: It is
necessary to hold thread ends to begin
stitching.
DRAWING BOBBIN THREAD UP THROUGH NEEDLE PLATE
HOW TO SEW:
PRESSER FOOT ADJUSTMENT
STITCH LENGTH ADJUSTMENT