Do you have a question about the Tisira TOC969E and is the answer not in the manual?
Explains how to set cooking temperature using the thermostat button.
Describes setting cooking programs using heater types and functions.
Details requirements and warnings for installing the appliance correctly.
Specifies safe distances and suitable locations for installing the oven.
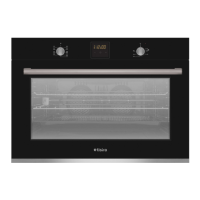
Covers placement, handling, and initial preparation for installing the 90cm built-in oven.
Covers under counter and elevated cabinet installation methods with required clearances.
Details furniture suitability, securing methods, and electrical connection needs.
Steps for first-time oven use, including cleaning and initial heating cycle.
Instructions for everyday operation, including setting temperature, time, and cooling system.
How to operate the grill function, including rack placement and temperature setting.
Guidance on using the chicken roaster accessory for cooking poultry.
Instructions for using the steam cleaning function to soften oven dirt.
Information about the catalytic panel's function and replacement advice.
Steps for properly inserting and taking out oven wire racks.
Detailed instructions for safely replacing the oven lamp, including safety warnings.
Guidance on recycling packaging materials according to regulations.
This document is a user manual for the Tisira 900 Electric Oven, model TOC969E, designed for Australian and New Zealand kitchens. It provides comprehensive information on the appliance's function, technical specifications, usage, and maintenance.
The Tisira 900 Electric Oven is a 90 cm built-in electric oven designed for indoor domestic use. Its primary function is cooking food through various heating programs. The oven incorporates a cooling fan system that extracts steam and prevents the outer surfaces from overheating during operation, continuing to run until the oven has cooled down. This ensures optimal performance and cooking results. The control panel features a function button to select heating programs, a digital timer for setting cooking durations, and a thermostat button to adjust the cooking temperature.
The manual notes that technical specifications may change without prior notice to improve product quality. Laboratory readings for values may differ based on usage and ambient conditions.
The oven offers a variety of cooking programs, each utilizing different heating elements to suit various food types:
Initial Use: Before first use, users must remove all labels, accessories, and protective foils. The oven interior should be wiped with a damp cloth. The oven should then be run at the highest temperature (240°C) for 30 minutes with the door closed to burn off any manufacturing residues, which may produce slight smoke and smell. After cooling, the interior should be cleaned with warm soapy water and dried.
Normal Use: To start cooking, users adjust the thermostat to the desired temperature and select a program. The digital timer allows setting cooking durations, after which heaters de-energize and an audible signal sounds. The cooling system continues to operate after cooking and should not be interrupted.
Grilling: When grilling, food should not touch the grill. The oven should be preheated for 5 minutes. Food should be centered for maximum airflow and can be turned upside down if necessary. The grill is activated by setting the function button to the grill symbol and then setting the desired grill temperature. The oven door must remain closed during grilling.
Chicken Roaster: For models with this feature, the spit is placed on its frame and slid into the oven. A dripping pan with water should be placed on the bottom to collect fat and facilitate cleaning. The plastic part must be removed from the spit before grilling. After cooking, the plastic handle is screwed onto the skewer to remove the food.
The oven door can be removed for easier cleaning. This involves fully opening the door, pulling the hinge lock upwards with a screwdriver, setting the hinge lock to its widest angle, and then closing the door slightly until it contacts the hinge lock. The door can then be lifted upwards by holding the cover with two hands. Reinstallation is the reverse process.
The inner glass panels can be removed. This involves pressing plastic latches on the left and right sides, pulling the profile towards oneself to release it, and then carefully pulling out the glass. The outer glass is fixed to the door profile. After cleaning, the glasses are reinstalled by reversing the process, ensuring the profile is properly seated.
Located behind the wire racks on the left and right walls of the oven cavity, catalytic panels absorb oil and food odors, burning them off during cooking to self-clean the oven. They are advised to be replaced every 2-3 years. To remove, first remove the wire racks.
Wire grills should be placed properly, ensuring they do not touch the rear wall. Deep or standard trays can be placed in lower and upper wire racks.
To remove, press the clips indicated by arrows, removing the lower side first, then the upper. Reinstallation is the reverse procedure.
Packaging materials are recyclable and should be disposed of in an environmentally friendly manner at designated collection points, not with domestic waste. The appliance itself is labeled in accordance with European Directive 2012/19/EU (WEEE) for proper return and recycling.