7/21
8
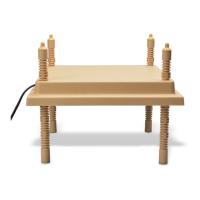
COMPONENT CHECKLIST
Prior to start up use the following list to double check the conveyor components.
MOTOR Have a qualied electrician ensure the motor is wired correctly for your power source.
Check that motor is securely fastened to the reducer or motorbase.
REDUCER Check that the proper amount of oil is in the reducer.* Make sure a vent plug is
installed on the reducer.* (A solid plug is usually installed for shipping.)
BEARINGS Double check that bearings are fastened securely. Be sure that locking collars are
tightened and set screws are screwed in rmly to the shaft.
GENERAL Check that sprockets with chain and/or sheaves with v-belt are aligned and
properly tensioned.*
*Additional information available in Maintenance section.
START UP
1. With no load on the belt, jog the belt until it makes a complete revolution. This will ensure that there are no
obstructions.
2. Run the belt for several hours before placing the conveyor into production. During this time watch how thebelt is
tracking. If the belt is running o to one side, loosen the bearing (on the drive end), on that side and with the
pusher bolt provided (See FIGURE 4) move the driveplate out slightly. This will force the belt towards the
opposite side. When the belt is tracking properly, tighten down the bearing and lock the pusher bolt in place with
the locking nut provided.
CHECK AT LEAST WEEKLY FOR PROPER TRACKING.
NOTE: Wear marks on the outside surface of the belt sidewings indicate the belt is tracking incorrectly.
3. As the belt is running observe the cotter pins on either side. Make certain they are all spread properly.
TORQUE LIMITER
Torque limiters are often provided to give protection against overloading or jamming. If the belt is factory installed, the torque
limiter is set to allow the belt to run freely without torque limiter slippage occurring (This may not be sucient for the loads
to be carried). If slippage of the torque limiter occurs, See the separate Torque Limiter Instructions sent with your conveyor
for further instructions
SEE THE TORQUE LIMITER INSTRUCTIONS THAT CAME WITH THE CONVEYOR
FOR ADJUSTMENT/REPLACEMENT INSTRUCTIONS AND PARTS LISTS.
MAINTENANCE
BELT CARE
1. LUBRICATION - Periodically oil the hinged steel belt to keep the belt components moving freely andreduce belt
drag. This will minimize wear on the belt and drive components and is especially important if the belt is operating
in wet conditions.
2. BELT TENSION - Check for proper belt tension at least monthly or after any jamming. Use the following
information as a guide for tension.