52
TTCSP49
In more detail . . .
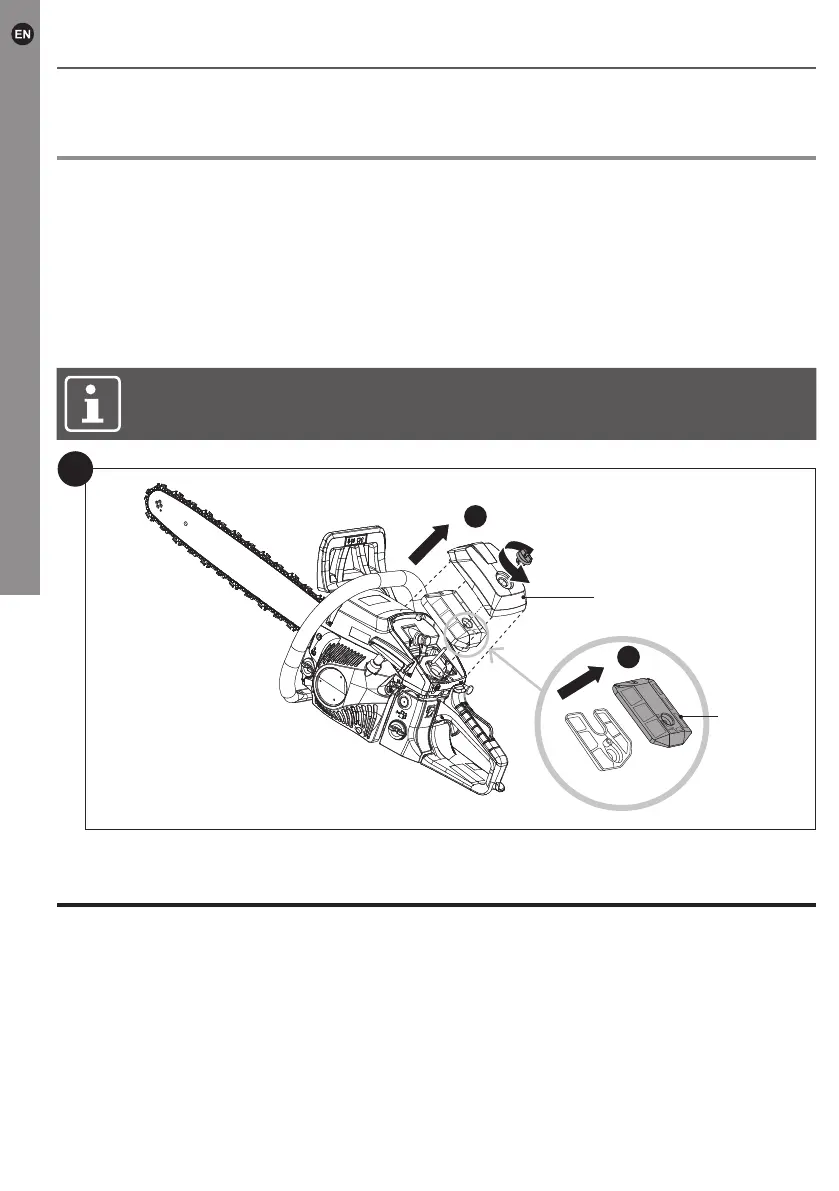
Air lter
Inspect the air lter (6b) regularly. Clean or replace it with a new one if necessary.
1. Loosen the xing screw and remove the top cover (6) (Fig. 47).
2. Remove the air lter (6b).
3. Using the screwdriver (28) separate the air lter (6b) into its two parts and tap them
on a stable surface to remove dust. Use compressed air (max. 3 bar) to remove
stubborn dust.
4. Reassemble the two lter parts and ret the air lter (6b).
5. Attach the top cover (6) and secure it with the xing screw.
NOTE: Ensure the rubber seal between the carburettor and the air lter (6b)
is clean and tightly ts in place.
47
6b
6
1
2
Fuel lterFuel lter
The fuel tank of this product is tted with a lter located at the free end of the fuel pipe. The fuel tank of this product is tted with a lter located at the free end of the fuel pipe.
If it be necessary to clean or replace the fuel lter, contact an authorised service centre If it be necessary to clean or replace the fuel lter, contact an authorised service centre
or a similarly qualied person.or a similarly qualied person.
Care and maintenance