TTI932CHN
25
Getting
started...
EN
WARNING!
remove battery pack from product before adjusting saw
chain tension!
The cutting edges of the saw chain are sharp! Always wear
protective gloves when handling chain!
Always maintain proper chain tension! A loose chain increases
the risk of kickback! A loose chain may jump out of the guide bar
groove! This may injure the operator and damage the chain! A loose
chain will cause rapid wear to the chain, guide bar and sprocket!
Tensioning the chain too tightly will overload the motor and cause
damage, and insufcient tension can cause chain derailing,
whereas a correctly tightened chain provides the best cutting
characteristics and prolonged working life! The chain life mainly
depends upon sufcient lubrication and correct tensioning!
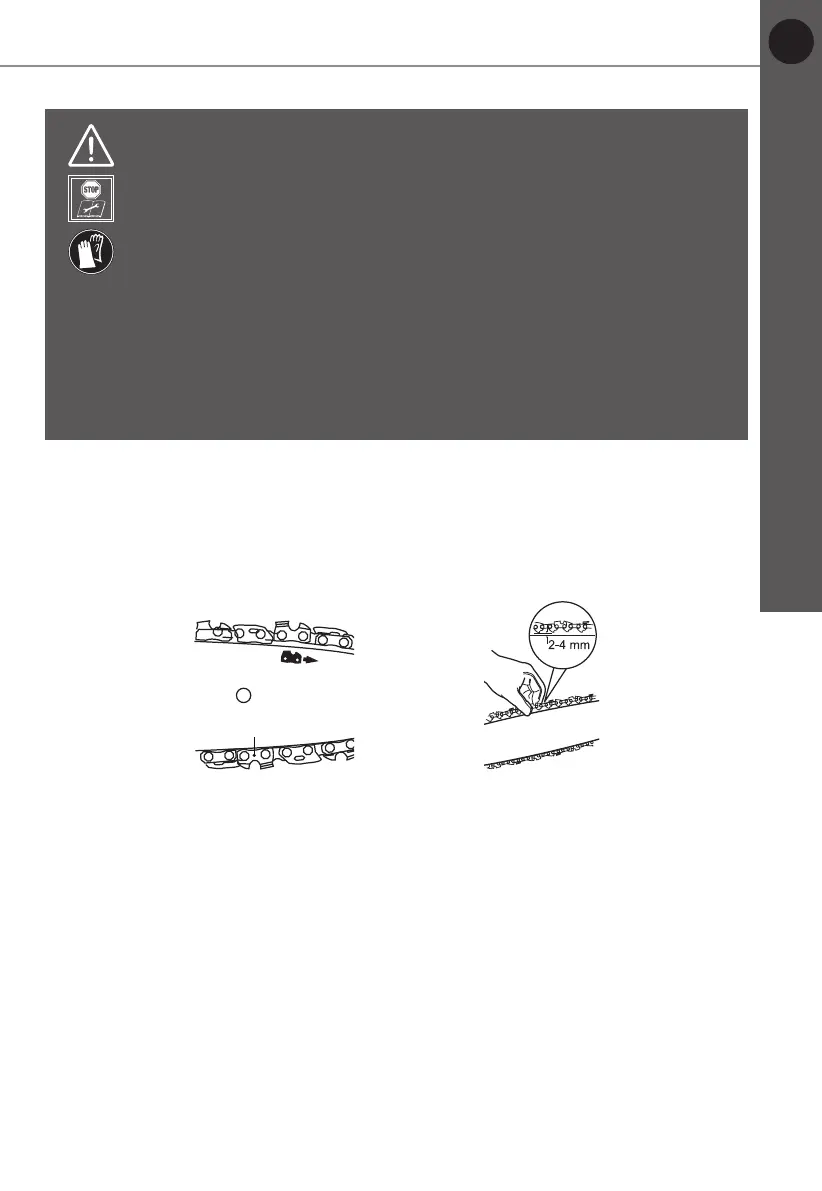
1. Place the product on a suitable at surface with the chain saw cover (14)
facing forwards.
2. Check the chain tension using one hand to lift the saw chain (11) against
the weight of the product. The correct chain tension is achieved when the
saw chain can be lifted by approximately 2 - 4 mm from the guide bar (12)
in the centre (Fig.7, 8).
’
Fig. 7 Fig. 8
3. Adjust the tension if you nd that the saw chain (11) is too loose or tight.
4. Slightly loosen the locking wheel (13), then screw the tension screw (7) in
or out to adjust the tension pin (8) / guide bar (12) towards the left or right
until the chain ‘tie straps’ are just touching the bottom edge of the guide bar
(12), hold it in the position.
5. Pull the saw chain (11) along the top of the guide bar (12) by gloved hand
from one end to the other, several times. The saw chain (11) should feel
tight but still move freely.
6. After the adjustment, re-tighten the locking wheel (13).
Before you start