Page 16 @)1&/2:(+.:4=&A02'/.)+'B&6=24'2&:4==&CD###DE#$D$EC#, Item 64804 64805
FG@<HI JGKLH<LGLM<NGFKM&O<PQKLR O<PQKLR&HKSFF<HTS
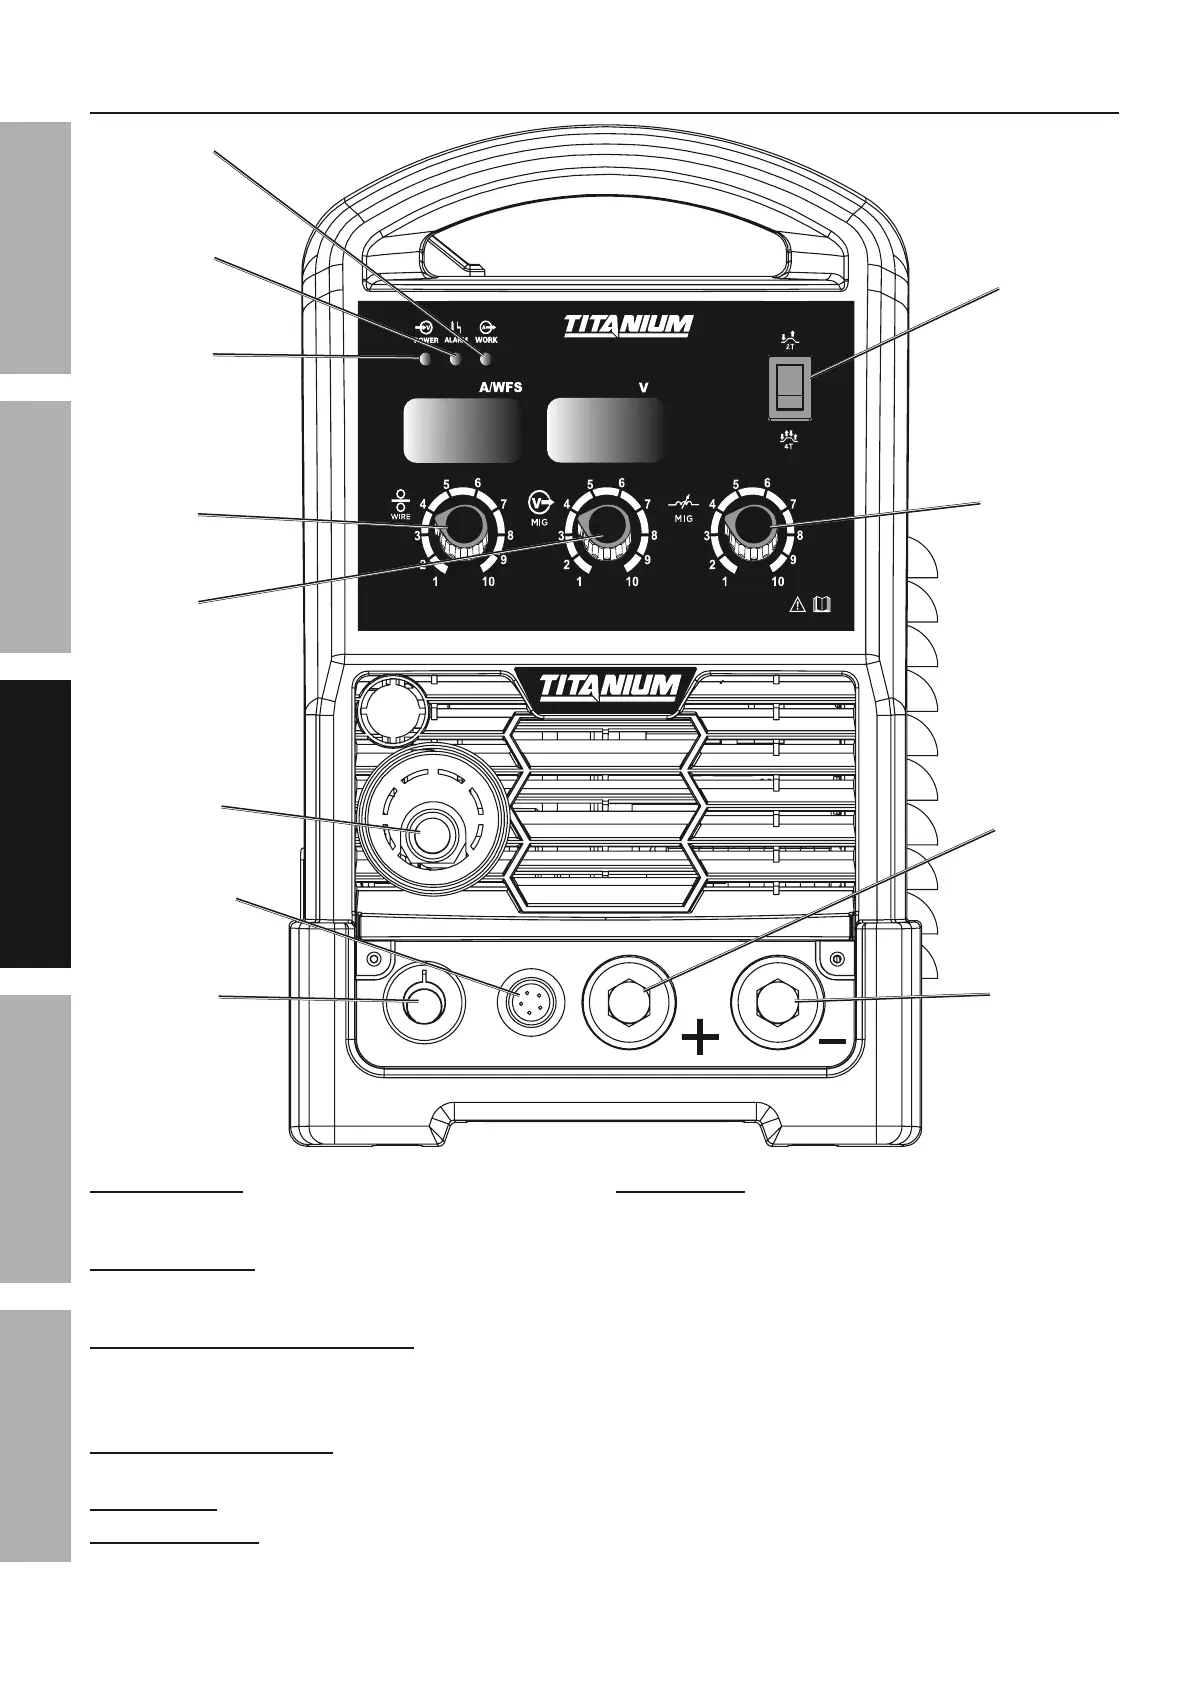
@1)+/&S4+2=&M)+/1)='
G=41;&K+>.:4/)15 Lights up if there
is a problem with welder operation.
See Alarm Indicator Error Codes on page 28.
O.12&F622>&Y+)35 Controls the speed that the
welding wire feeds out of the MIG Gun or Spool
Gun and the output amperage of the Welder.
JKR Gun / Spool Gun Cable Socket5&The MIG Gun
and Spool Gun Cables connect here. The wire,
welding current, and shielding gas (if performing MIG)
feed to the welding gun through here.
O.12&@22>&M)+/1)=&F):\2/5 Connect the
Wire Feed Control Cable here.
-)=/492&Y+)35 This controls the output voltage.
K+>0:/4+:2&Y+)35 This controls the output inductance.
bH7"H&F*./:(5 Use this to set the Gun Trigger
operation to either 2T or 4T mode:
2T (2 touch) mode:
1. Squeeze the trigger to start the welding current
2. Release trigger to stop the welding current.
4T (4 touch) mode:
1. Squeeze trigger to start welding.
2. Release trigger during welding.
3. Squeeze and release trigger to
shut welding current off.
O.12&
F622>&
Y+)3
K+>0:/4+:2&
Y+)3
bH&7&"H&
F*./:(
-)=/492&
Y+)3
JKR&R0+&7&
F6))=&R0+&
M43=2&F):\2/&
O.12&@22>&
S)*21&M43=2
G=41;&
K+>.:4/)1
O)1\&
K+>.:4/)1
S)*21&
K+>.:4/)1
O.12&@22>&
M)+/1)=&F):\2/
S)'./.X2&
H21;.+4=
L294/.X2&
H21;.+4=