Page 8 @)1&/2:(+.:4=&A02'/.)+'B&6=24'2&:4==&CD###DE#FDFEC#, Item 57863 57864
GH@<IJ KHLMI<MHMN<OHGLN&P<QRLMS P<QRLMS&ILTGG<IUT
M)/25 Wire Spool sold separately.
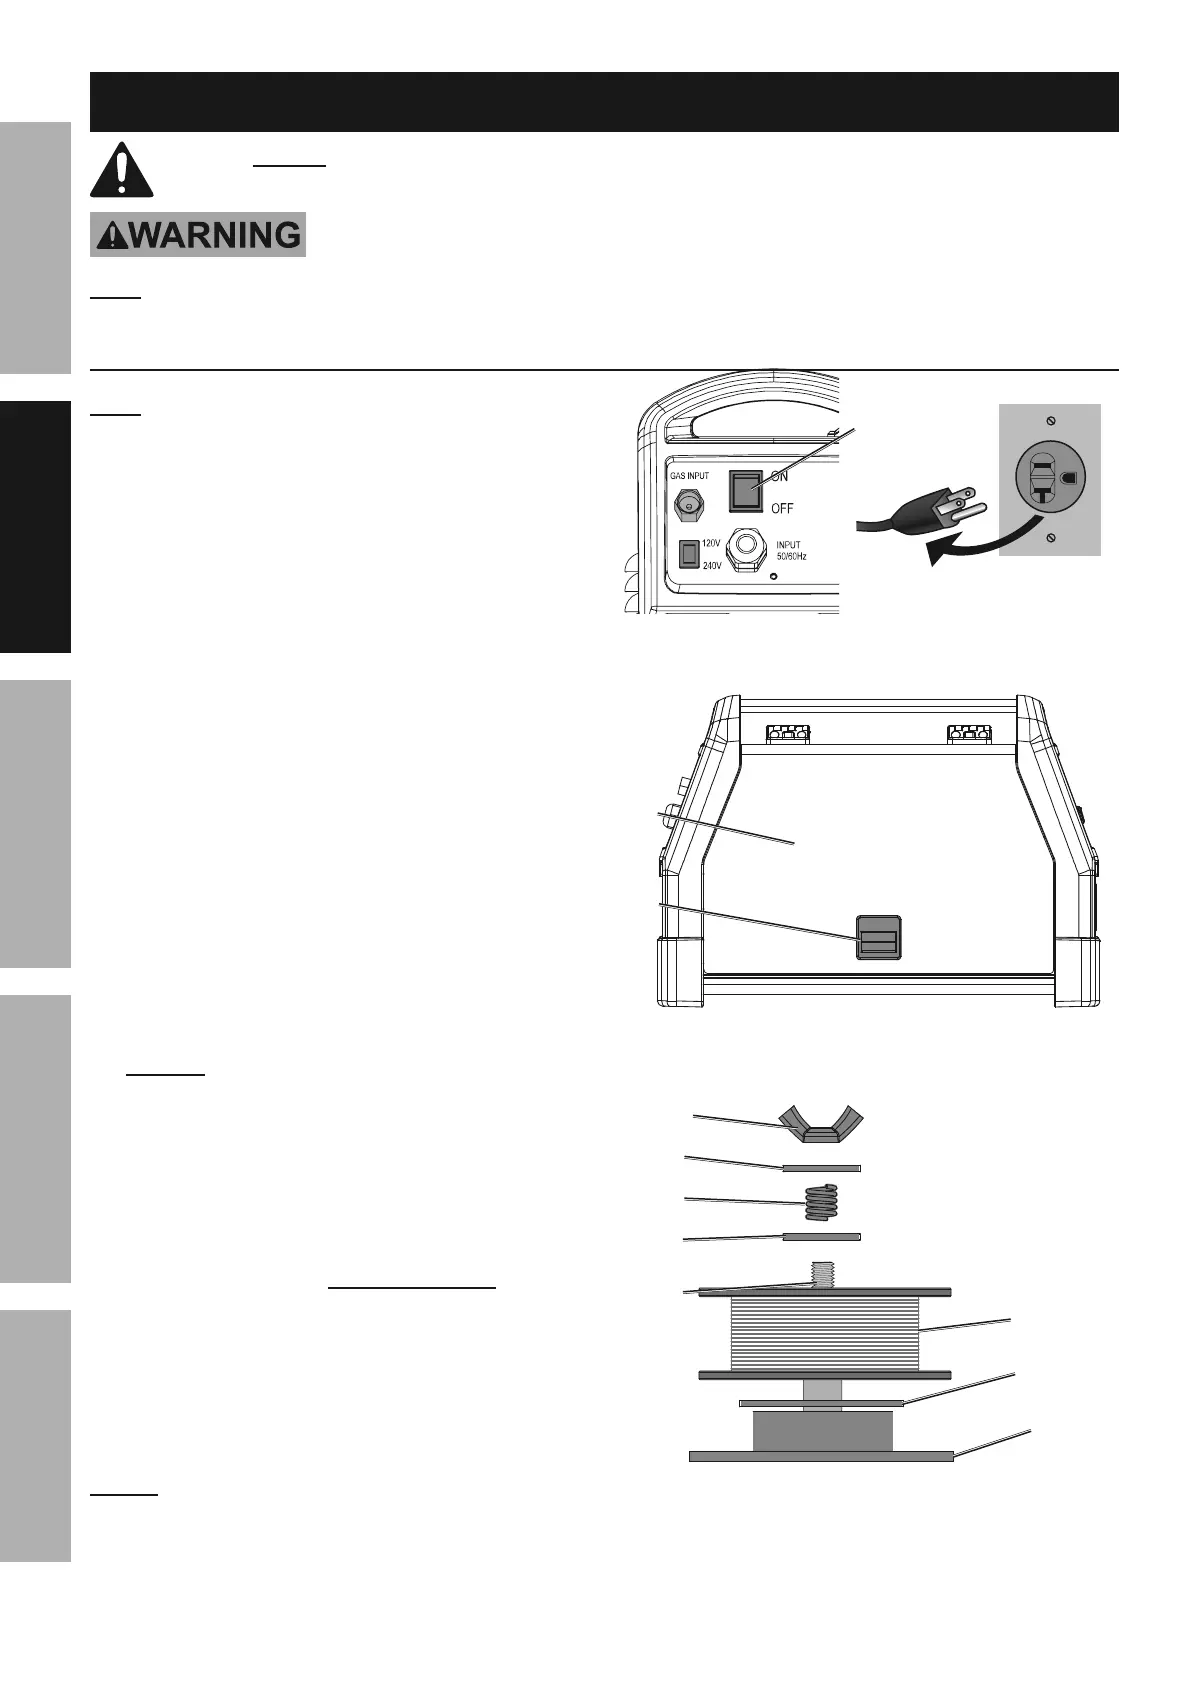
1. I01+&/(2&T)*21&G*./:(&W@@&4+>&0+6=09&
/(2&P2=>21&328)12&61):22>.+9,
2. Pull up on the Door Latch,
then open the Door.
3. b&T)0+>&P.12&G6))=&L+'/4==4/.)+5
Remove the Wingnut, Keyed Washers, and
Spring. If replacing a Spool, remove the old
Spool and all remaining wire from the liners.
4. Place the new Wire Spool over the Spool Spindle
and against the Spool Brake Pad as illustrated.
I)&612Y2+/&*.12&822>&61)3=2;'B&'2/&/(2&G6))=&
')&/(4/&./&*.==&0+*.+>&:)0+/21:=):]*.'2,
5. Line up the Keyed Washers with
the groove on the Spindle. Replace
the Keyed Washers and Spring
over the Spool Spindle and secure
Spool in place with the Wingnut.
M)/.:25 If Wire Spool can spin freely, Wingnut is too
loose. This will cause the welding wire to unravel and
unspool which can cause tangling and feeding problems.
T)*21&
G*./:(
R))1&
Q4/:(
R))1
P2=>21&
P4==
P.+9+0/
b&=3&&
P.12&G6))=
G6))=&
O14]2&T4>
Z2X2>&
P4'(21
Z2X2>&
P4'(21
G61.+9
G6))=&
G6.+>=2
b&=3&G6))=&Q)4>.+9
G2/06
V24>&/(2&<MILV<&LKTWVIHMI&GH@<IJ&LM@WVKHILWM&'2:/.)+&4/&/(2&329.++.+9&)8&/(.'&;4+04=&
.+:=0>.+9&4==&/2\/&0+>21&'03(24>.+9'&/(212.+&328)12&'2/&06&)1&0'2&)8&/(.'&61)>0:/,
IW&TV<-<MI&G<VLWUG&LMcUVJ&@VWK&HNNLR<MIHQ&WT<VHILWM5&
I01+&/(2&T)*21&G*./:(&)88&4+>&0+6=09&/(2&P2=>21&328)12&'2/06,
M)/25&Remove the protective foam and cardboard from the Welder before setup.
Wire Spool Installation / Wire Setup