─ 18 ─
Assembly
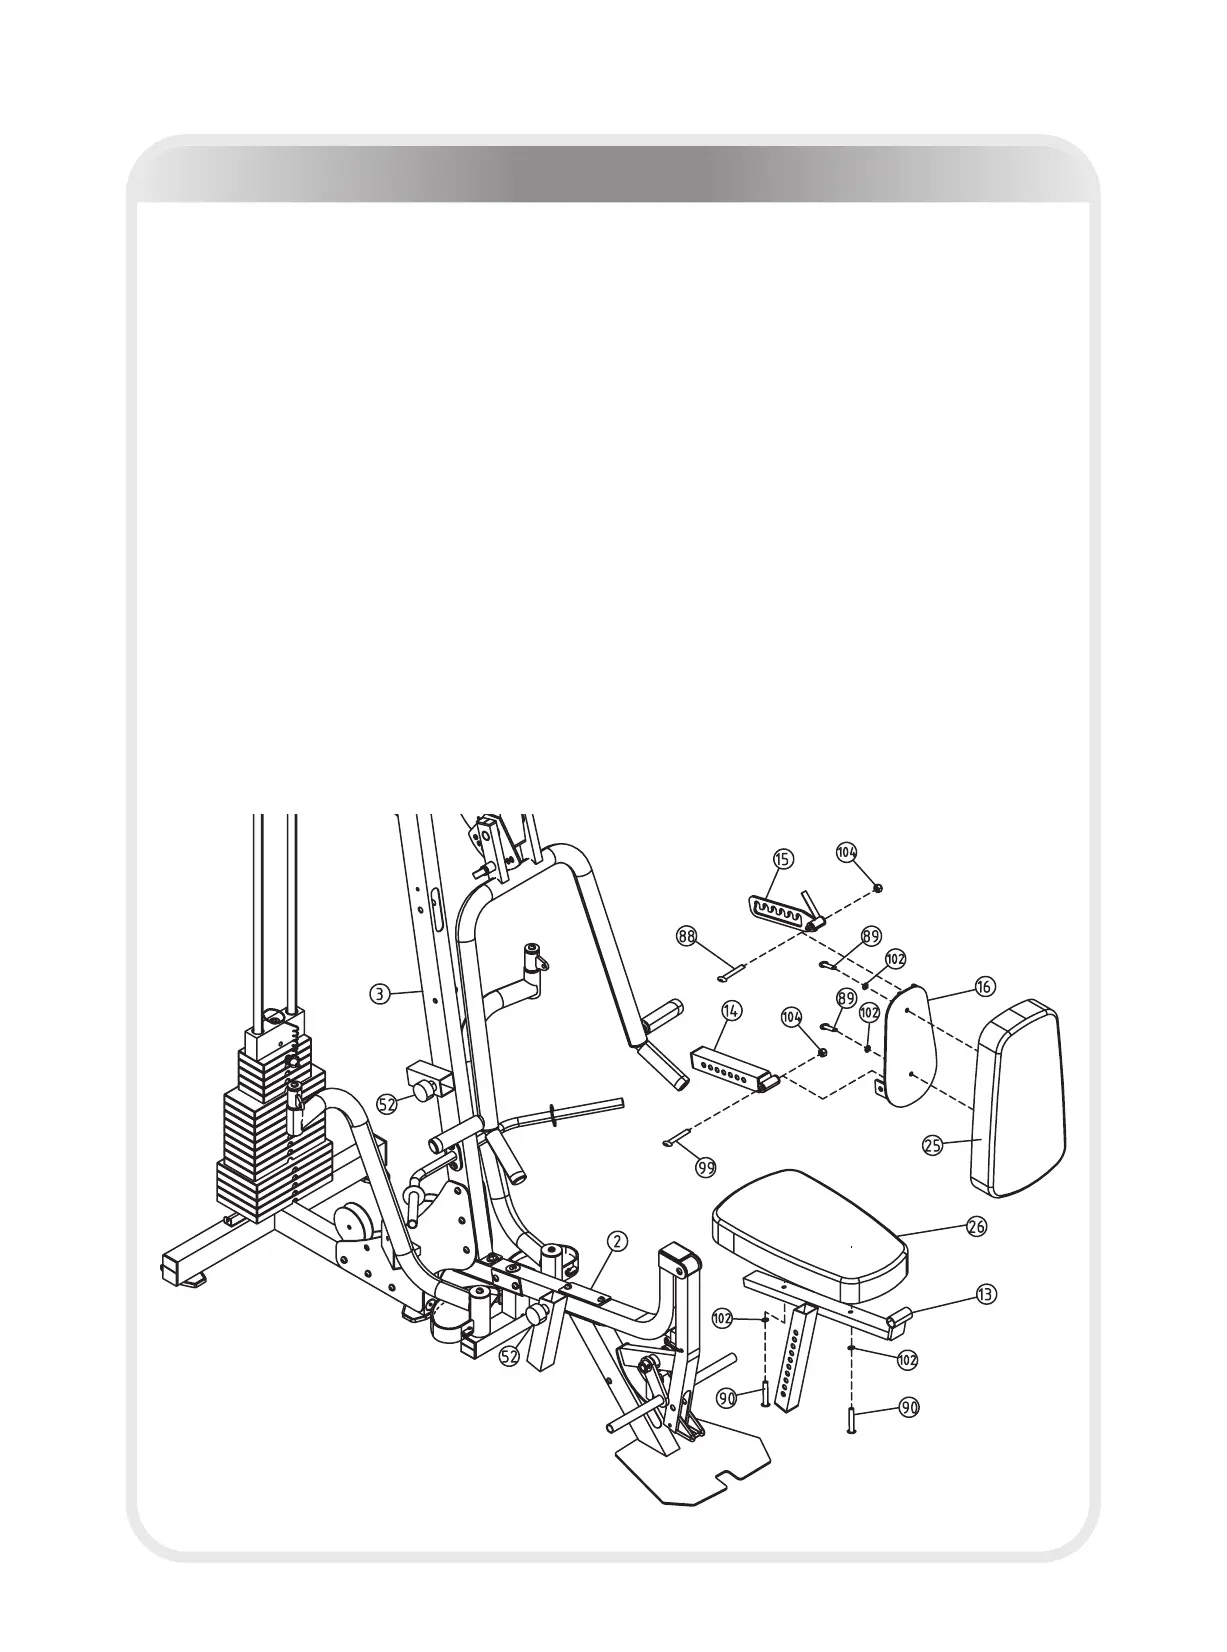
Step 9
1. Attach the Seat Pad (#26) to the Seat Pad Support (#13) using:
two Φ11*Φ20*2 Flat Washer (#102) two M10*50 BHCS (#90)
2. Slide the Seat Support assembly (#13) into the Seat Pad Support Receptacle
(#2) and secure by tightening attached the Locking Pop Pin (#52).
3. Install the Telescope (#14) to the bottom of the Back Pad Support (#16) and
secure in place using:
one M10 Nylon Locknut (#104) one Long Shoulder Bolt (#99)
4. Install the Tilting (#15) to the top of the Back Pad Support (#16) and secure in
place using:
one M10 Nylon Locknut (#104) one Short Shoulder Bolt (#88)
5. Attach the Back Pad (#25) to Back Pad Support (#16) using:
twoΦ11*Φ20*2 Flat Washer (#102) two M10*30 BHCS (#89)
6. Last, slide the Back Pad Support assembly into the receptacle on the Main
Upright (#3) and secure by tightening the Locking Pop Pin (#52).
Note: Hand tighten bolts and Nylon Lock nuts until machine is fully assembled.