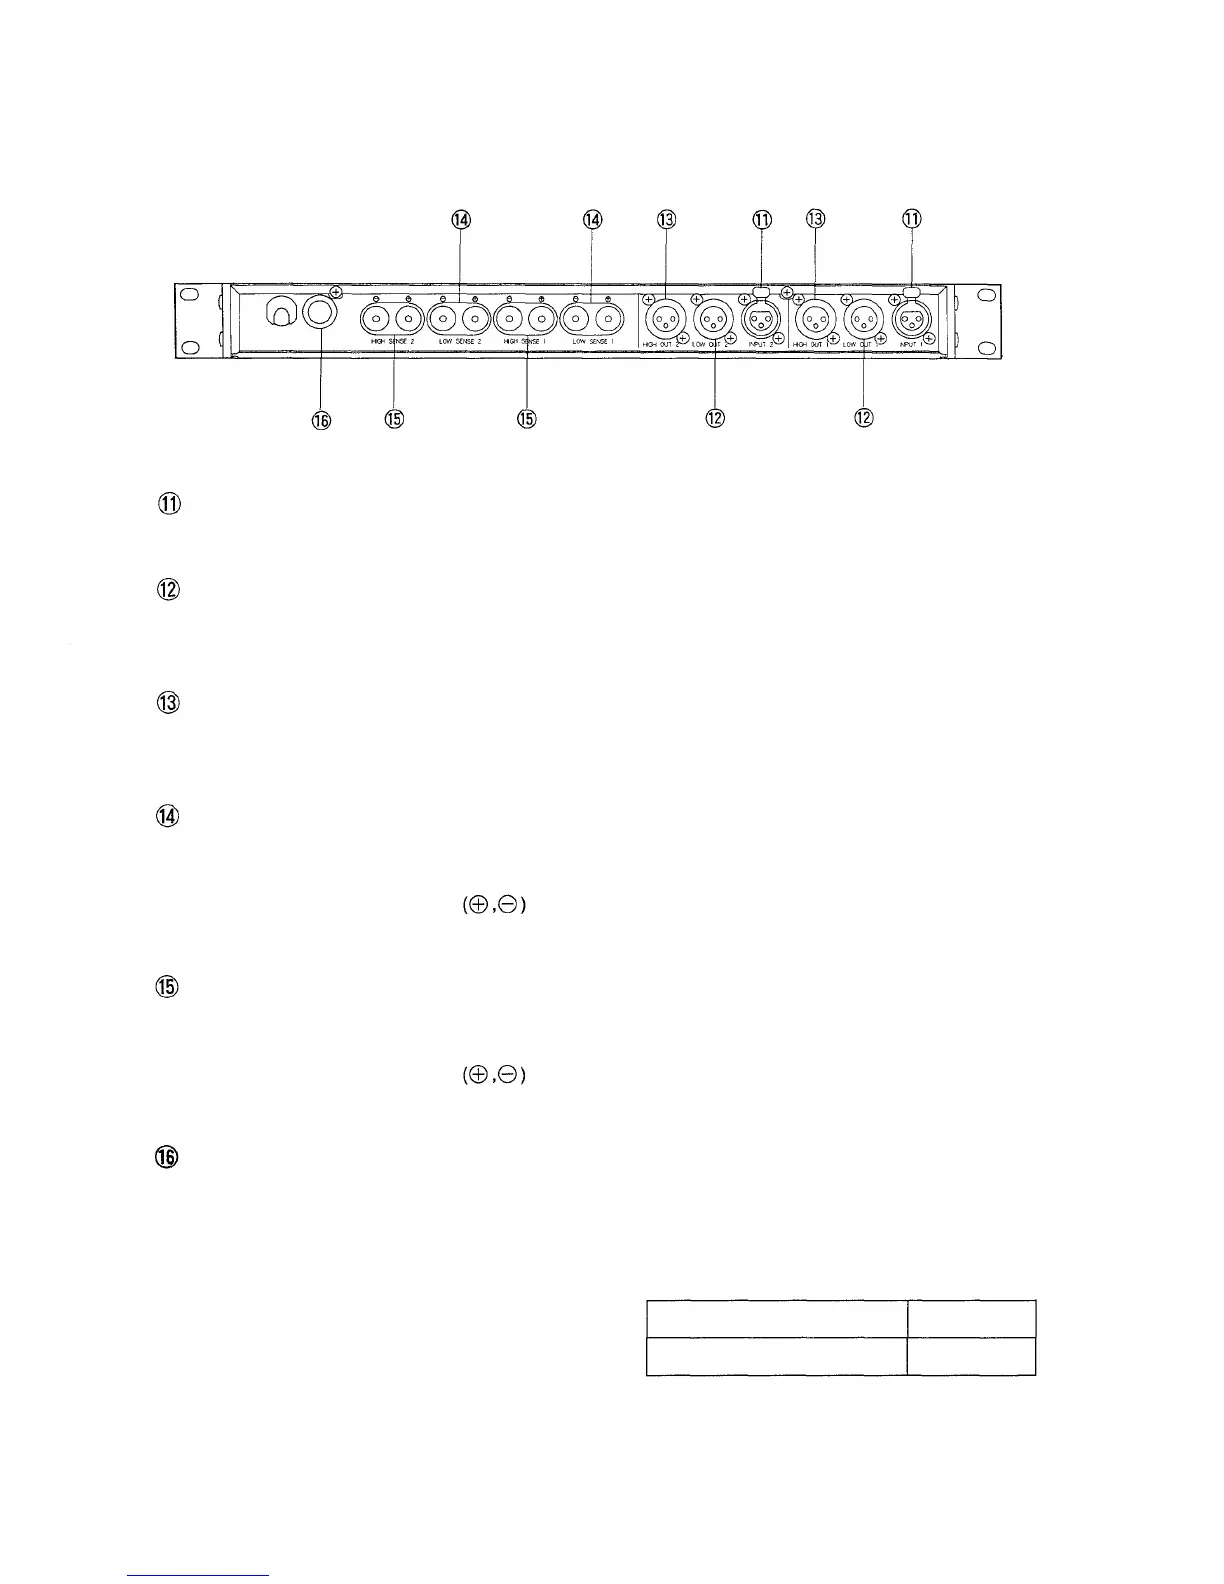
[Rear view]
Input connector (INPUT1, 2)
Input connector for signal is used the electronically balanced XLR type connector.
Low output connector (LOW OUT 1, 2)
Output connector to the power amplifier for low frequency range is used the electronically balanced XLR
type connector.
High output connector (HIGH OUT 1, 2)
Output connector to the power amplifier for high frequency range is used the electronically balanced XLR
type connector.
Low sense input terminal (LOW SENSE 1, 2)
Input terminal for inputting signal from the power amplifier output for low frequency range is used the
electronically balanced screw terminal.
Connect to accord with polarities
between the power amplifier output terminal and the sense input
terminal.
High sense input terminal (HIGH SENSE 1, 2)
Input terminal for inputting signal from the power amplifier output for the high frequency range is used the
electronically balanced screw terminal.
Connect to accord with polarities
between the power amplifier output terminal and the sense input
terminal.
Fuse
When the fuse blew, ensure to replace it with the same type fuse after confirming its cause and
countermeasures. (Be sure to unplug the power cord before replacing with a new fuse.)
Use of other fuses than the same type fuse will lead to failures of unit.
Fuse rating
220~240V AC version
120V AC version
250V 0.2A
250V 0.63A
6