EasyManuals Logo

Toa H-2 User Manual

Toa H-2
12 pages
To Next Page IconTo Next Page
To Previous Page IconTo Previous Page
Page #6 background imageLoading...
Page #6 background image
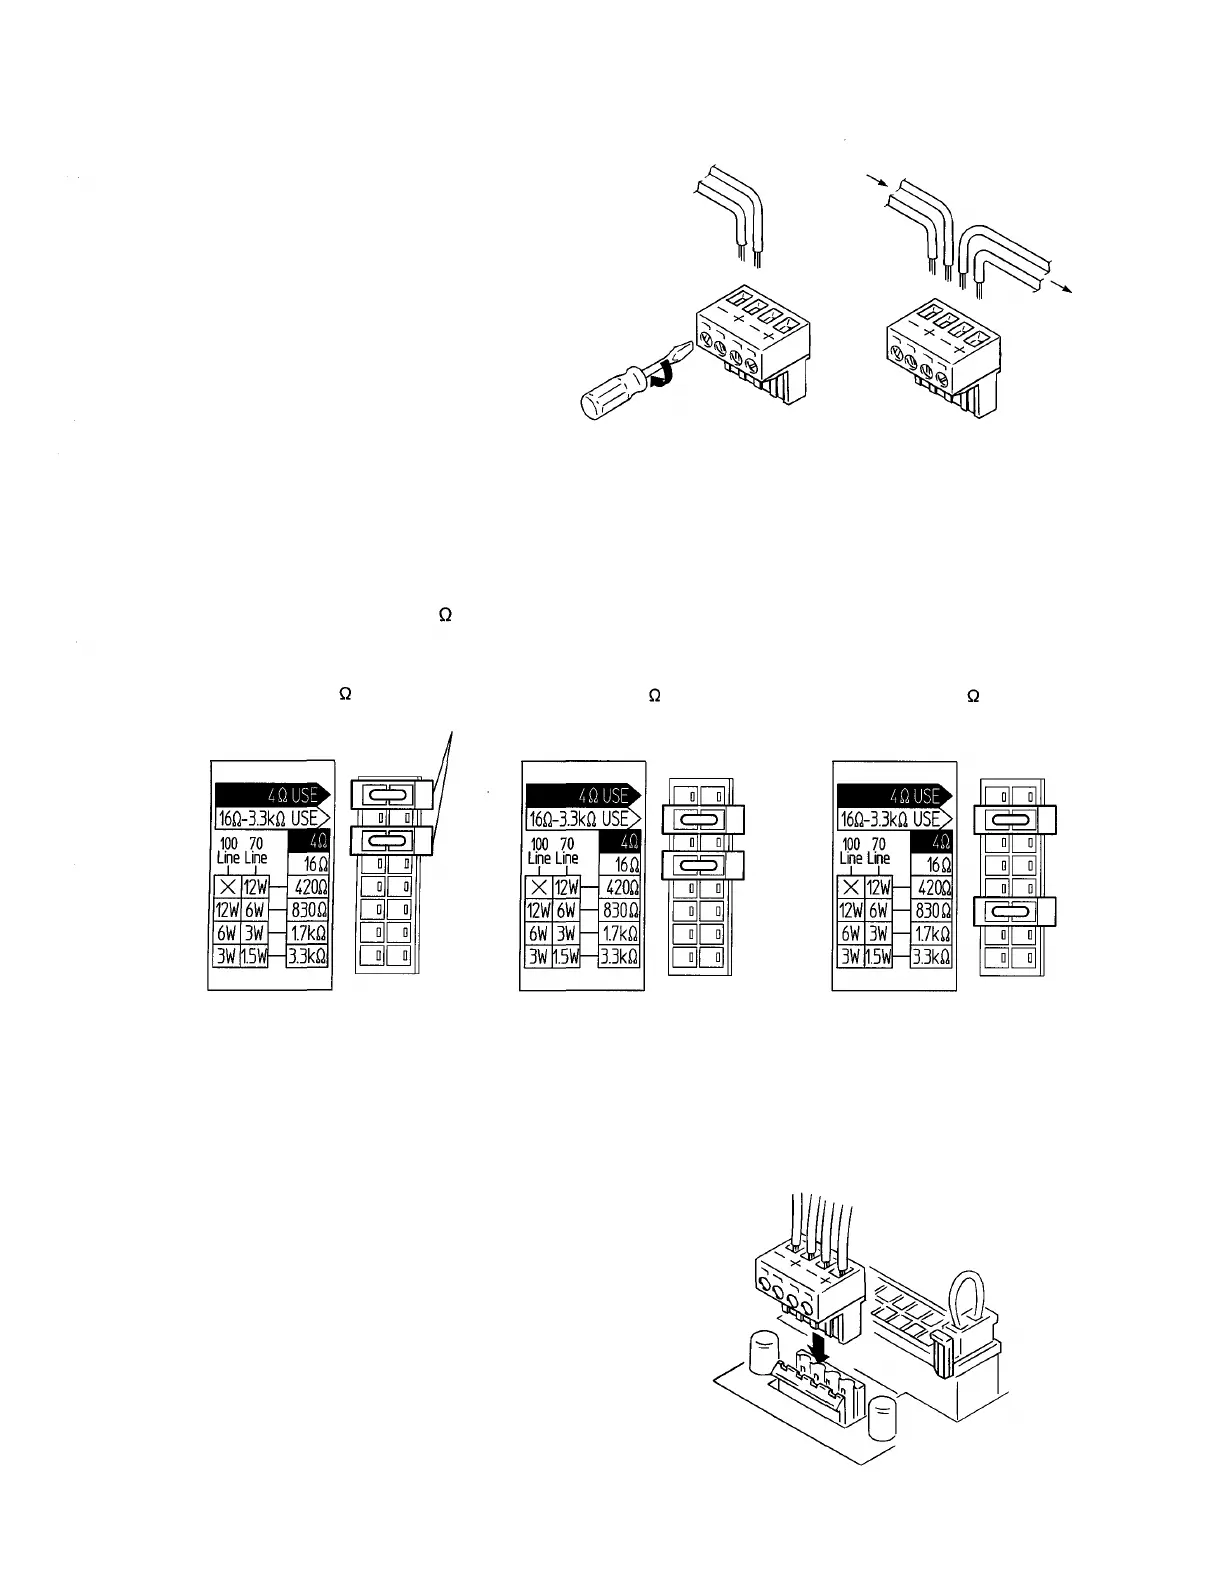
2-2. Insert the stripped cable ends into the input
connector, and tighten the connector screws.
Note
When not bridging connections, be sure to also
tighten the screws of the terminals not in use to avoid
vibration or rattle noises.
When not bridging
connections
When bridging
connections
To next
speaker
From amplifier
2-3. Attach two impedance selector sockets to the 16-pin
connector to select the desired impedance. (Preset to
12 W for 100 V line and 6 W for 70 V line.)
Note
The speakers are designed to be used for both 70 V
and 100 V line applications. When using the 100 V
line, do not select the "420 " impedance, since the
speaker itself or power amplifier may be damaged.
When selecting 830
(preset by the factory)
When selecting 4
When selecting 16
Impedance selector socket
2-4. Insert the detachable input connector into the
speaker socket.
6

Questions and Answers:

Question and Answer IconNeed help?

Do you have a question about the Toa H-2 and is the answer not in the manual?

Toa H-2 Specifications

H-2

Power IconPower
power handling continuous program input120 W
power handling continuous pink noise input40 W
rated input12 W
Acoustic Specifications IconAcoustic Specifications
output sound pressure level88 dB
frequency response100 Hz to 20 kHz
crossover frequency5, 000 Hz
Weight and Dimensions IconWeight and Dimensions
dimensions268 x 111 mm
weight2.1 kg

H-2WP

Power IconPower
power handling continuous program input120 W
power handling continuous pink noise input40 W
rated input12 W
Acoustic Specifications IconAcoustic Specifications
output sound pressure level88 dB
frequency response100 Hz to 20 kHz
crossover frequency5, 000 Hz
Weight and Dimensions IconWeight and Dimensions
dimensions268 x 111 mm
weight2.1 kg

Related product manuals