11
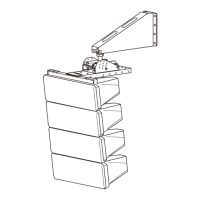
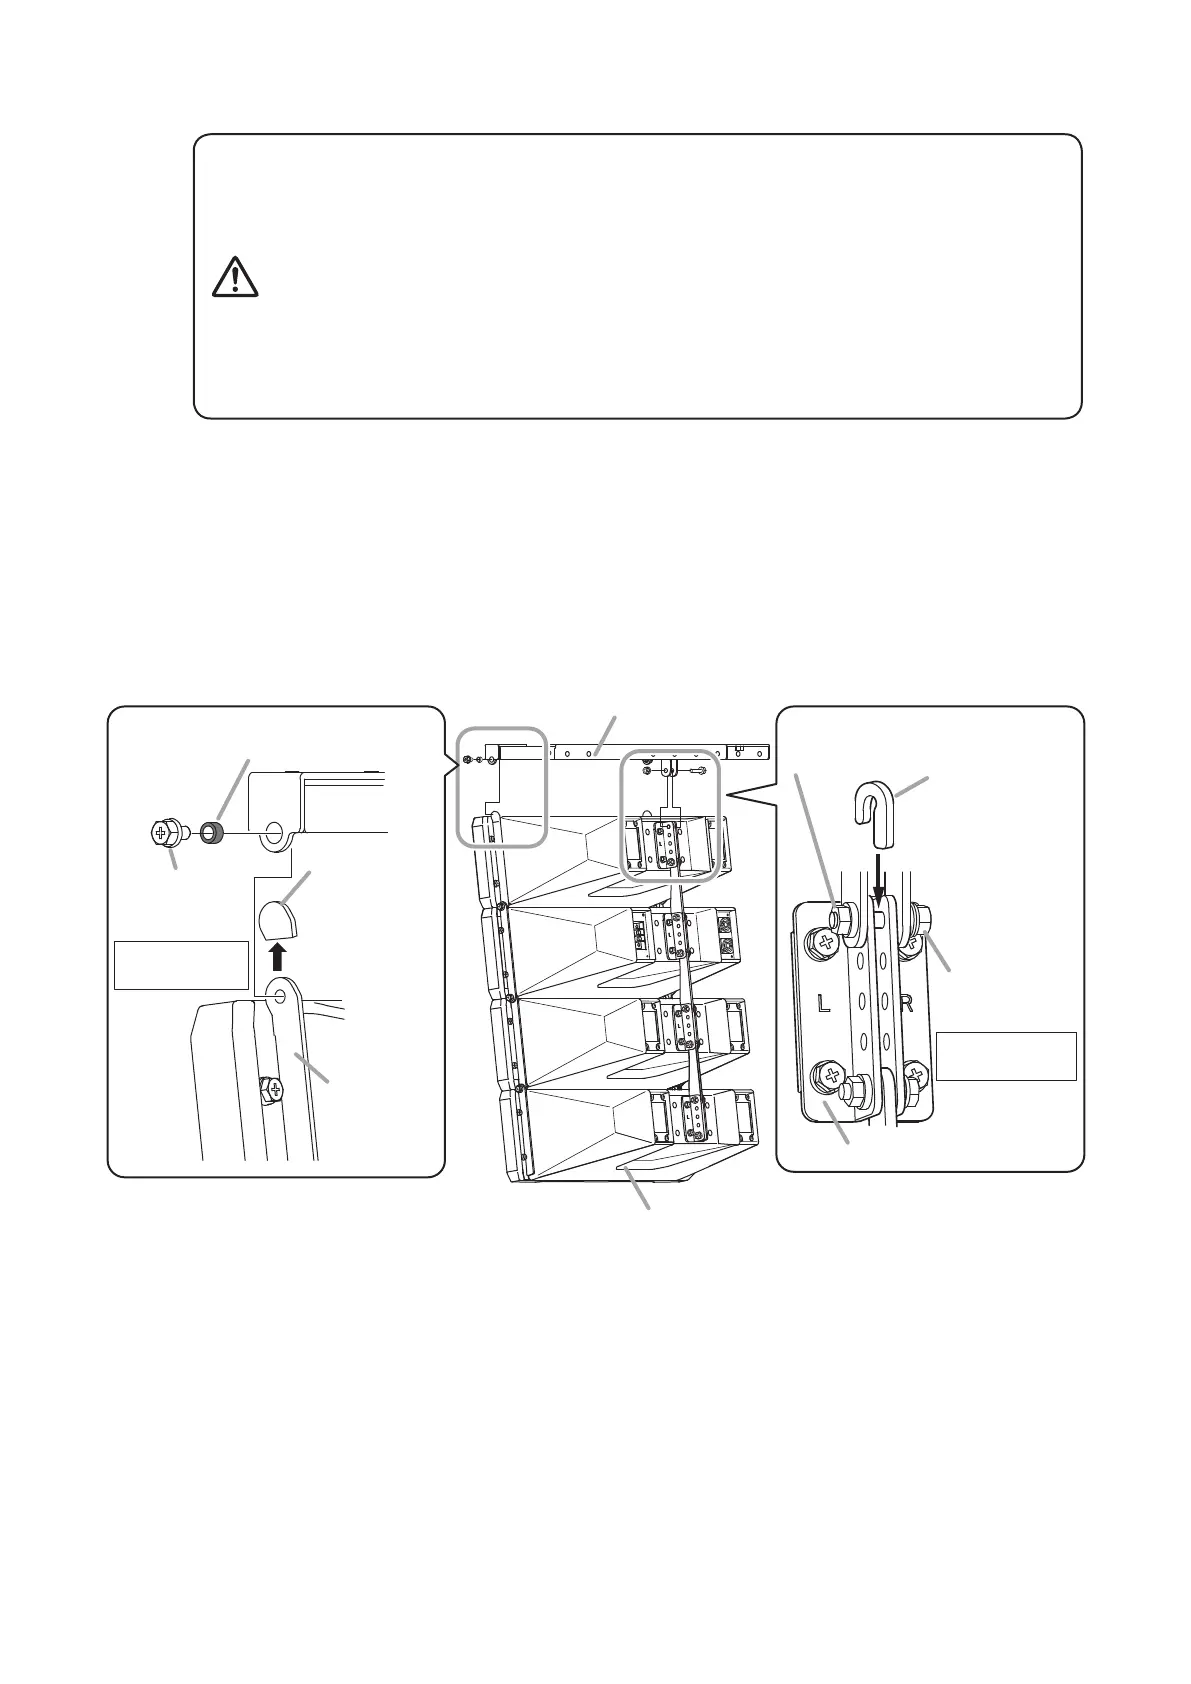
Step 2. MountthespeakersystemtotheT-bracket.
• Owingtothespeaker’ssizeandweight,besurethatatleast
twopersonsareavailabletoinstalltheunit.Failuretodoso
couldresultinpersonalinjury.
• Tightentheboltssecurely,asinstructedbelow.
Failuretofollowinstructionspreciselycouldresultinafalling
speakerandpotentialpersonalinjury.
· Ensure that all bolts are securely inserted as far as their
threadsgo,thensecurelyfasteneachboltwithanut.
· Tightenalltheboltswiththedesignatedtighteningtorque.
Fortightening,useaPhillipsscrewdriver,oropen-orbox-
endwrench.
WARNING
Mountthespeakersystemvertically,asshowninthegure.
FixthespeakertotheT-bracketatall3indicatedpositions.
2-1. FixtheT-brackettobothendsofthesideangleplatesofthespeakerfront.
Usethesuppliedbolts(withspringandplainwashers)andspacers.
2-2. FixtheT-brackettothespeaker’srearbracket.
Fixtotherearbracket’sendmosthole.
Usethesuppliedbolt(withspringandplainwashers),J-spacer,andangenut.
Fordetails,refertotheprocedures(1)to(3)asshownbelow.
Rear bracket
Note
Similarly, fix the T-bracket to the end of the
side angle plate on the opposite side.
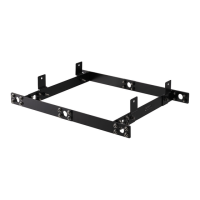
HX-7B or HX-7W
T-bracket
Spacer ø9.2 (0.36")
(accessory)
Rear bracket
Hex head
bolt M6x12
(accessory)
Side angle plate
Protection cover
Note
Remove the
protection covers
from the side
angle plates
before joining.
2-1
Tightening torque:
5 N·m
J-spacer
(accessory)
2-2
(1) Lightly secure.
(3) Tighten firmly.
(2) Insert.
Flange nut for M6
(accessory)
Hex head
bolt M6x30
(accessory)
Tightening torque:
5 N·m
Note
After tightening the bolt, ensure
thattheJ-spacerisrmlyxed.
 Loading...