Do you have a question about the Top Flite Mini Contender Ep and is the answer not in the manual?
Details Top Flite's warranty against defects, limitations on liability, and buyer responsibilities.
Provides instructions for submitting a warranty claim, including contact information and required documentation.
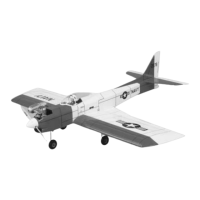
Overview of the Mini Contender EP ARF, its heritage, and the benefits of electric power.
Guidance on obtaining the latest technical updates and manual corrections from the Top Flite website.
Treating the model as sophisticated equipment, avoiding injury, and understanding risks.
Emphasizes following instructions precisely and avoiding unauthorized modifications for safety.
Stresses the importance of building straight, true, and strong for safe and reliable flight.
Ensuring correct components and thorough pre-flight checks for safe operation.
Advises seeking assistance from experienced pilots for new pilots or unfamiliar models.
Guidance on reinforcing the model for high-stress flying or using more powerful components.
Recommends specific motors, ESCs, propellers, and LiPo batteries for optimal performance.
Details the necessary radio system, channel count, and servo specifications for the model.
Suggests recommended chargers and balancing equipment for LiPo batteries.
Lists essential adhesives, building supplies, and various tools needed for assembly.
Specifies required drill bit sizes, knives, screwdrivers, and wrenches for construction tasks.
Method for hardening wood holes for screws using thin CA to prevent stripping.
Guidance on using photos and sketches strategically placed within the manual for clarity.
Instructions for patching or repairing MonoKote film, including tool usage and techniques.
Ensures all parts are present and in acceptable condition before commencing construction.
Provides contact details for obtaining assembly help or reporting missing/defective parts.
Details how to order replacement parts through hobby dealers or directly via Hobby Services.
Lists available replacement parts with their corresponding order numbers for easy reordering.
Techniques for smoothing and securing wing and aileron covering using a sealing iron.
Step-by-step guide for installing aileron servos, including connecting extensions and pushrods.
Instructions for securing the main landing gear to the wing using straps and screws.
Details the assembly of wheels, wheel collars, and screws onto the landing gear wire.
Instructions for installing the horizontal stabilizer and vertical fin, ensuring alignment.
Guidance on using epoxy to permanently glue the stabilizer and fin into the fuselage.
Connecting servo extensions, mounting servos, and aligning servo arms for rudder and elevator.
Details installing control horns and connecting pushrods to servos for control surface actuation.
Procedure for installing control horns on the rudder and elevator, similar to aileron horns.
Securing the nose gear block to the firewall using machine screws and threadlocker.
Installing the nose gear, pushrod, and steering arm for directional control.
Attaching the motor to the plywood mount, noting offset for right thrust, with threadlocker.
Mounting the motor to the fuselage using machine screws and flat washers with threadlocker.
Marking reference lines and drilling pilot holes on the fuselage and cowl for attachment.
Securing the cowl to the fuselage using sheet metal screws and reinforcing screw holes.
Creating a battery strap using hook and loop material for securing the motor battery.
Routing servo wires and connecting servos to the receiver within the compartment.
Securing the compartment cover using a sheet metal screw and reinforcing with CA.
Emphasizes balancing propellers to prevent vibration damage to the model.
Procedure for installing the propeller and spinner cone, securing with screws.
Instructions for applying die-cut decals using a soap and water solution for positioning.
Notes on trimming the recommended pilot figure to fit within the cowl.
Guidance on balancing the model laterally by adding weight to the lighter wing tip.
Ensuring all control surfaces respond correctly and centering trims and servo arms.
Advises setting control throws as specified in the manual for optimal flight performance.
Detailed steps for measuring up and down elevator throws using a ruler.
Methods for adjusting control throws via servo arm position, pushrods, or transmitter ATVs.
Instructions for measuring and setting low rate throws for all control surfaces.
Recommends using 20-30% expo on high rate ailerons for sensitive center response.
Stresses the critical impact of the C.G. on model stability and flyability.
Ensures all components are installed and the model is balanced before flight.
Verifying the C.G. according to the measurements provided in the manual.
Confirming the motor battery is securely mounted in the fuselage with tight straps.
Guidance on adding weight if needed to achieve balance, and how to attach it securely.
Ensuring the model is balanced laterally as explained previously.
Using threadlocking compound on critical fasteners like landing gear and motor mount screws.
Adding a drop of oil to the landing gear for smooth wheel rotation.
Performing a quick tug test on control surfaces to ensure all hinges are securely glued.
Reinforcing screw holes with thin CA where appropriate for durability.
Confirming controls operate correctly and throws match manual specifications.
Ensuring servo arms are secured with screws and connections are taped or heat-shrunk.
Checking that servo extension cords do not interfere with other model systems.
Verifying propeller balance and spinner screw tightness before flight.
Placing personal and AMA identification on or inside the model as per AMA rules.
Performing a radio range check at the flying field before the first flight.
Guidelines for initial charging of transmitter and receiver batteries for conditioning.
Warnings regarding motor heat, propeller removal, and battery handling during charging.
Crucial safety advice for charging and handling LiPo batteries to prevent damage or injury.
Key general rules from the AMA Safety Code, including flight testing and air traffic avoidance.
Performing a successful radio equipment ground check before the first flight.
Guidelines for flying in the presence of spectators and the need for an experienced helper.
Adherence to established flying site rules, including flight lines and spectator areas.
Operating the model using only FCC-approved radio control frequencies.
Prohibits touching a powered model in flight or intentionally touching the ground except during landing.
Describes the Mini Contender EP ARF as a smooth and predictable flying model.
Notes that the model is not a primary trainer and is best flown by experienced R/C pilots.
Identifies causes and actions to take if control surface flutter is detected during flight.
Recommends practicing ground handling at low speeds before takeoff.
Guidance on advancing throttle, achieving speed, applying up elevator, and counteracting torque.
Advises taking it easy, adjusting trims for straight and level flight, and practicing slow flight.
Encourages making notes on trim or C.G. changes needed to fine-tune the model's flight.
Guidance on lowering throttle, maintaining airspeed, and turning onto the runway.
Techniques for flaring the model and achieving a smooth touchdown.
Stresses the benefit of having a goal or flight plan to reduce chances of crashing.
Encourages staying in control and flying in a safe manner for enjoyment.
| Brand | Top Flite |
|---|---|
| Model | Mini Contender EP |
| Category | Toy |
| Airfoil | Semi-symmetrical |
| Power Source | Electric |
| Servos | Micro |