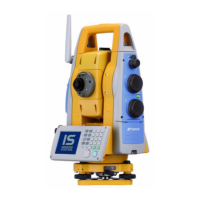
3) Turn on the OS Series using the Power Button.
The “Virtual Bubble” is shown on the screen.
“” indicates the bubble in the circular level.
4) Centre “” in the Circular level.
(When the bubble is in the centre proceed to step 7)
5) Turn the Instrument until the telescope is parallel
To a line between levelling foot screws A and B.
6) Set the tilt angle to 0˚ using foot screws A and B for the X direction and levelling screw
C for the y direction Remember Fingers and Thumbs! Always turn A and B in opposite
directions to half the error on each foot screw.
7) Loosen the centering screw slightly.
Looking through the optical plummet eyepiece, slide the instrument over the Tripod
head until the survey point is exactly centred in the reticule.
Retighten the centering screw securely.
8) Check again to make sure the bubble in the virtual circular level is centred.
If not, repeat the procedure starting from step 6.
9) Press {ESC} on the instrument keypad to return to observation mode.
10) If the instrument does not automatically open the MAGNET Field software, press
{PRG} on the instrument keypad.
Select “MAGNET Field” from the listed programs
The remainder of the Backsight setup procedure is completed using MAGNET Field.

 Loading...