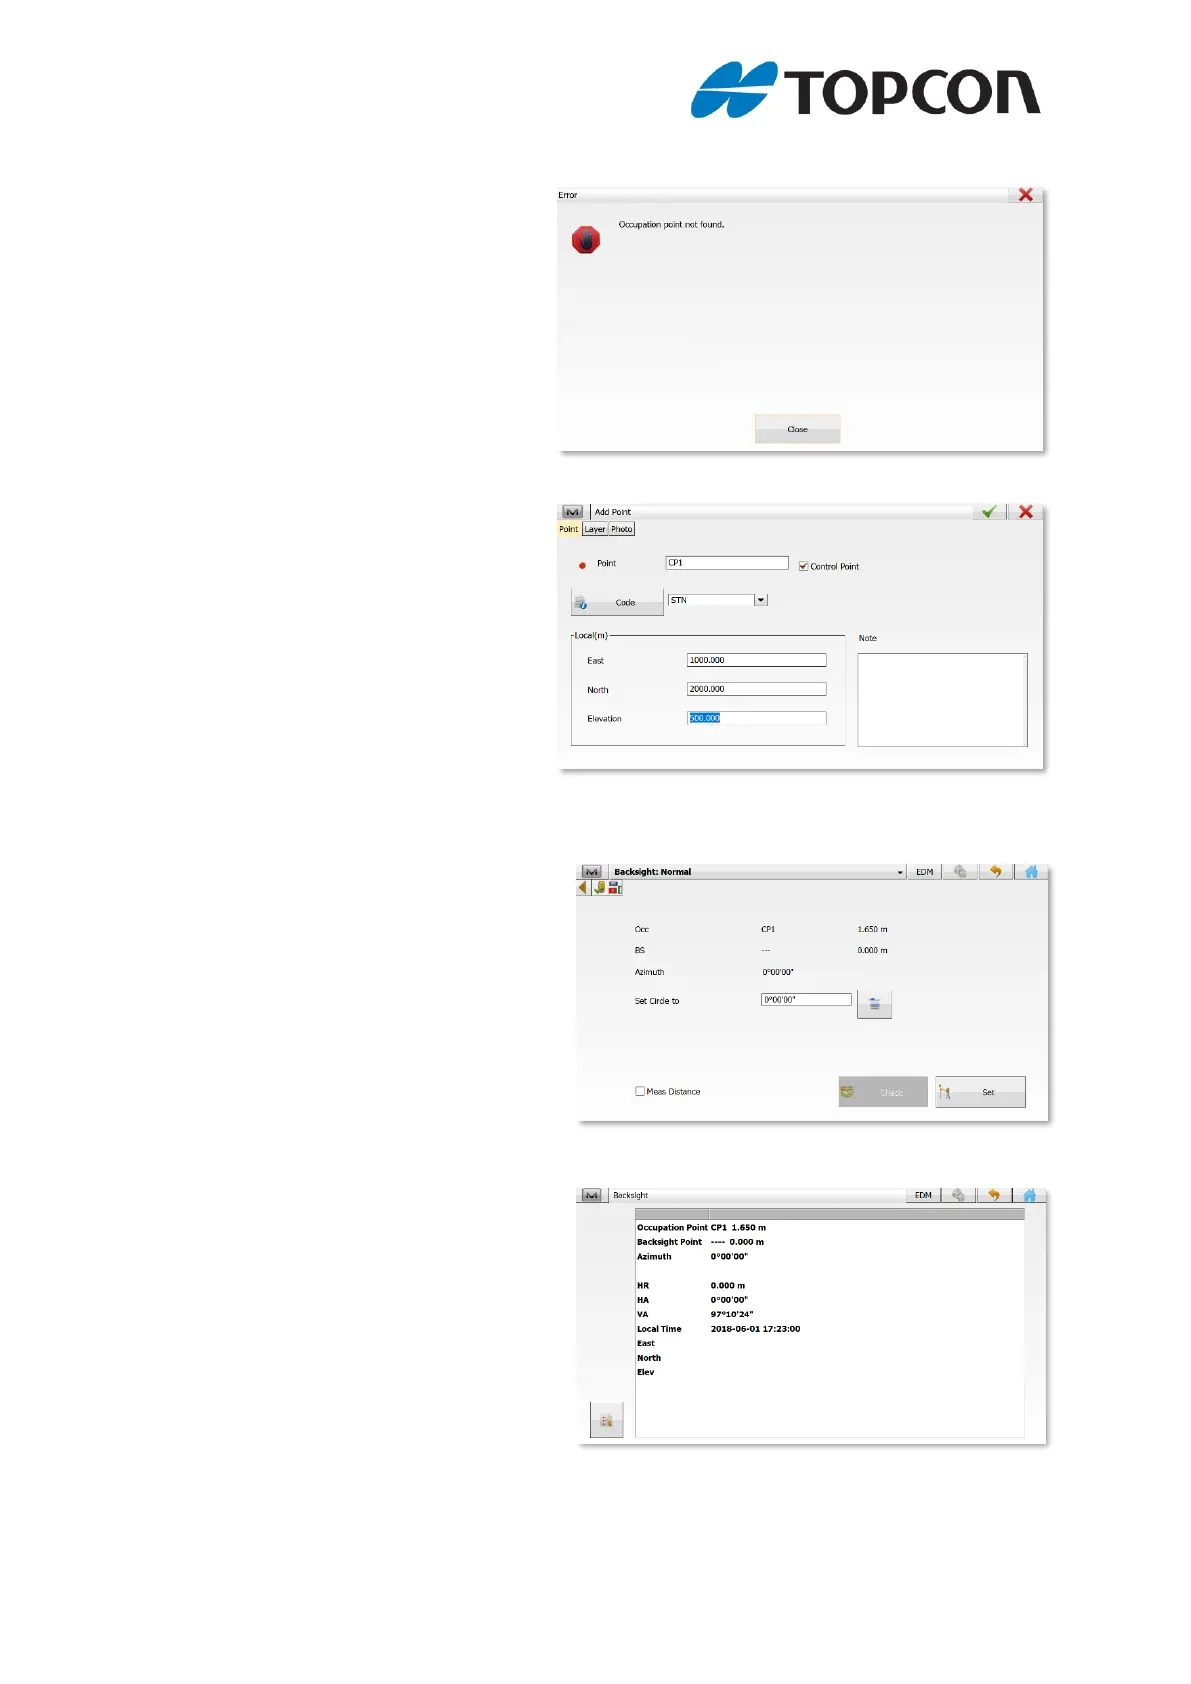
4) Because we entered an
unknown point name (CP1) in
the “Occupation Point” in step 3
which was not in the Database,
we have been given an error
message. Tap the [Close] icon
and MAGNET Field will take you
to the “Add Point” screen.
5) On the “Add Point” screen, we
can enter the information about
the point we have used for the
“Occupation Point” of the Total
Station. In this case we have
marked it with the Feature Code
“STN” for Station, ticked the
“Control Point” box and given it a
coordinate.
When you have entered the
information, tap the green tick icon at the Top Right of the screen.
6) Measuring the Backsight
As we have entered an Azimuth of
“Zero” on this occasion, we are
going to roughly line the instrument
up with “North” on site and then
press the “Set” Icon.
If we had entered a “Point” as our
Backsight, we would now target
the total Station on the Prism and
then press “Set”.
7) The Backsight information will now
be displayed. The instrument is
now setup and ready to complete a
Survey.
To return to the Home Screen, tap
the “Home” icon to the Top Right of
the screen.

 Loading...