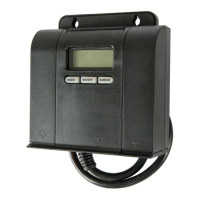
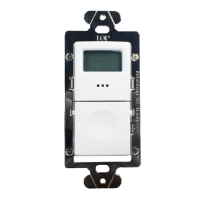
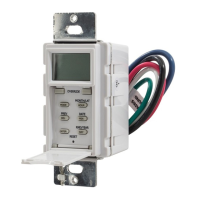
PROGRAMMING INSTRUCTIONS
SA210
ONE YEAR LIMITED WARRANTY: If this product fails because of a manufacturing defect within one
year after purchase, we will, at our option, either repair or replace it at no charge. Our warranty
does not cover damage caused by accident, abuse or misuse. We assume no further liability with
respect to the sale or use of this product. THIS WARRANTY IS IN LIEU OF ALL OTHER WARRANTIES,
EXPRESSED OR IMPLIED, INCLUDING THE WARRANTY OF MERCHANTABILITY. We make no
warranty with respect to the fitness of any goods for the users particular application. This warranty
gives you specific legal rights, and you also may have other rights which vary from state to state.
It is our intent to provide accurate and current specification information. However, in the interest of
product improvement, TORK may alter the specifications or constructional details without prior notice.
USING PROGRAMMABLE ON AND OFF TIME SETTINGS
The SA210 has 2 independent programmable ON/OFF time settings so
you can turn outdoor holiday, landscape and security lighting, etc. ON
and OFF at specific times. The third setting (12) runs the combination of
program 1 and program 2 times for the days selected.
1. Press MODE button until the “PROG” and “1” icons are displayed.
2. Press the CALENDAR/7-5-2 button to select the timer frequency.
“7” means the timer will operate all week, “5” for weekdays and “2”
for just the weekend.
3. (Figure E) Press and hold the PROGRAM button until the display is
flashing.
4. The display will change to show the “ON” time for program 1 and
flash. The “ON” Icon will appear. Press the FORWARD/HOURLY
ADJUST button or REVERSE button to adjust the ON time.
5. (Figure F) Press the ON/OFF/ENTER button or wait for approx.
10 seconds. The display will show OFF time, and the “OFF” icon will appear. Press the FORWARD/HOURLY
ADJUST button or REVERSE button to adjust OFF time. Press the ON/OFF/ENTER button once more or wait
for approx. 10 seconds to return to normal mode. Display will change back to show the clock time.
6. To program 2nd timer, just follow step 1-5 but press MODE button until “PROG” and corresponding (“2” or
“12”) icons are displayed.
NOTE: Do not program the same ON and OFF time when setting programs 1, 2 or 12. You cannot set the turn
ON and turn OFF to the same time (i.e., Turn on at 5:00 am and turn OFF at 5:00 am). Doing so will produce an
error message on the display. To resolve the error message, change the OFF time by at least one minute using the
FORWARD or REVERSE button.
ACTIVATING THE PROGRAMMABLE TIMER
1. Press MODE button until one of the program icons appears. That programmed timer is now active. (Press the
PROGRAM button to view the existing ON and OFF preset times).
2. There is a simpler way to adjust turn on time by pressing the FORWARD/HOURLY ADJUST button. The
turn ON can be adjusted by +/-90 minutes.
3. If you wish, press the RANDOM button once to activate the random feature. The timer ON/OFF time will
fluctuate +/-10 to +/-120 minutes randomly. To cancel this feature, just press the button again.
BATTERY REPLACEMENT
This unit comes with 2 x CR2032 batteries for time keeping and backup. You should replace the batteries every 2
years. To replace the batteries, please follow these steps:
1. Remove the SA210 plug from the wall socket.
2. Unscrew mounting screws and remove unit from wall.
3. Turn unit over and using a small Phillips screwdriver, remove the 2 screws holding the battery compartment
cover (on back of unit).
4. Using a small flat screwdriver, gently pry the battery door open. Remove the 2 CR2032 batteries.
5. Install 2 new CR2032 batteries into the battery compartment, making sure that the “+” and “–” polarities
match up with the diagram printed on the unit.
6. When the batteries are in place, return the battery door its original position and tighten the screws.
7. If you find the timer is not running after installing new batteries, you may need to reset it first. Using the point
of a pencil or paperclip, press the RESET button located on the front panel. You will then need to reset the time
and date.
8. Remount unit as before and plug the timer into the wall socket.
NOTE: When changing batteries, make sure to reset the current
time to the correct time in the Eastern time zone. When you enter
your telephone area code, it will then automatically adjust to the
proper time for your location/time zone. If Reset: ZIP-SET must have
the area code, year and date and Eastern time entered properly to
function.
SETTING CLOCK AND CALENDAR
This function is usually used when batteries must be replaced. Set only
to Eastern Time - 212 area code.
1. Press and hold the TIME SET button until the display is flashing.
2. Press and hold the FORWARD/HOURLY ADJUST button to
rapidly advance the time forward, or the REVERSE button to rapidly
change the time backward. Release button when the approximate correct Eastern time is displayed. PM Indicator
is on the upper right corner of the display.
NOTE: While pressing either FORWARD/HOURLY ADJUST or REVERSE button the minutes will begin at a
moderate pace, and then get faster. This will help you in set the time faster and more accurately.
3. Press the FORWARD/HOURLY ADJUST or REVERSE button repeatedly until the correct Eastern time is
displayed.
4. Press the ON/OFF/ENTER button or wait for approx. 10 seconds to exit time setting mode.
5. The DST Indicator is to the right of the display. Press the DST button to ON to have timer increase the current
time by 1 hour for daylight saving time. Press the DST button again to turn it OFF. Current time will decrease 1
hour.
CALENDAR SETTING
This function is usually used when batteries must be replaced.
1. Press and hold the CALENDAR/7-5-2 button until “Y 04” (default) flashes on the display.
2. Press the FORWARD/HOURLY ADJUST or the REVERSE button to adjust to current year then press
ON/OFF/ENTER button or wait for approx. 10 seconds. The display will show month/date and flash.
3. Press the FORWARD/HOURLY ADJUST or REVERSE button repeatedly until the correct month/date is
displayed.
4. Press the ON/OFF/ENTER button or wait for approx. 10 seconds to exit calendar setting mode.
NOTE:
While pressing either FORWARD/HOURLY ADJUST or REVERSE button the date will begin at a moderate
pace, and then get faster. This will assist you in setting the time quickly and accurately.
FUNCTION
Designed for outdoor use, the SA210 can be mounted inside or outside on a wall. It controls outdoor holiday,
landscape, pool, spa accessories, security lighting, etc. The SA210 has 3 outlets: 2 timed outlets are powered and
controlled by the SA210 digital timer and 1 extra untimed outlet which always has power. We suggest that you
always plug any outdoor timer to a GFCI outlet. Connect your outdoor lighting, etc. to either of the desired timed
outlet.
NOTE: the total rating (untimed extra outlet and timer outlets) of all items connected to the timer must not
exceed the SA210 rating of 15 amps and that any timer settings applied are for all of the timed outlets; they
cannot operate independently.
TIMER OPERATION
MANUAL OVERRIDE
To override the ON or OFF settings, press the ON/OFF button. The override will be in place until the next
program event.
TURN OFF ALL TIMER FUNCTIONS
If you don’t want to use any timer functions, just press the MODE button until “OFF” is displayed. TO
CONFIRM TIMER SETTINGS FOR ON/OFF: Press MODE, select program then press PROGRAM button.
SET TIME WITH ZIP-SET MODE
Simply enter your telephone area code by following these easy steps to
have the time adjust to your location:
1. (Figure A) Press the MODE button until “ZIP” appears in the display.
2. (Figure B) Press and hold the ZIP-SET/Clear button until the display
shows the 3-digit area code input mode.
3. The 1st digit of the telephone area code should be flashing. Press the
FORWARD/HOURLY ADJUST button or REVERSE button to adjust
it, then press ON/OFF/ENTER button to enter it and edit the next
digit. Press the ZIP-SET/Clear button to go back to edit the previous
digit. Continue until the correct telephone area code is displayed (for
special area code time zones see note below).
4. (Figure C) Once your telephone area code is entered select a turn
OFF time for the ZIP-SET automatic sunset timer (the default turn OFF
time of 6 should flash). You can have the timer turn OFF 2, 4, 6, 8, 10,
12, 14, or 16 hours after sunset or a fixed time, 12:30am, 1:00am,
1:30am, etc. While the turn OFF time is flashing, press the FORWARD/
HOURLY ADJUST button to cycle to the desired turn OFF setting, then
press ON/OFF/ENTER button to enter it. When “DONE” appears in the
display (Figure D), press ON/OFF/ENTER button to confirm or wait
10 seconds.
5. Press MODE button to “ZIP” (display icon) to confirm the timer is set
for ZIP-SET Auto ON at Sunset.
NOTE:
1. After entering the area codes for certain states, a “C” may appear next to the telephone area code, indicating
a central location in the state. Press FORWARD or REVERSE to toggle to W (West) or E (East) and N (North) or
S (South) if needed for proper time setting.
2. There are also area codes that may have different time zones; for example the 208 area code; by default will
flash PST or by pressing FORWARD or REVERSE will toggle to MST).
3. Telephone area codes can change and may not appear in the timer’s table. Should that occur, please use the
closest adjacent area code to set the timer correctly for your location.
4. If a new area code was issued after this unit was manufactured or if you enter an invalid/nonexistent area
code, you will get an error message, “AREA CODE NOT FOUND”. Enter the closest correct area code for ZIP-SET
mode to function properly.
5. If the clock/calendar is not correct or time is lost after replacing batteries, ZIP-SET mode will not function
properly. Please see SETTING CLOCK AND CALENDAR.
ACTIVATE THE ZIP-SET SUNSET TIMER
1. Press the MODE button until “ZIP” icon is displayed. The ZIP-SET sunset timer is set and active.
2. SA210, once properly set, knows the sunset time of your location. It will automatically turn ON at sunset and
turn OFF after your selected duration time of 2, 4, 6, 8, 10, 12, 14 or 16 hours (see SET TIME WITH ZIP-SET
MODE) or at a fixed time, 12:30am, 1:00am, 1:30am, etc.
3. Press the RANDOM button once to activate the random feature so the timer ON/OFF time will fluctuate
between +/-10 minutes to +/-120 minutes randomly. To cancel this feature, just press the button again (random
disappears). When your home is left unattended, this is an excellent security feature to simulate household
activity and random should be activated.