EasyManua.ls Logo

Tork SS721Z - User Manual

Tork SS721Z
2 pages
Print Icon
To Next Page IconTo Next Page
Loading...
FOR TECHNICAL SUPPORT: SOUTIEN TECHNIQUE : PARA COMUNICARSE CON EL SERVICIO TÉCNICO: techsupport@nsiindustries.com 877.230.7874
LI-835
A DIVISION OF NSi INDUSTRIES, LLC
PROGRAMMING INSTRUCTIONS
SS721Z
SS721ZA
CAUTION
Before wiring and servicing, power
to this time switch and the equipment
it controls must be turned off at the
main panel.
WARNING
Unit must be properly grounded to
operate correctly.
RATINGS
• 120/277VAC 16A 1920/4432W Resistive
• 120/277VAC 13A 1560/3600VA Ballast
• 120VAC 8A 960W Tungsten
• 120VAC 1 HP
SS721Z SMART TIMER
INSTALLATION
1. Connect black and blue wires as shown in the diagram.
Cap the red wire.
2. Connect the mounting strap green wire and timer green
wire to the ground wire.
3. Mount the timer inside electrical box using 2 mounting
screws provided.
4. Install cover plate.
5. Turn power on at the electrical panel.
RETROFITTING A SS721Z
TO EXISTING 3-WAY SWITCH
1. Disconnect the second 3-way switch.
2. Connect the timer blue wire to the load. Connect the timer
black wire to “Traveler A” and the timer red wire to
“Traveler B”.
3. Connect the mounting strap green wire and timer green
wire to the ground wire.
4. Mount the timer inside electrical box using 2 mounting
screws provided.
5. At switch #1 connect a wire between the hot leg of the
3-way and “Traveler A” inside of that switch’s gang-box.
6. Install cover plates.
7. Turn power on at the electrical panel.
Question and Answer IconNeed help?

Do you have a question about the Tork SS721Z and is the answer not in the manual?

Summary

Smart Timer Installation

Wiring Diagram for SS721 Z Installation

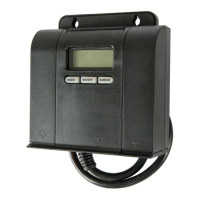
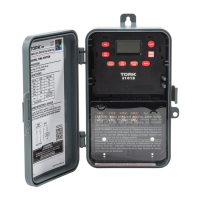
Provides a wiring diagram for the SS721Z timer installation.

Retrofitting to Existing 3-Way Switch

Wiring Diagram for 3-Way Installation

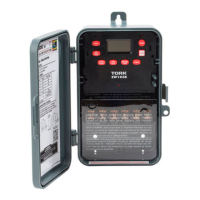
Illustrates the wiring for retrofitting the timer to a 3-way switch.

Timer Programming Instructions

Setting the Clock

Instructions for setting the current time on the timer.

Setting the Date

Procedure to set the current date on the timer.

Automatic Daylight Saving Time

How to set DST adjustments and confirm the mode.

Schedule Set Mode Options

Options for setting ON/OFF times and schedules.

Setting an ON Time

Guide to setting a specific ON time for the timer.

Setting an OFF Time

Guide to setting a specific OFF time for the timer.

Automatic Daily Sunset;Sunrise Schedule

How to set automatic ON/OFF times based on sunset/sunrise.

Astronomical Latitude Zones

Map and zones for setting astronomical schedules based on latitude.

Setting Sunset ON Time

How to set the automatic ON time based on sunset.

Optional Offset for Sunset

Adjusts the ON time relative to the calculated sunset.

Setting Sunrise OFF Time

How to set the automatic OFF time based on sunrise.

Optional Offset for Sunrise

Adjusts the OFF time relative to the calculated sunrise.

Automatic (AUTO) Mode

Follows programmed schedule; OVERRIDE sets ON/OFF until next event.

Manual (MAN) Mode

Bypasses programmed schedule; OVERRIDE sets ON/OFF until next push.

Tork SS721Z Specifications

General IconGeneral
TypeDigital Timer
Minimum ON/OFF Time1 minute
Number of Outlets1
Voltage120V AC
Timing RangeUp to 7 days
Power Consumption1W

Related product manuals