g034338
Figure9
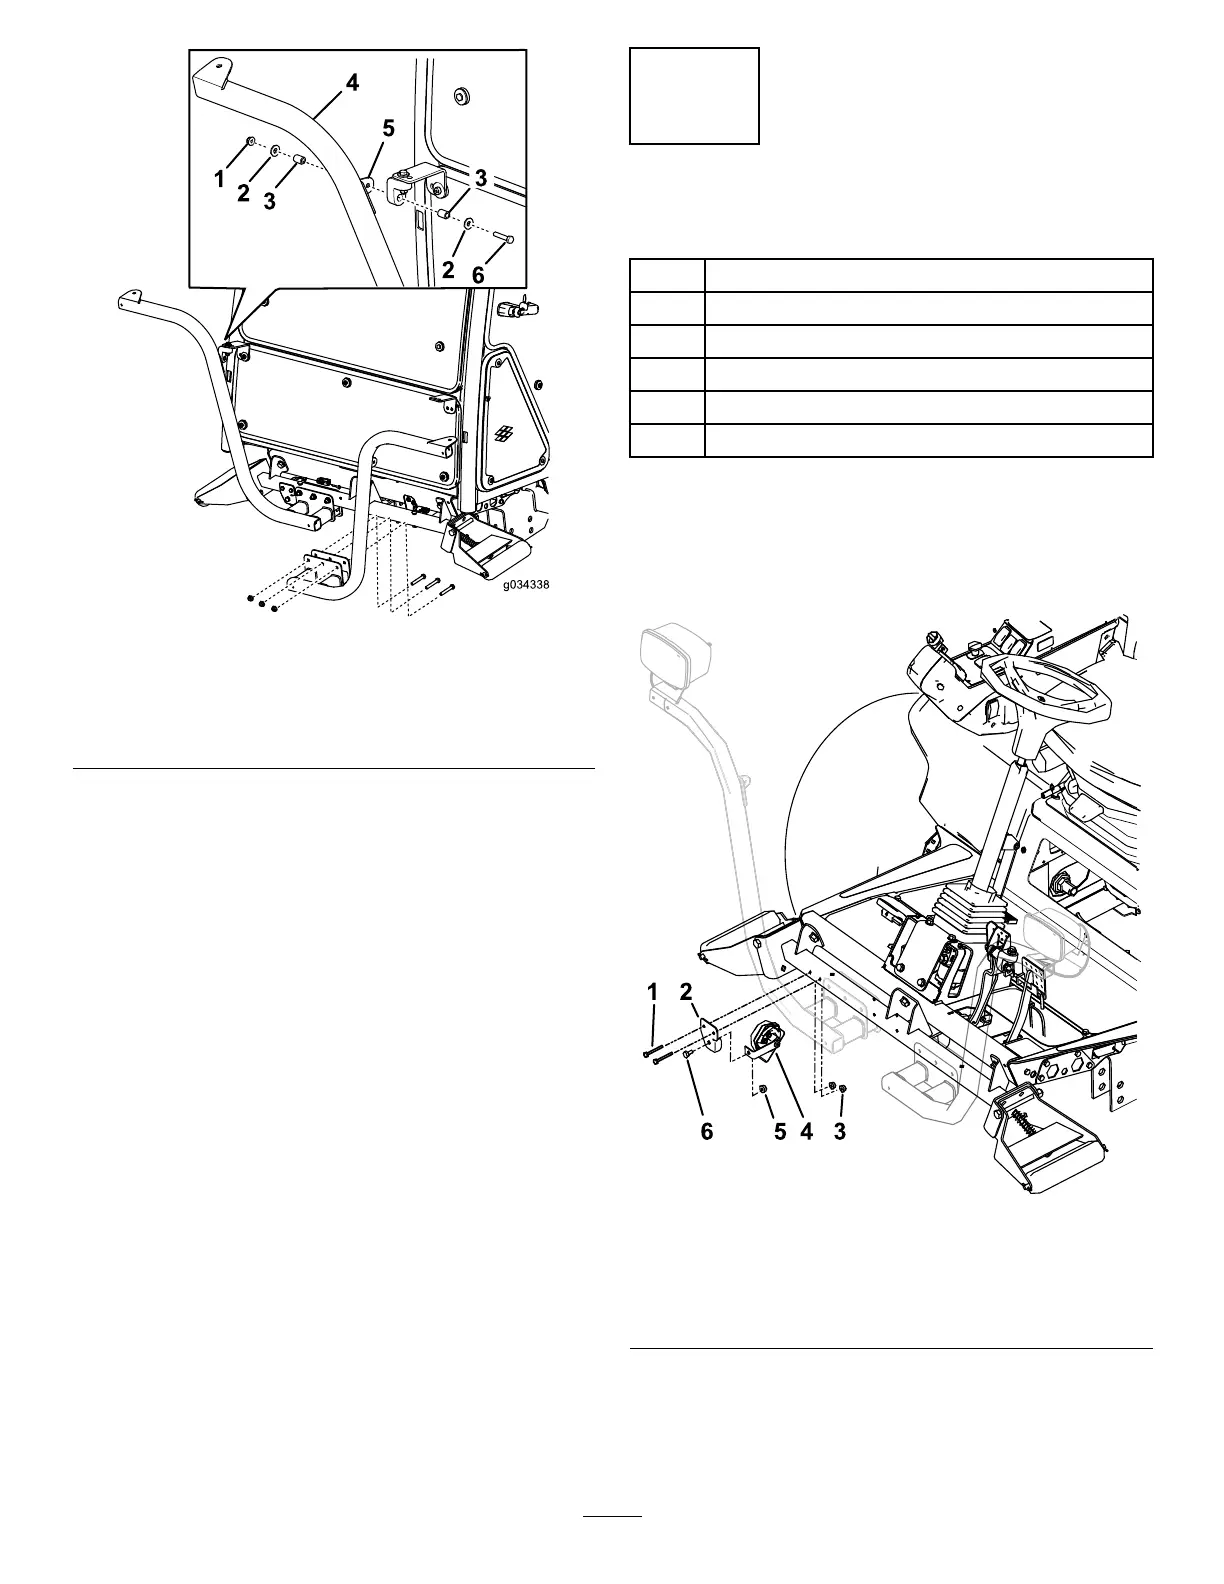
1.Nut(5/16inch)
4.Headlightbracket
2.Washer5.Brackettab
3.Spacer6.Bolt(5/16x1-5/8inch)
4.Fastentheleftandrightheadlightassemblies
totheheadlightbrackets(Figure7)withthe
fastenerssuppliedinthekit.
Note:Ensurethattheturn-signallensonthe
headlightispositionedtowardtheoutsideofthe
tractionunit.
5.Tightenthelocknuttormlyholdtheheadlight
assemblytotheheadlight-assemblybracket.
Note:Donotovertightenthelocknut.
Note:Youcannotusethefrontandrearcablightsfor
CEapplications.Disablethefrontandrearcablights
asfollows:
•Front—Removethelightsfromthecabroofand
disconnectthewiresfromthelights.Installthe
lightsintothecab.
•Rear—Removethescrewssecuringthelensesto
thelights.Removethebulbsfromthelightsand
installthelensestothelights.
4
InstallingtheHorn
Partsneededforthisprocedure:
1Horn
1Hornbracket
1
Bolt(3/8x5/8inch)
1
Flangenut(3/8inch)
2
Bolt(1/4x2inches)
2
Nut(1/4inch)
Procedure
1.Securethehornstraptothehornbracketwitha
bolt(3/8x5/8inch)andaangenut(3/8inch)
asshowninFigure10.
g371386
Figure10
1.Bolt(1/4x2inches)
4.Hornwithstrap
2.Hornbracket
5.Flangenut(3/8inch)
3.Nut(1/4inch)6.Bolt(3/8x5/8inch)
2.Mountthehornbrackettothebacksideofthe
roller-supporttubewith2bolts(1/4x2inches)
andnuts(1/4inch).Rotatethehornsothatit
facesdown(Figure10).
9
 Loading...


