Maintenance
24
m–2347
1
2
3
4
5
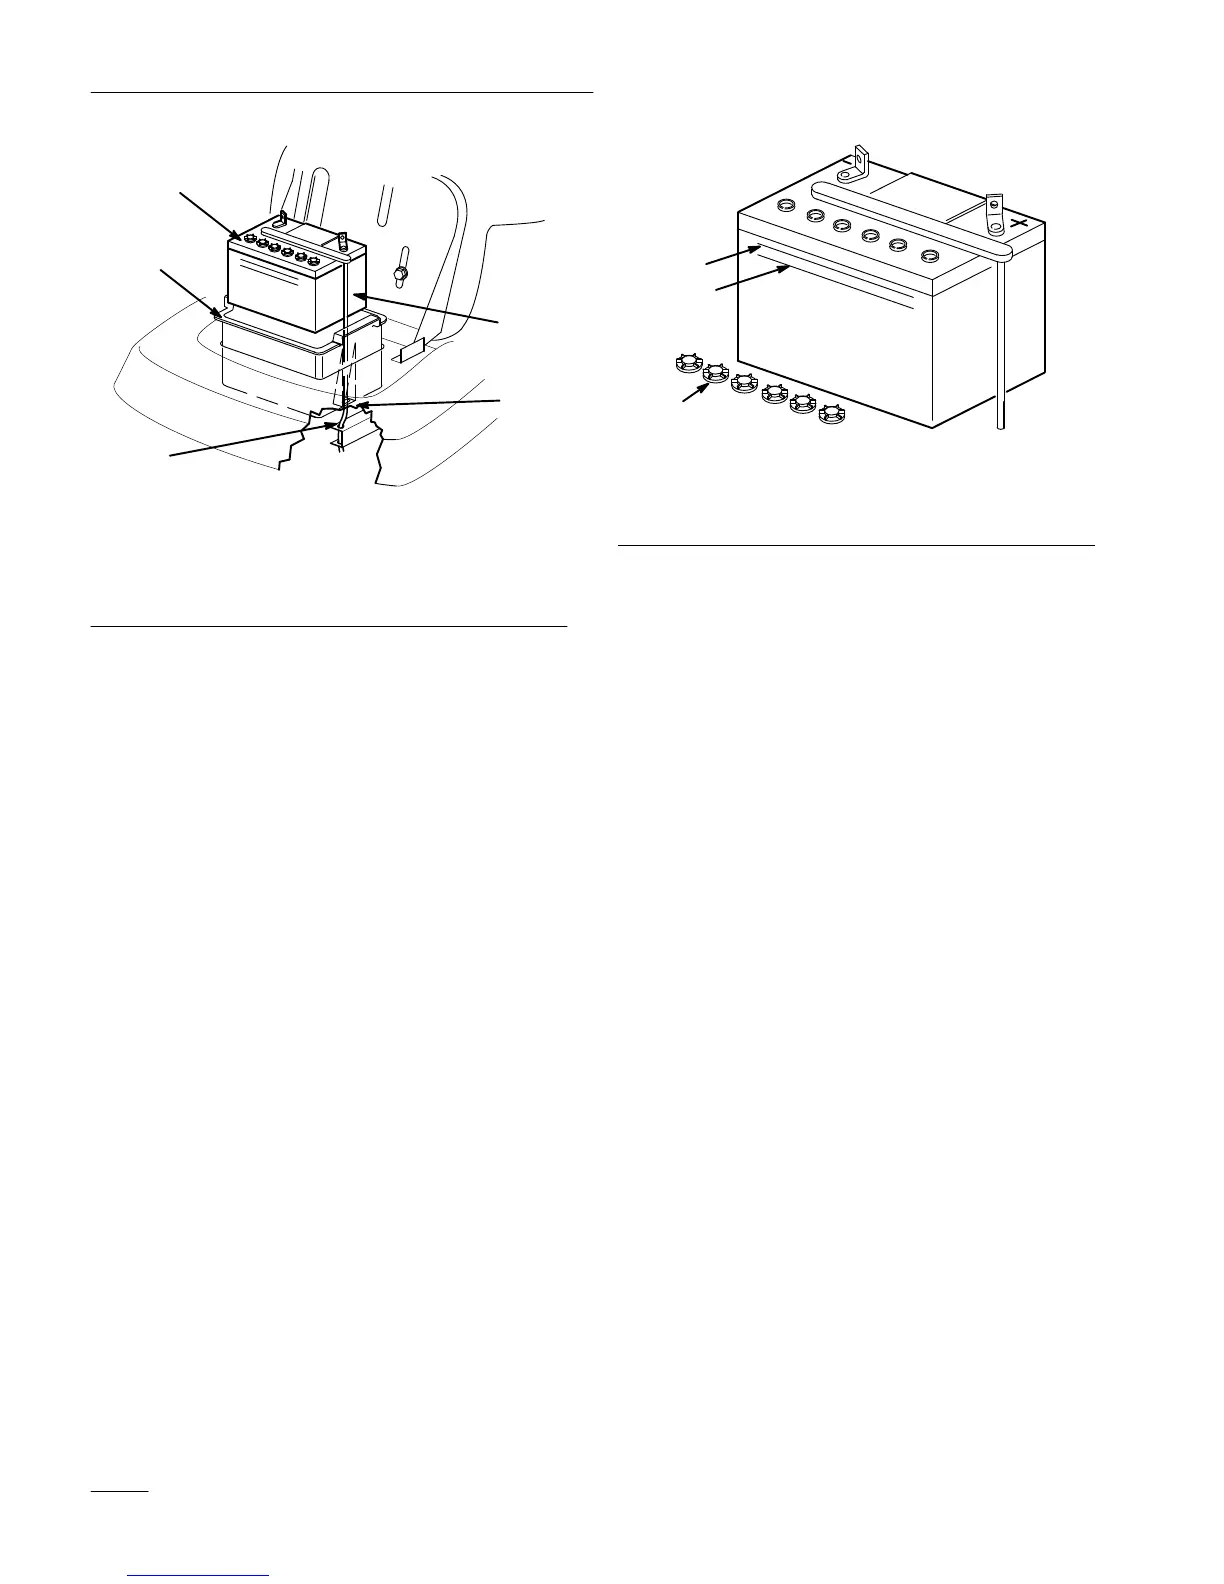
Figure 20
1. Battery
2. Battery
box
3. V
ent tube
4.
Slot in battery box
5.
Holes in frame
2. Install the battery box and battery into the
chassis (Fig. 20). Make sure to slide the end of
the vent tube through the holes in the frame
(Fig. 20).
3. Using the bolt and wing nut, connect the positive
(red) cable to the positive (+) battery post
(Fig. 19). Slide the rubber cover over the battery
post.
4. Using the bolt and wing nut, connect the
negative (black) cable to the negative (–) battery
post (Fig. 19).
Checking Electrolyte Level
1. Tip the seat forward to see the battery.
2. Look at the side of the battery. The electrolyte
must be up to the “UPPER” line (Fig. 21). Do
not allow the electrolyte to get below the
“LOWER” line (Fig. 21).
3. If the electrolyte is low, add the required amount
of distilled water; refer to Adding Water to the
Battery, page 24.
m–1878
1
2
3
Figure 21
1. Filler
caps
2.
UPPER line
3.
LOWER line
Adding Water to the Battery
The best time to add distilled water to the battery is
just before you operate the machine. This lets the
water mix thoroughly with the electrolyte solution.
1. Clean the top of the battery with a paper towel.
2. Unscrew the filler caps (Fig. 21).
3. Slowly pour distilled water into each battery cell
until the level is up to the “UPPER” line
(Fig. 21) on the battery case.
IMPORTANT: Do not overfill the battery
because electr
olyte (sulfuric acid) can cause
sever
e corr
osion and damage to the chassis.
4. Screw the filler caps onto the battery.