Maintenance
38
m–1889
1
4
3
2
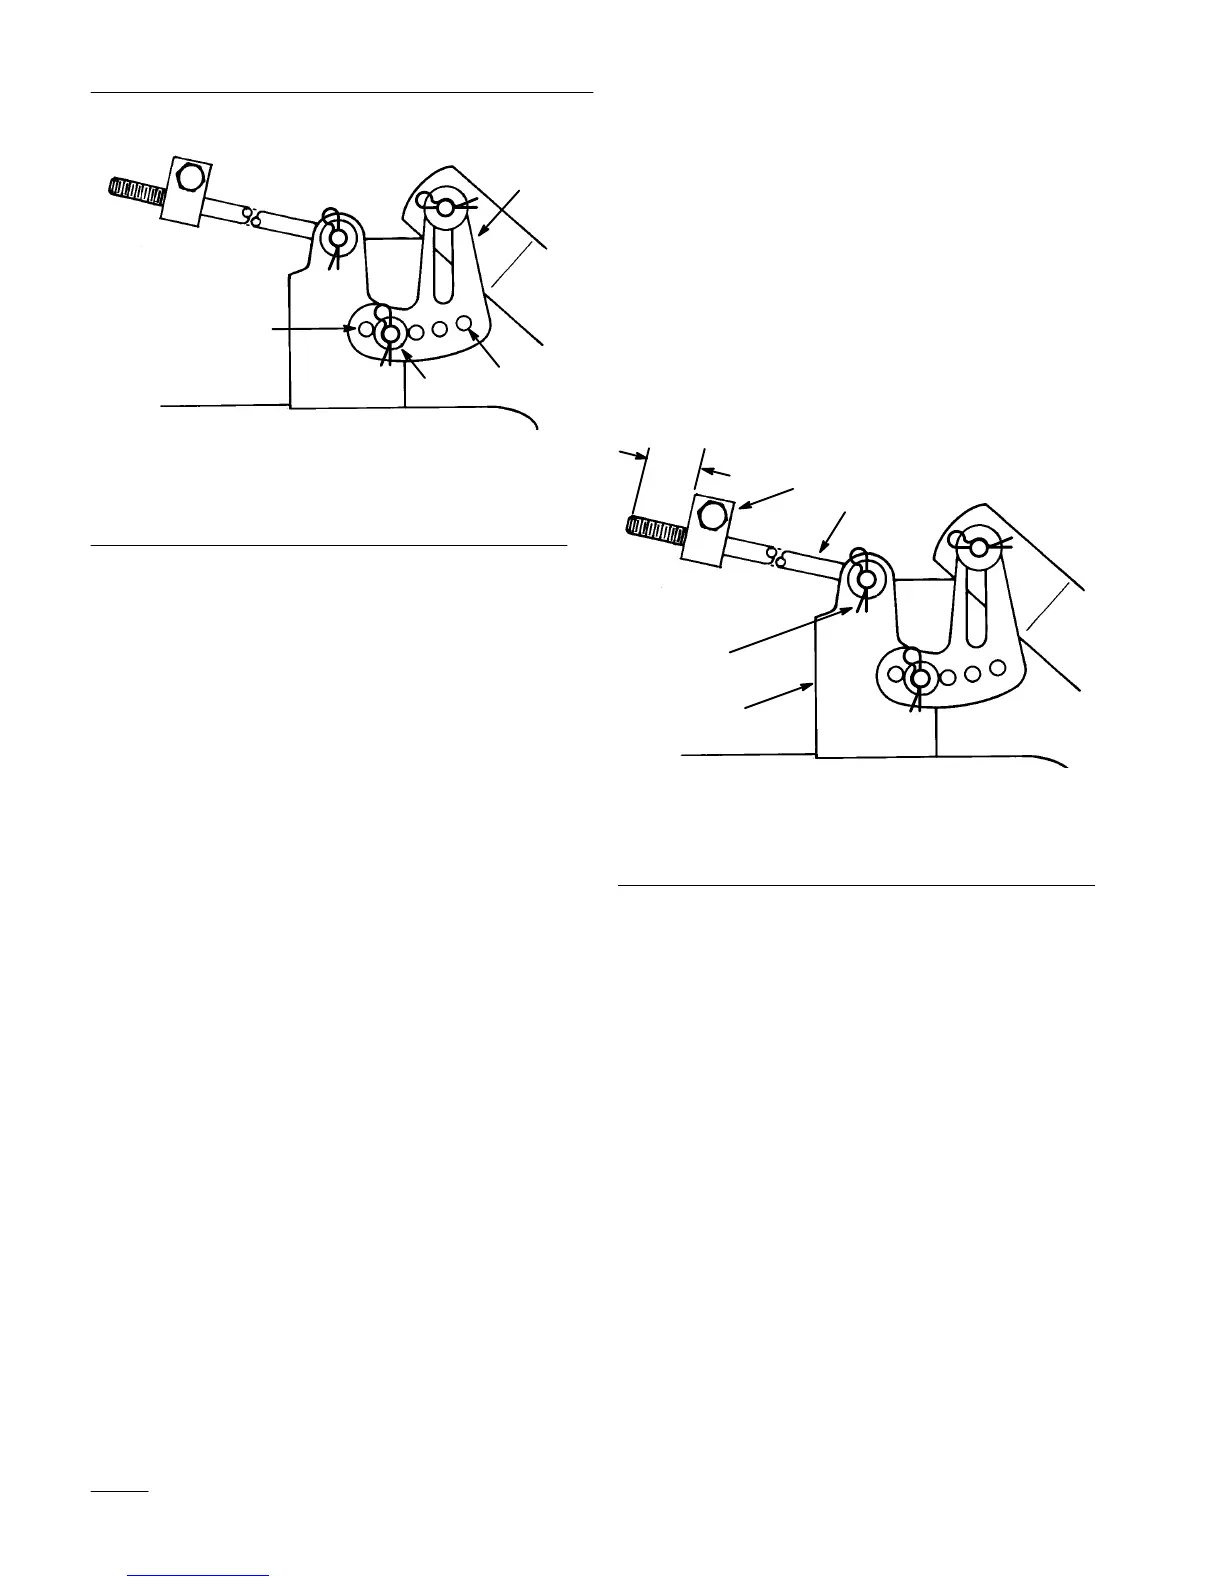
Figure 48
1. Hair
pin cotter and
washer
2. Leveling
bracket
3.
Front hole
4.
Rear hole
6. Now check the front-to-rear blade slope; refer to
Front-to-Rear Blade Slope, page 38.
Front-to-Rear
Blade Slope
Check the front-to-rear blade slope any time you
install the mower. Before you check the slope, set the
air pressure in the front and rear tires to the
recommended inflation. Refer to “Tire Pressure”
(page 19) in the Maintenance Section. If the front of
the mower is not within a range of 1/8”–3/8”
(3.5mm–10.5mm) lower than the rear of the mower,
adjust the blade slope using the following
instructions:
1. Park the machine on a level surface, disengage
the blade control (PTO), shift into neutral, set
the parking brake, and turn the ignition key to
“OFF” to stop the engine. Remove the key.
2. Check and adjust side-to-side blade level if you
have not checked the setting; refer to
Side-to-Side Mower Leveling, page 37.
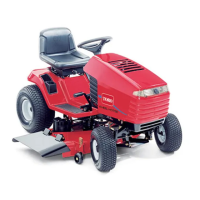
3. Measure the length of the rod extending out the
front of the adjusting block on the sides of the
chassis (Fig. 49). If the rod length is not 5/8”
(16 mm), remove the hair pin cotter and washer
from the end of the rod (Fig. 49), and turn the
rod until the 5/8” (16 mm) dimension is
obtained. Then install the end of the rod into the
hole in the mower mount and secure in place
with washer and hair pin cotter. Repeat
procedure on the opposite side.
5/8”
(16
mm)
1
2
3
4
1805
Figure
49
1. Hair
pin cotter and
washer
2. Leveling
bracket
3.
Front hole
4.
Rear hole
4. Check the front to rear slope by measuring
between the bottom of the mower
(front center and rear center) and the flat surface
(Fig. 50). If the front is not within a range of
1/8”–3/8” (3.5mm–10.5mm) lower than the rear,
an adjustment is required.