Maintenance
40
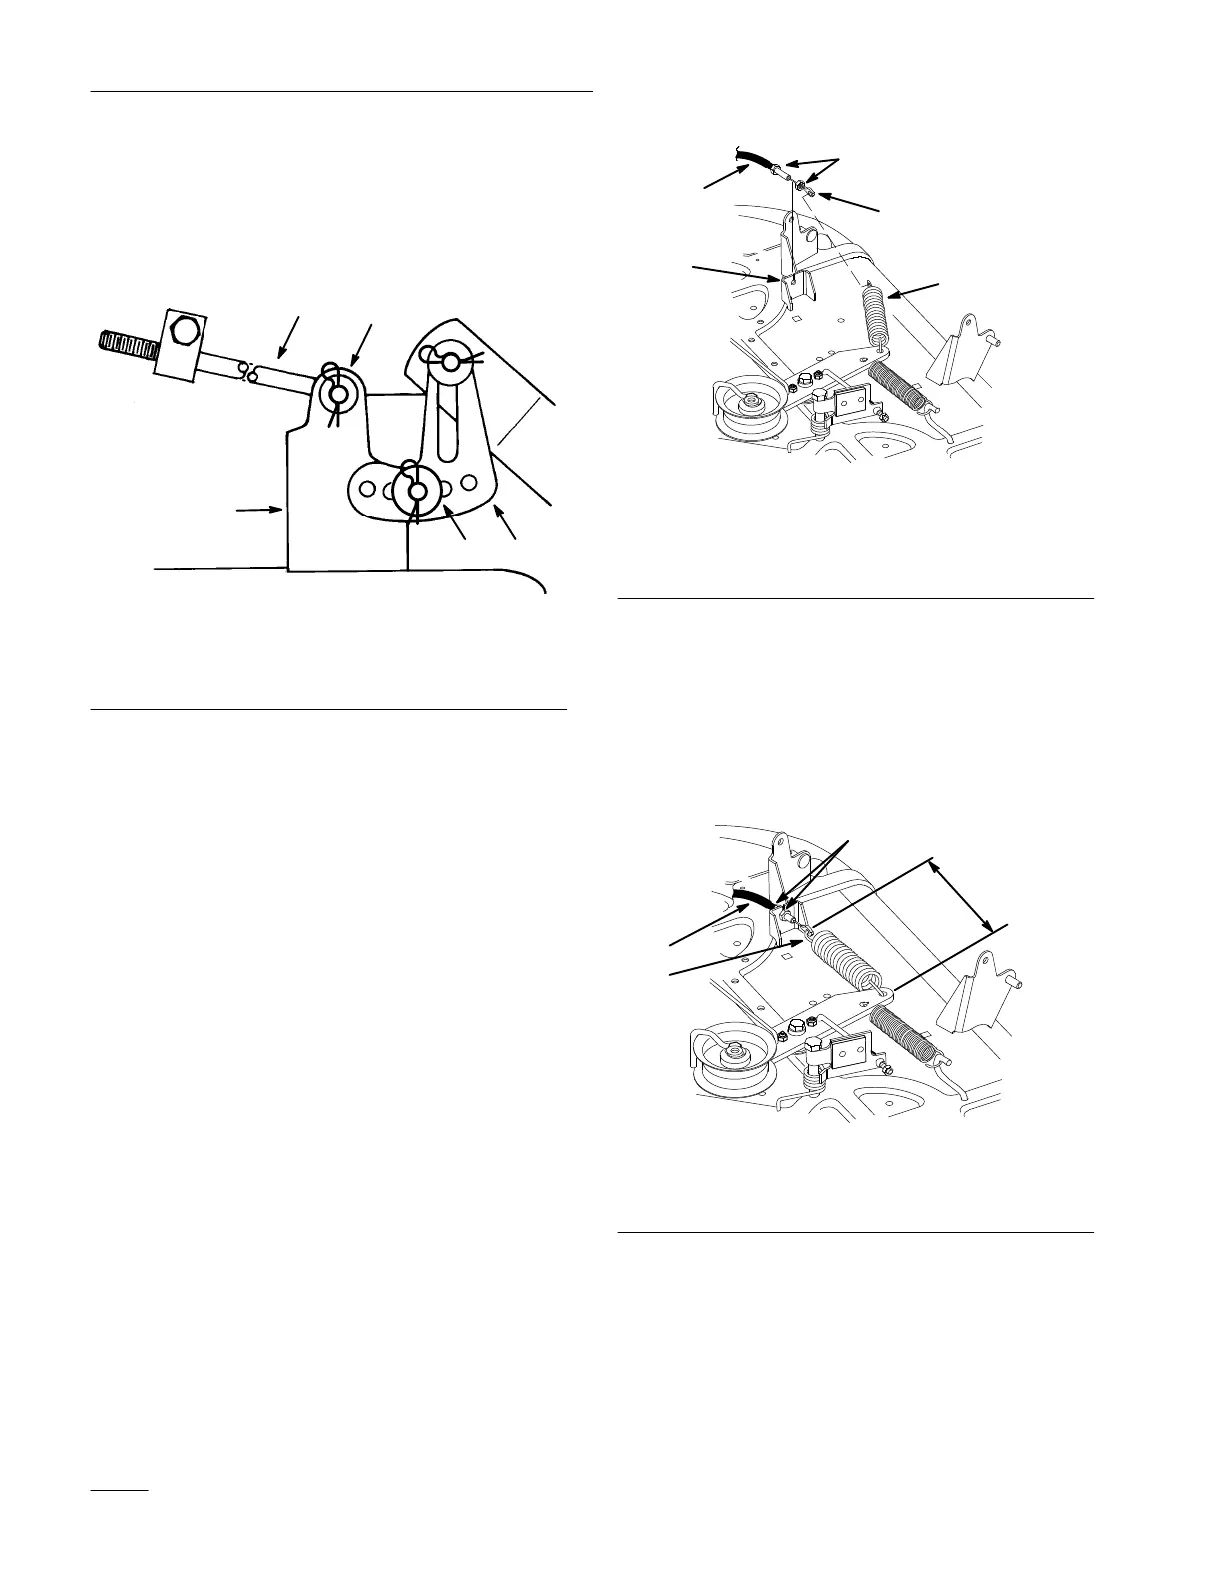
8. Mount the slotted mower leveling bracket onto
the pin on the height-of-cut arm (Fig. 45). Install
the washer and hair pin cotter to secure the
mower. Repeat this step on the opposite side of
the mower.
1805
3
2
1
1
4
Figure 45
1. Hairpin cotter and washer
2. Long rod
3. Leveling bracket
4. Mower mount
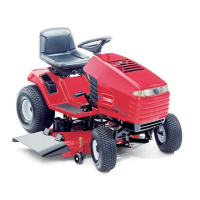
9. Look under tractor and take down blade control
(PTO) cable nested inside frame rail.
10. Remove first jam nut and thread second jam nut
onto the blade control (PTO) cable all the way.
Route cable through slot in deck bracket and
thread second jam nut onto cable (Fig. 46).
11. Hook end of blade control (PTO) cable onto
idler spring (Fig. 46).
1
3
4
5
2384
2
Figure 46
1. Blade control (PTO) cable
2. Ring end
3. Idler spring
4. Jam nut
5. Mounting bracket
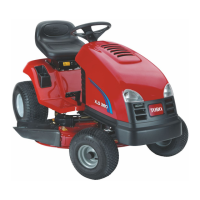
12. Engage blade control (PTO) lever on dash.
Measure distance between hook ends of idler
spring (Fig. 47). Adjust jam nuts so 6”
(150 mm) dimension is obtained (Fig. 47).
13. Tighten jam nuts securely and disengage blade
control (PTO).
1
2
6”
2385
3
(150 mm)
Figure 47
1. Blade control (PTO) cable
2. Jam nut
3. Idler spring
14. Move the height-of-cut lever (deck lift) into the
“D” notch to make it easier to install the
height-of-cut lift assist spring.