38
6. Tighten the nuts at the ball joints (Fig. 45).
Electrical system will not perform proper safety
shut off with jumper wire installed.
• Remove jumper wire from wire harness
connector and plug connector into seat switch
when adjustment is completed.
• Never operate this unit with jumper installed
and seat switch bypassed.
Warning
7. After both pump neutrals are set, shut off the machine.
8. Remove jumper wire from wire harness connector and
plug connector into seat switch.
9. Reinstall prop rod and lower the seat into position.
10. Remove the jack stands.
Adjusting the Tracking
The left–hand pump has a knob for adjusting the tracking.
Important Adjust the handle neutral and hydraulic
pump neutral before adjusting the tracking. Refer to
Adjusting the Handle Neutral on page 36 and Adjusting the
Hydraulic Pump Neutral on page 37.
1. Push both control levers forward the same distance.
2. Check if the machine pulls to one side. If it does, stop
the machine and set the parking brake.
3. Tip the seat up to access the tracking knob.
Note: Determine the left and right sides of the machine
from the normal operating position.
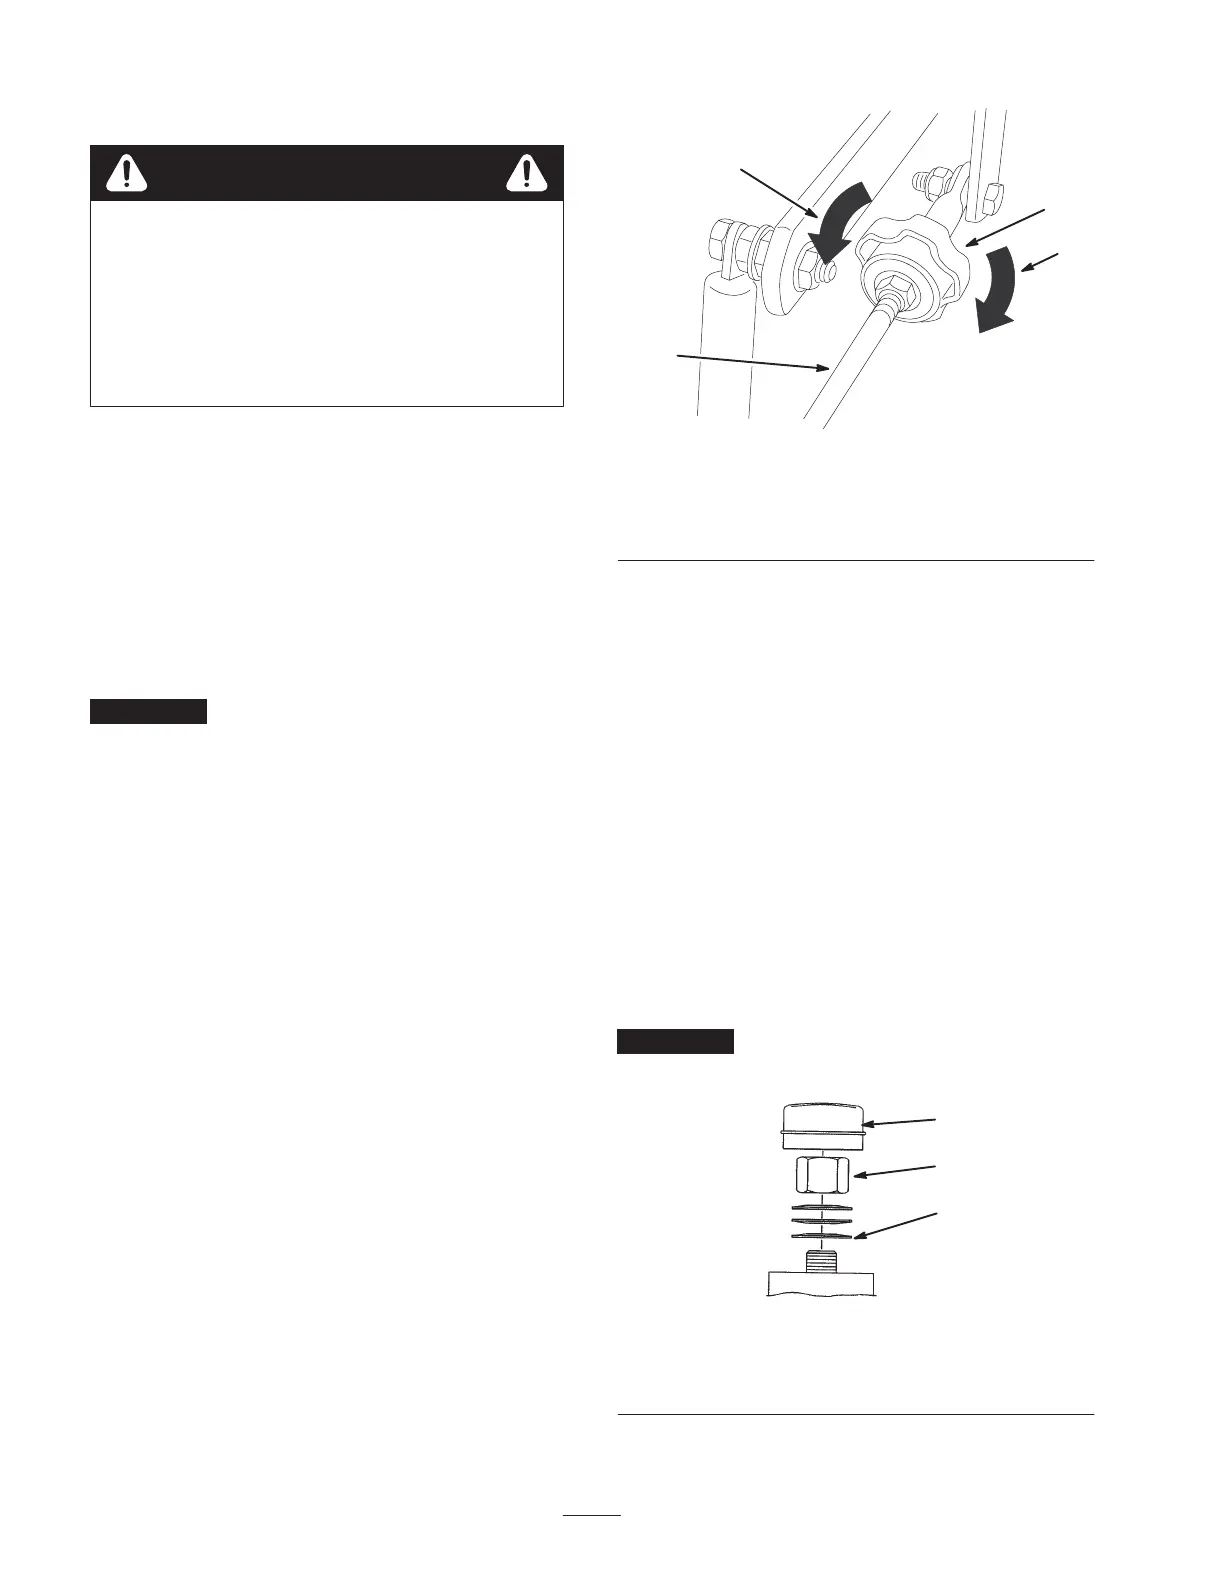
4. To make the machine go right, turn the knob towards
the rightside of the machine. Refer to figure 47.
5. To make the machine go left, turn the knob towards the
leftside of the machine. Refer to figure 47.
6. Repeat adjustment until the tracking is correct.
3
1
2
4
m–6280
Figure 47
1. Pump rod
2. Turn this way to track left
3. Tracking knob
4. Turn this way to track
right
Adjusting the Caster Pivot
Bearing
Check after every 500 operating hours or at storage,
whichever occurs first.
1. Disengage the PTO, move the motion control levers to
the neutral locked position and set the parking brake.
2. Stop the engine, remove the key, and wait for all
moving parts to stop before leaving the operating
position.
3. Remove the dust cap from the caster and tighten the
locknut (Fig. 48).
4. Tighten until the spring washers are flat and then back
off 1/4 turn to properly set the preload on the bearings
(Fig. 48).
Important Make sure that the spring washers are
installed correctly as shown in Figure 48.
1
2
3
m–4640
Figure 48
1. Spring washers
2. Locknut
3. Dust cap