R otating shaft and f an can cause per sonal
injur y .
• Do not operate the machine without the
co v er s in place.
• K eep finger s, hands and clothing clear of
r otating f an and dri v e shaft.
• Shut of f the engine and r emo v e
the ignition k ey bef or e perf or ming
maintenance.
Sw allo wing engine coolant can cause
poisoning .
• Do not s w allo w engine coolant.
• K eep out of r each fr om childr en and pets.
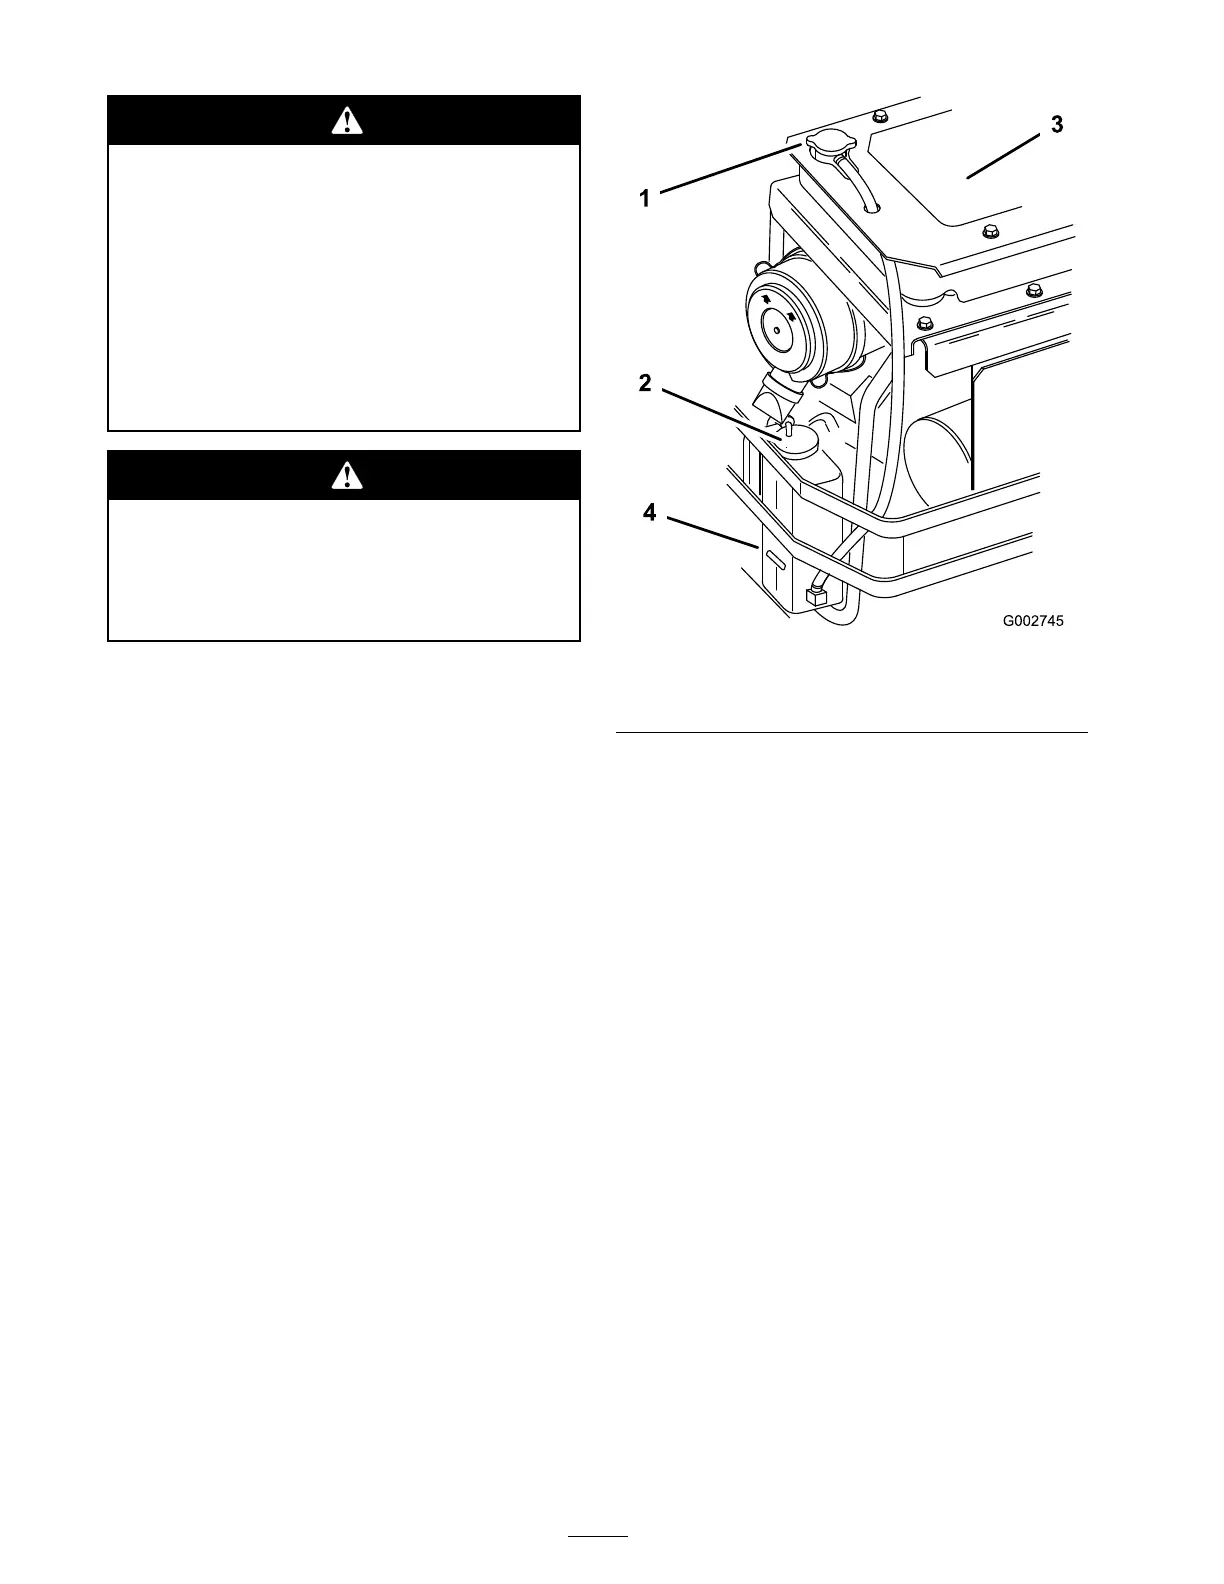
Checking the Radiator Coolant
Chec k the cooling system lev el daily .
Chec k the cooling system hoses ev er y 100 hours .
Fluid T ype: 50/50 mix of extended life
antifreeze/Dex-Cool® and w ater
Cooling System Capacity: 156 ounces (4.6 l)
Note: Do not open the radiator cap . Doing this
ma y induce air into the cooling system.
1. P osition the mac hine on a lev el surface , stop
the engine , and set the parking brak e .
2. Unlatc h the seat and tilt the seat up .
3. With the engine cool, c hec k the o v erflo w bottle
lev el. T he fluid needs to be up to the bump on
the outside of the o v erflo w bottle ( Figure 51 ).
4. If the coolant lev el is lo w , add a 50/50 mix of
extended life antifreeze/Dex-Cool® and w ater
to the o v erflo w bottle ( Figure 51 ).
5. Add the 50/50 coolant mix to the o v erflo w
bottle and fill it to the indicator line on the
bottle ( Figure 51 ).
Figure 51
1. Antifreeze overow bottle 2. Indicator line on side of
overow bottle
Cleaning the Cooling System and
Hydraulic Pumps
Before eac h use , c hec k and remo v e any build-up
of g rass , dir t or other debris from the radiator
screen and h y draulic pumps with compressed air
( Figure 51 ).
1. Diseng ag e the PTO , mo v e the motion control
lev ers to the neutral loc k ed position and set
the parking brak e .
2. Stop the engine , remo v e the k ey , and w ait for
all mo ving par ts to stop before lea ving the
operating position.
Note: Before star ting the engine , clean g rass
from the pump dri v e belt compar tment. Chec k
more often in dr y conditions .
3. Unlatc h the seat, tilt the seat up and raise the
r ubber flap abo v e the dri v e belt compar tment.
4. R emo v e debris from the dri v e belt
compar tment and h y draulic pumps .
5. R emo v e debris from the screen on the engine
co v er .
6. Tilt the engine co v er forw ard.
42