g006836
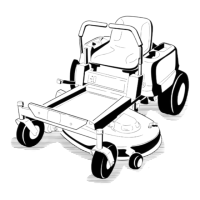
Figure 56
1. Idler 5. Engine
2. Belt guide B 6. Belt guide A
3. PT O belt
7. Blower
4. Jackshaft
9. Engage the PT O lever .
10. Rotate the brake band down into the original
position.
1 1. Install the clevis pin and hairpin cotter to secure
the brake band.
12. Loosen the jam nuts and adjust the linkage until
the top of the idler arm is aligned with the bottom
of the notch on the tension arm as shown in
Figure 57 .
g006837
Figure 57
1. T ension arm
2. Loosen the jam nuts.
3. When PT O is engaged, align top of idler arm with bottom of
notch on tension arm, as shown.
4. Idler arm
13. T ighten the jam nuts and disengage the PT O
lever .
14. Engage the PT O lever and check the alignment.
15. Check and adjust the belt guides as stated in
Adjusting the Belt Guides ( page 52 ) .
Replacing the Pump-Drive
Belt
1. Park the machine on a level surface, move the
speed-control lever to the N EUTRAL position,
disengage the PT O, and engage the parking
brake.
2. Shut of f the engine, remove the key , and wait
for all moving parts to stop before leaving the
operating position.
3. Remove the PT O Belts; refer to Replacing the
PT O Belts ( page 50 ) .
4. Pull the spring idler or remove the spring to
relieve the tension of the pump-drive belt.
5. Remove the old belt.
6. Route the new belt onto the sheaves as shown
in the decal located on the back of the left drive
shield ( Figure 58 ).
g006838
Figure 58
1. Pump-drive belt 4. Pump
2. Pump 5. Idler
3. Idler 6. Engine
7. Install the PT O belts; refer to Replacing the PT O
Belts ( page 50 ) .
51

 Loading...