ReplacingtheGrassDeector
ServiceInterval:Beforeeachuseordaily—Inspectthegrass
deectorfordamage.
WARNING
Anuncovereddischargeopeningcouldallowthe
lawnmowertothrowobjectsatyouorbystanders,
resultinginseriousinjury.Also,contactwiththe
bladecouldoccur.Neveroperatethemachine
withoutthegrassdeector,thedischargecover,or
thegrass-collectionsysteminplace.
Neveroperatethemachinewithoutthegrass
deector,thedischargecover,orthegrass-collection
systeminplace.
1.Removethenut(3/8inch)fromtherodunderthe
mower(Figure68andFigure69).
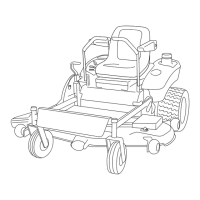
g014636
Figure68
81cm(32-Inch)Deck
1.Mowerdeck
5.Spring
2.Grassdeector6.Nut(3/8inch)
3.Grass-deectorbracket7.Shortstandoff
4.Rod
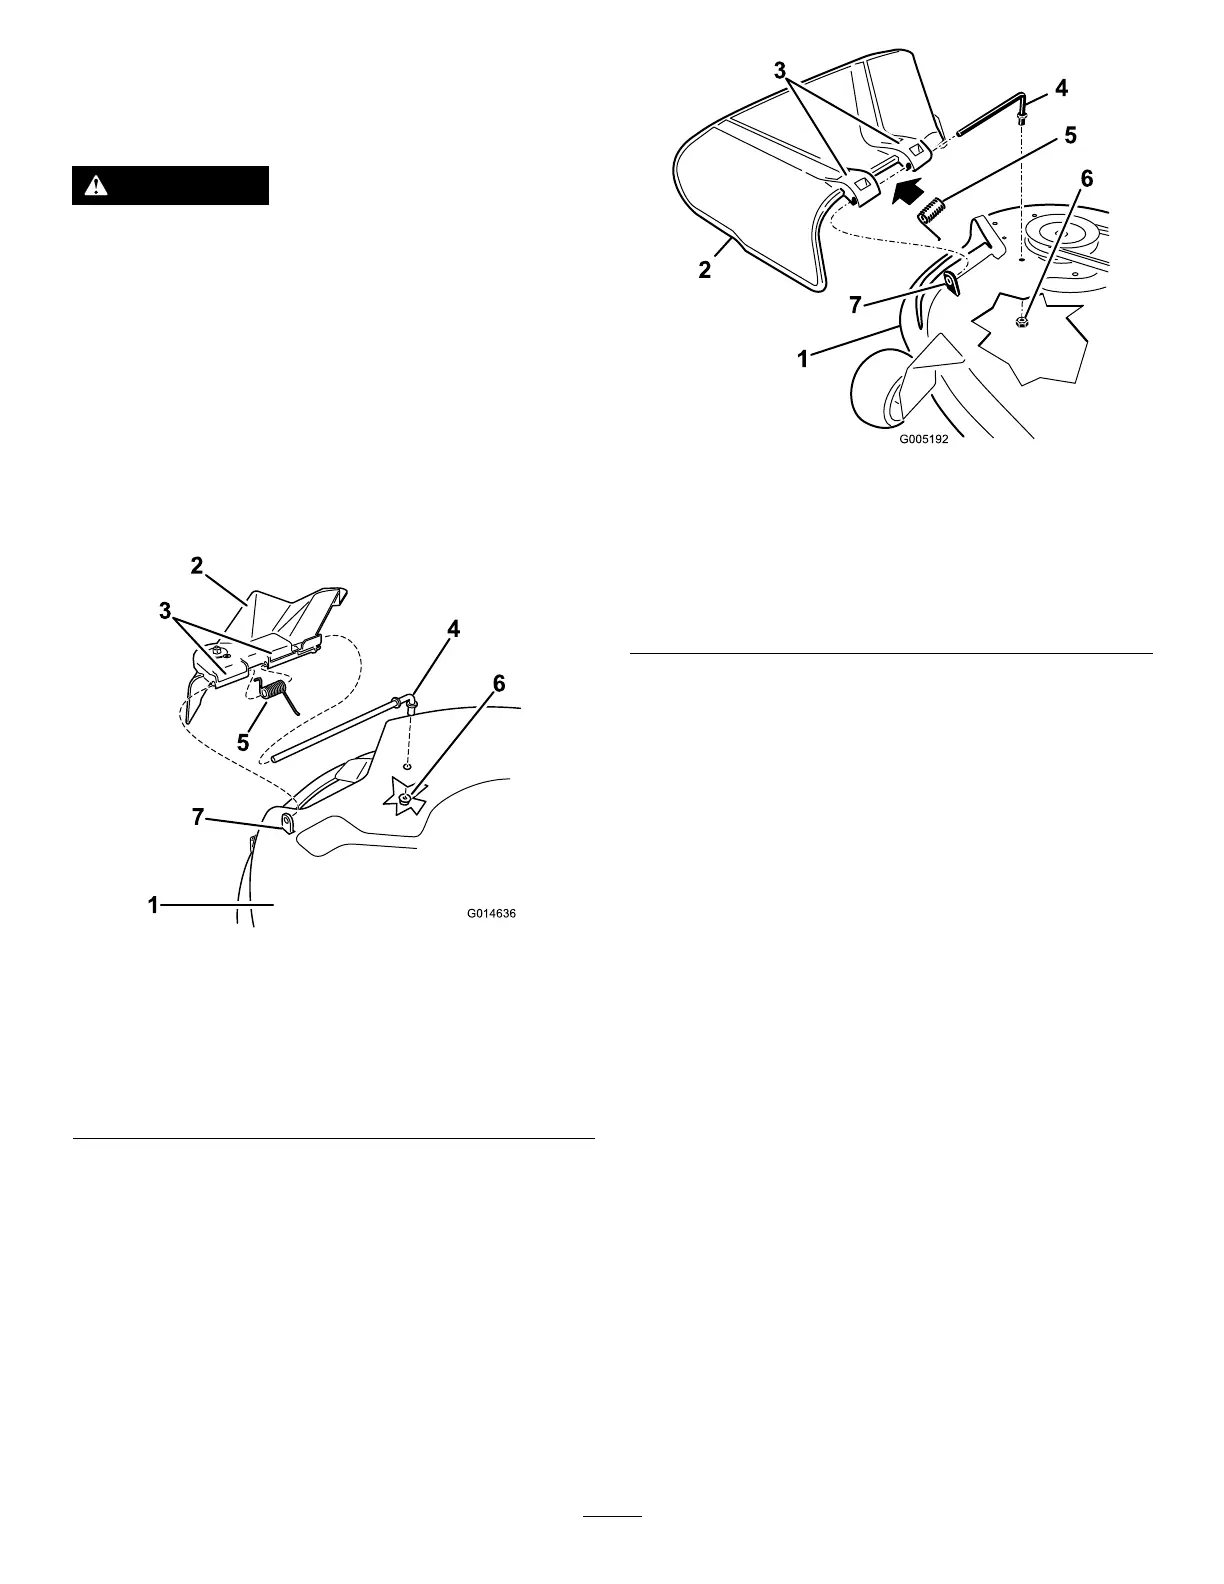
g005192
Figure69
107cm(42-Inch)Deck
1.Mowerdeck
5.Spring
2.Grassdeector6.Nut(3/8inch)
3.Grass-deectorbracket7.Shortstandoff
4.Rod
2.Slidetherodoutoftheshortstand-off,spring,and
grassdeector(Figure68andFigure69).
3.Removethedamagedorworngrassdeector.
4.Replacethegrassdeector(Figure68andFigure69).
5.Slidetherod(straightend),throughthe
rear-grass-deectorbracket.
6.Placethespringontherod,withtheendwiresdown,
andbetweenthegrassdeectorbrackets.
7.Slidetherodthroughsecondgrassdeectorbracket
(Figure68andFigure69).
8.Inserttherodatthefrontofthegrassdeectorinto
theshortstandoffonthedeck.
9.Securetherearendoftherodintothemowerwitha
nut(3/8inch)asshowninFigure68andFigure69.
Important:Thegrassdeectormustbespring
loadedinthedownposition.Liftthedeectorup
totestthatitsnapstothefulldownposition.
44