16
m–4014
3
1
6
4
2
5
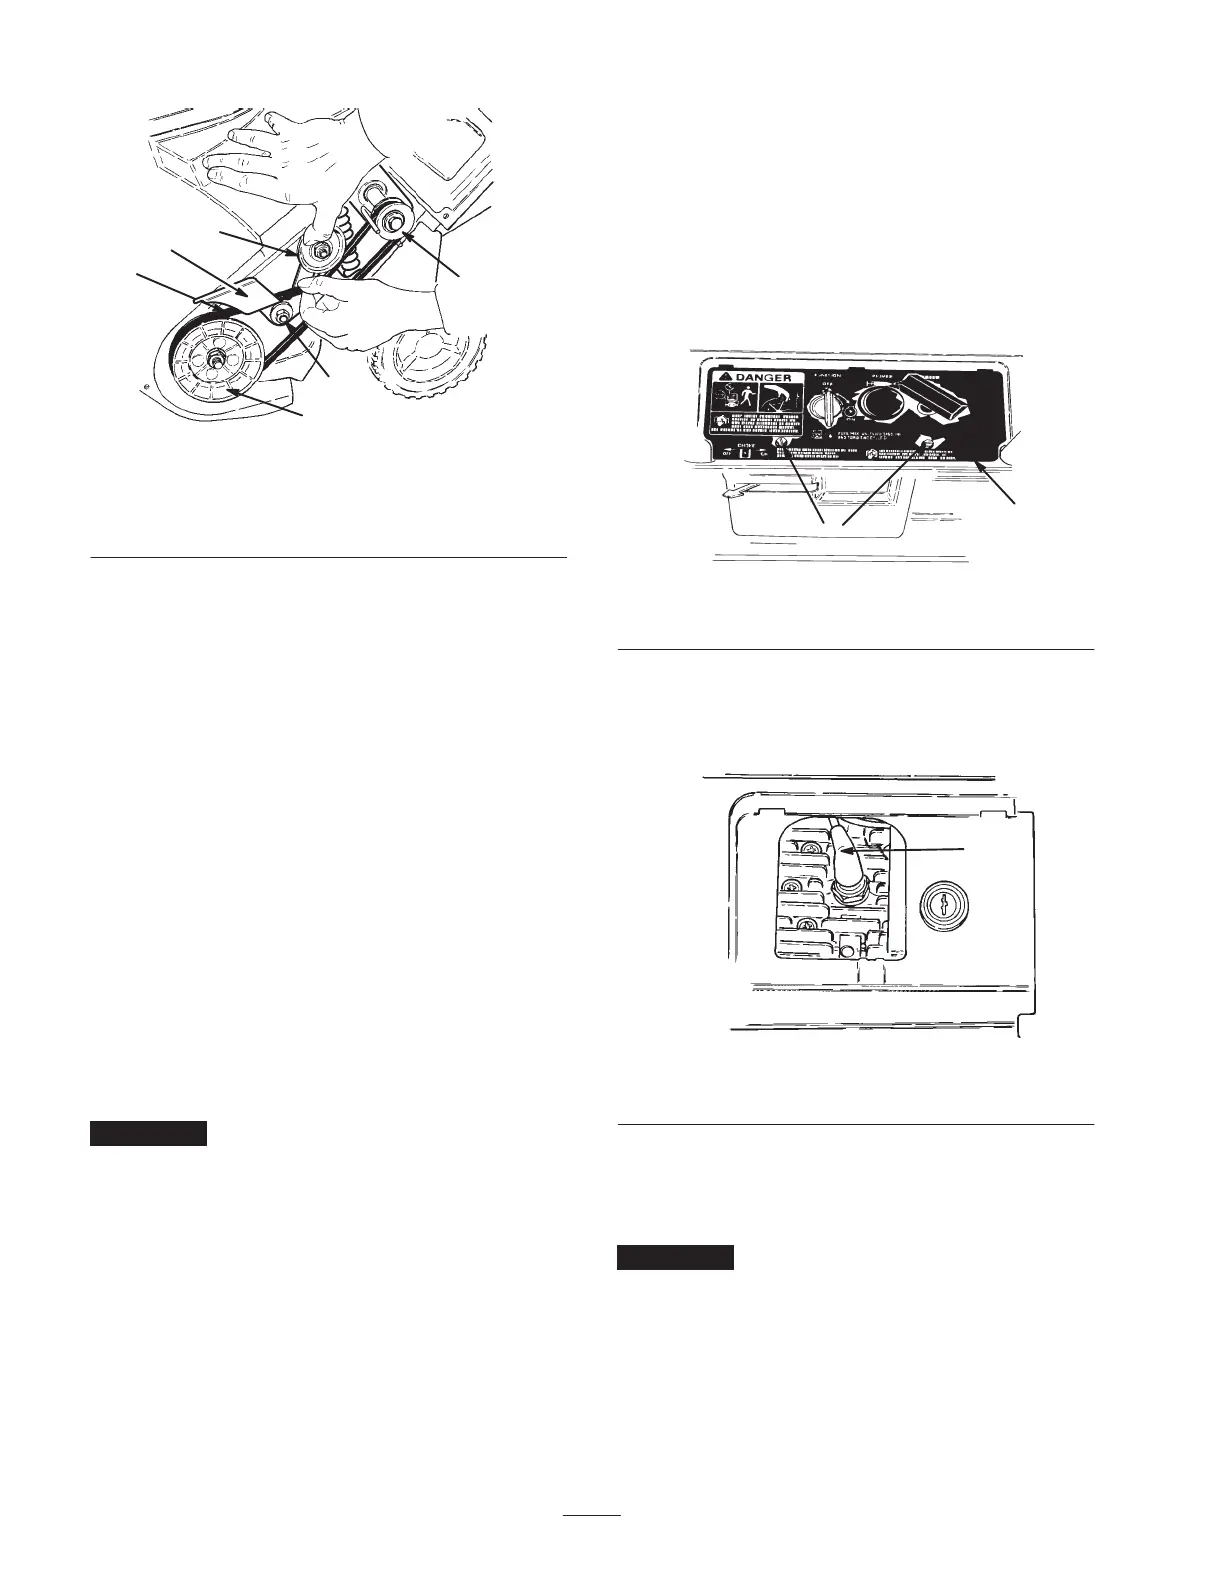
Figure 14
1. Drive belt
2. Brake arm
3. Idler pulley
4. Drive pulley
5. Idler pivot nut
6. Rotor pulley
8. Remove the old drive belt from the rotor pulley
(Fig. 14).
9. Push down on the idler pulley to release the brake arm
and pull the old drive belt out from behind the brake
arm (Fig. 14).
10. Slide the old drive belt off the drive pulley (Fig. 14).
11. Loop the new drive belt around the drive pulley and
behind the brake arm (Fig. 14).
12. While holding the new drive belt, slip it onto the rotor
pulley and rotate the rotor with the other hand until it is
completely on the rotor pulley (Fig. 14).
13. Ensure that the long end of the idler spring is hooked in
the housing hole and the round end of the spring is
hooked in the brake arm (Fig. 13).
14. Lift up the brake arm assembly, squeeze the new drive
belt together, and route it under the idler pulley
(Fig. 13).
15. Torque the engine mounting nuts and the idler pivot nut
(Fig. 14) to 170 to 200 in-lbs (19.2 to 22.6 N·m).
Important Ensure that the drive cable is on the cable
pulley before you install the left side cover (Fig. 13).
16. Install the left side cover and tighten fasteners securely,
but do not overtighten.
17. Adjust the control cable if necessary. Refer to Adjusting
the Control Cable on page 13.
18. Connect the wire to the spark plug.
19. Install the control panel.
20. Insert the key in the switch.
Replacing the Spark Plug
Use a Champion CJ8Y or equivalent spark plug. Install a
new spark plug after every 100 operating hours.
1. Stop the engine and wait for all moving parts to stop.
2. Remove the key from the switch.
3. Remove the two screws that secure the control panel to
the housing (Fig. 15).
917
2
1
Figure 15
1. Screws 2. Control panel
4. Lift off the control panel and allow it to hang on the
recoil rope.
5. Disconnect the wire from the spark plug (Fig. 16).
918
1
Figure 16
1. Spark-plug wire
6. Remove the spark plug.
7. Examine the spark plug and replace it if it is cracked,
fouled, dirty, or if the electrodes are worn.
Important Do not clean the electrodes because grit
could enter the cylinder and damage the engine.
8. Set the gap on the new spark plug at 0.030 inch
(0.76 mm) as shown in Figure 17.
 Loading...