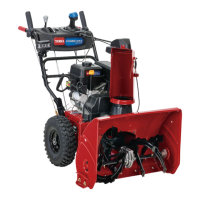
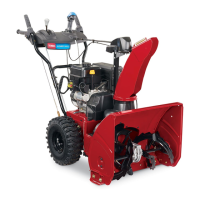
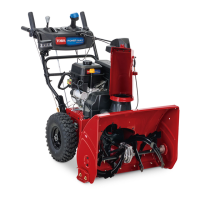
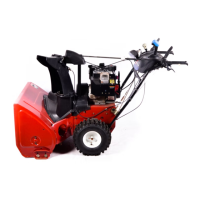
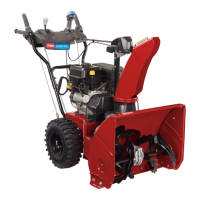
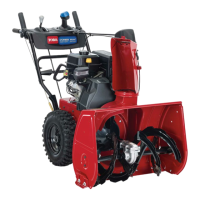
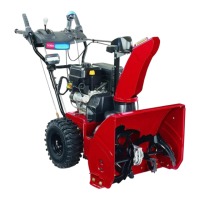
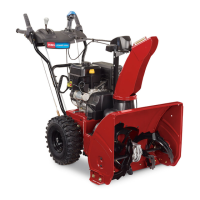
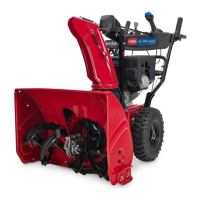
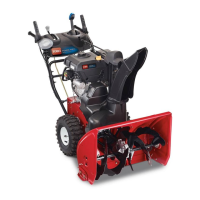
EasyManua.ls Logo

Toro Power Max 826 User Manual

Toro Power Max 826
32 pages
To Next Page IconTo Next Page
Page #1 background imageLoading...
Page #1 background image
FormNo.3446-914RevB
PowerMax
®
826OHAESnowthrower
ModelNo.37805—SerialNo.400000000andUp
Operator'sManual
Introduction
Thismachineisintendedtobeusedbyresidential
homeowners.Itisdesignedprimarilyforremoving
snowfrompavedsurfaces,suchasdrivewaysand
sidewalks,andothersurfaces.Itisnotdesignedfor
removingmaterialsotherthansnow,norisitdesigned
forclearinggravelsurfaces.Usingthisproductfor
purposesotherthanitsintendedusecouldprove
dangeroustoyouandbystanders.
Readthisinformationcarefullytolearnhowtooperate
andmaintainyourproductproperlyandtoavoid
injuryandproductdamage.Youareresponsiblefor
operatingtheproductproperlyandsafely.
Visitwww.Toro.comforproductsafetyandoperation
trainingmaterials,accessoryinformation,helpnding
adealer,ortoregisteryourproduct.
Wheneveryouneedservice,genuineT oroparts,or
additionalinformation,contactanAuthorizedService
DealerorToroCustomerServiceandhavethemodel
andserialnumbersofyourproductready.Figure1
identiesthelocationofthemodelandserialnumbers
onthemachine.Writethenumbersinthespace
provided.
Important:Withyourmobiledevice,youcan
scantheQRcodeontheserialnumberdecal(if
equipped)toaccesswarranty,parts,andother
productinformation.
g293068
Figure1
1.Modelandserialnumberlocation
ModelNo.
SerialNo.
Thismanualidentiespotentialhazardsandhas
safetymessagesidentiedbythesafety-alertsymbol
(Figure2),whichsignalsahazardthatmaycause
seriousinjuryordeathifyoudonotfollowthe
recommendedprecautions.
g000502
Figure2
Safety-alertsymbol
Thismanualuses2wordstohighlightinformation.
Importantcallsattentiontospecialmechanical
informationandNoteemphasizesgeneralinformation
worthyofspecialattention.
Important:Ifyouareusingthismachineabove
1500m(5,000ft)foracontinuousperiod,ensure
thattheHighAltitudeKithasbeeninstalled
sothattheenginemeetsCARB/EPAemission
regulations.TheHighAltitudeKitincreases
engineperformancewhilepreventingspark-plug
fouling,hardstarting,andincreasedemissions.
Onceyouhaveinstalledthekit,attachthe
high-altitudelabelnexttotheserialdecalonthe
machine.ContactanyAuthorizedToroService
DealertoobtaintheproperHighAltitudeKitand
high-altitudelabelforyourmachine.Tolocate
adealerconvenienttoyou,accessourwebsite
atwww.Toro.comorcontactourToroCustomer
CareDepartmentatthenumber(s)listedinyour
EmissionControlWarrantyStatement.Remove
thekitfromtheengineandrestoretheengineto
itsoriginalfactorycongurationwhenrunningthe
engineunder1500m(5,000ft).Donotoperatean
enginethathasbeenconvertedforhigh-altitude
useatloweraltitudes;otherwise,youcould
overheatanddamagetheengine.
Ifyouareunsurewhetherornotyourmachinehas
beenconvertedforhigh-altitudeuse,lookforthe
followinglabel(Figure3).
©2022—TheToro®Company
8111LyndaleAvenueSouth
Bloomington,MN55420
Registeratwww.Toro.com.
OriginalInstructions(EN)
PrintedinMexico
AllRightsReserved
*3446-914*

Table of Contents

Questions and Answers:

Toro Power Max 826 Specifications

General IconGeneral
Engine Displacement252cc
Engine Type4-Cycle OHV
Start TypeElectric Start
Fuel TypeGasoline
Clearing Width26 inches
Intake Height20 inches

Summary

Introduction

Safety-Alert Symbol

Identifies hazards and safety messages.

Important and Note

Highlights mechanical and general information.

High Altitude Kit

Information on installing and using a high altitude kit for engine performance.

Safety

General Safety

General safety precautions for operating the snowthrower.

Safety and Instructional Decals

Location and importance of safety decals on the machine.

Operation Safety Decals

Cutting/Dismemberment Hazard

Warning about hand/foot hazards from impeller and auger.

Thrown Object Hazard

Warning about thrown objects and keeping bystanders away.

Moving Parts Safety

Hazard warning for moving parts and servicing.

Read Operator's Manual

Reminder to consult the manual for safety.

Setup

Installing the Chute

Step-by-step procedure for installing the discharge chute.

Unfolding the Upper Handle

Instructions for unfolding and setting up the upper handle.

Installing the Traction-Control Linkage

Procedure for installing the traction control linkage system.

Installing the Chute-Control Rod

Steps for installing the rod that controls the discharge chute direction.

Installing the Snow-Cleanout Tool

How to install the snow-cleanout tool for safety.

Checking the Engine-Oil Level

Procedure for checking the engine oil level before operation.

Checking and Adjusting the Tire Pressure

How to check and set the correct tire pressure.

Checking the Skids and Scraper

Inspecting and adjusting the skids and scraper for proper operation.

Checking the Operation of the Traction Drive

Verifying the proper function of the machine's traction drive system.

Product Overview

Figure 11: Snowthrower Components

Diagram labeling main parts of the snowthrower.

Figure 12: Control Panel Components

Diagram labeling control panel elements.

Before Operation

Before Operation Safety

Critical safety measures to follow before operating the machine.

General Safety

Overall safety rules for operating the snowthrower.

Fuel Safety

Important safety information regarding fuel handling and storage.

Freewheeling and Self-Propel Drive

Freewheel Operation

Instructions for operating with the axle pins not through wheel hubs.

Self-Propel Operation

Instructions for operating with axle pins through wheel hubs.

Filling the Fuel Tank

During Operation

During Operation Safety

Critical safety measures to follow while operating the machine.

General Safety

General safety rules applicable during operation.

Starting the Engine

Electric Start Procedure

Instructions for starting the engine using the electric starter.

Electrical Cord Safety Warning

Critical safety warning about the electrical cord.

Power Outlet Safety Caution

Cautionary note regarding leaving the machine plugged in.

Recoil Start Procedure

Shutting Off the Engine

Operating the Handwarmers

Operating the Traction Drive

Traction Drive Safety

Warning about improper traction drive adjustment and potential injury.

Operating the Speed Selector

Operating the Auger/Impeller Drive

Auger/Impeller Rotation Hazard

Warning about auger/impeller continuing to rotate after release.

Operating the Quick Stick®

Moving the Discharge Chute

Steps to move the discharge chute left or right.

Moving the Chute Deflector

Steps to adjust the chute deflector up or down.

Clearing a Clogged Discharge Chute

Clogged Chute Safety

Warning about clearing clogs and potential injury.

Operating Tips

Rotating Parts Danger

Danger warning for rotating impeller and auger parts.

Thrown Object Hazard

Warning about thrown objects and injury risk.

After Operation

After Operation Safety

Safety precautions to take after finishing operation.

Preventing Freeze-up After Use

Steps to prevent controls and parts from freezing.

Maintenance

Maintenance Schedule

Schedule of maintenance tasks based on usage intervals.

Maintenance Safety

Safety precautions to follow during maintenance.

Prepare for Maintenance

Steps to take before starting any maintenance tasks.

Check Engine-Oil Level

Check and Adjust Skids and Scraper

Check and Adjust Traction Cable

Check and Adjust Auger/Impeller Cable

Check Auger-Gearbox-Oil Level

Change Engine Oil

Lubricate Hex Shaft

Replace Spark Plug

Adjust Discharge-Chute Latch

Replace Drive Belts

Replace Headlight

Storage

Storage Safety

Safety precautions to take when storing the machine.

Store Machine

Detailed steps for preparing and storing the snowthrower.

Remove from Storage

Troubleshooting

Electric Starter Problems

Troubleshooting for when the electric starter doesn't work.

Engine Start Problems

Solutions for engine not starting or starting with difficulty.

Engine Runs Rough

Causes and fixes for the engine running poorly.

Poor Engine Performance

Discharge Chute Problems

Machine Clearing Problems

California Proposition 65 Warning Information

Related product manuals