Maintenance
RecommendedMaintenanceSchedule(s)
MaintenanceService
Interval
MaintenanceProcedure
Beforeeachuseordaily
•Checktheoillevelandaddbarandchainoilifnecessary.
•Checkthechainbrake.
•Checkthechaintensionandadjustitifnecessary.
•Checkthechainforsharpness;contactanAuthorizedServiceDealertohavethe
chainsharpenedorreplaced.
Aftereachbatterydrain
cycle
•Checktheoillevelandaddbarandchainoilifnecessary.
•Checkthechainbrake.
•Checkthechaintensionandadjustitifnecessary.
Yearlyorbeforestorage
•Servicetheguidebar,chain,anddrivesprocket.
•Checkthechainforsharpness;contactanAuthorizedServiceDealertohavethe
chainsharpenedorreplaced.
CheckingtheOilLeveland
AddingBarandChainOil
ServiceInterval:Beforeeachuseordaily
Aftereachbatterydraincycle
1.Placethechainsawonaatsurfaceand
removethebatterypack;refertoRemovingthe
BatteryPack(page14).
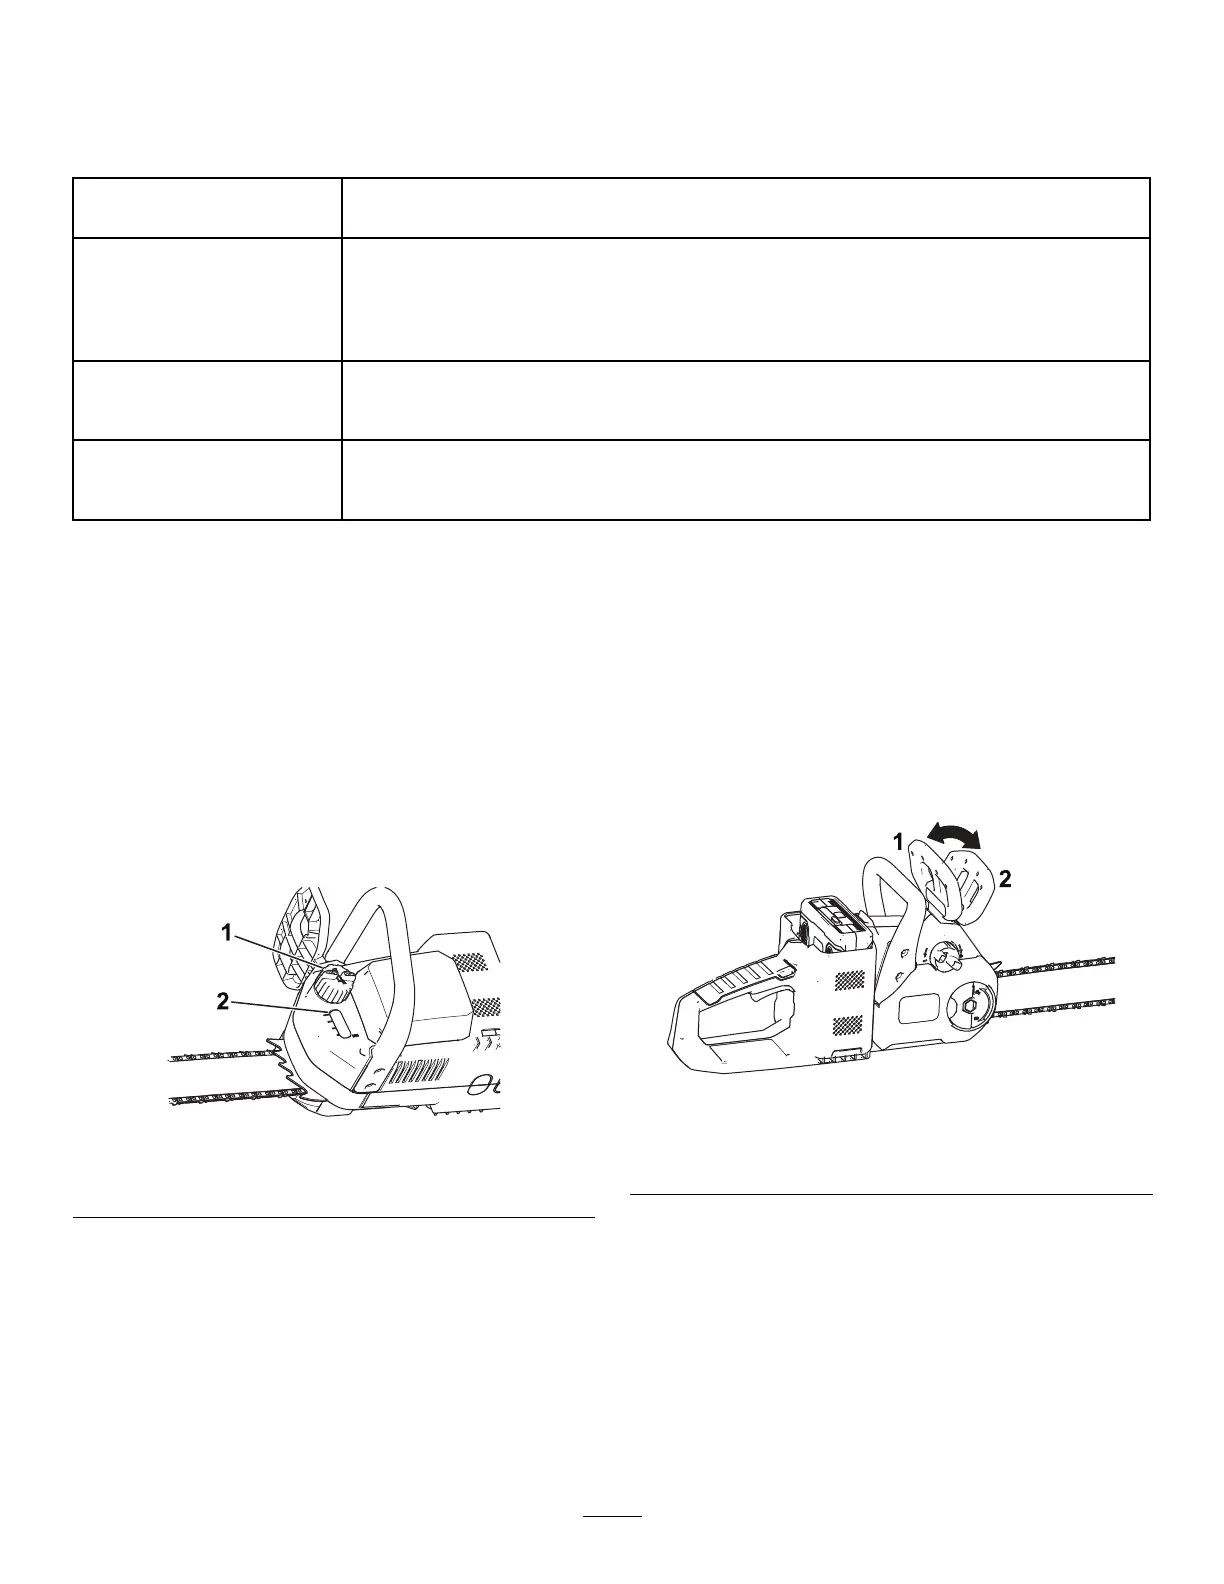
2.Checktheoillevelinthewindow.Ifyoucannot
seeoilinthewindow,addbarandchainoilto
thechainsaw(Figure26).
g192110
Figure26
1.Oilcap
2.Window
3.Cleantheareaaroundtheoilcap(Figure26).
Note:Makesurethatyoudonotallow
debris/woodchipstoentertheoiltank.
4.Removethecapandpouroilintothechainsaw
untiltheoilllsthewindow(Figure26).
Note:Donotllthechainsawhigherthanthe
bottomofthellneck.
5.Cleanupanyspilledoilandreplacetheoilcap.
CheckingtheChainBrake
ServiceInterval:Beforeeachuseordaily
Aftereachbatterydraincycle
1.Placethechainsawonaatsurfaceand
removethebatterypack;refertoRemovingthe
BatteryPack(page14).
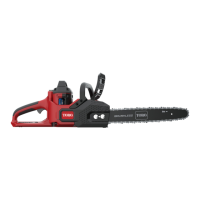
2.Engagethechainbrakebymovingthechain
brakeforwardtotheSTOPposition(Figure27).
g192111
Figure27
1.Chainbrake(OPERATING
position)
2.Chainbrake(STOP
position)
3.Gripthechainwithaglovedhandandattempt
topullitaroundtheguidebar;thechainshould
notmovearoundtheguidebar.Ifitdoes,take
thechainsawtoanAuthorizedServiceDealer
forrepair.
4.Disengagethechainbrakebymovingthe
chainbrakerearwardtotheOPERATINGposition
(Figure27).
5.Gripthechainwithaglovedhandandattempt
topullitaroundtheguidebar;thechainshould
16