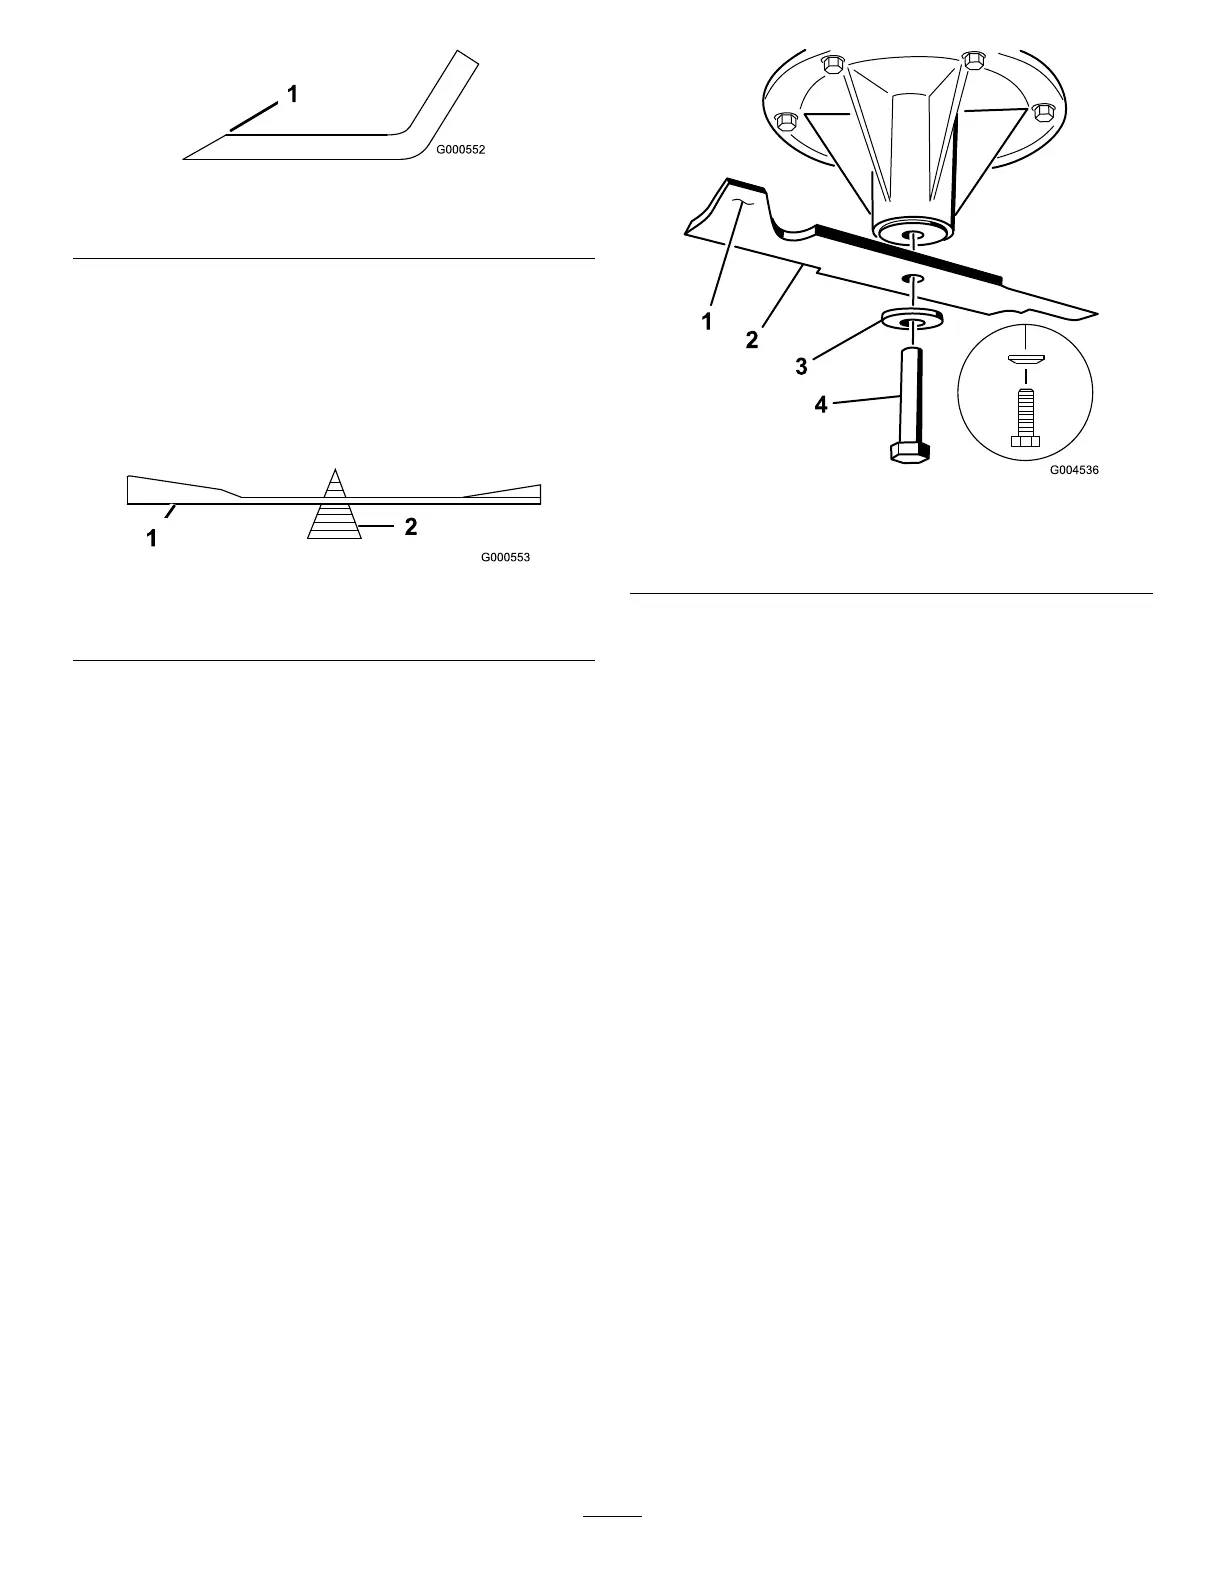
g000552
Figure71
1.Sharpenatoriginalangle.
2.Checkthebalanceofthebladebyputtingitona
bladebalancer(Figure72).
Note:Ifthebladestaysinahorizontalposition,
thebladeisbalancedandcanbeused.
Note:Ifthebladeisnotbalanced,lesome
metalofftheendofthesailareaonly(Figure71).
g000553
Figure72
1.Blade2.Balancer
3.Repeatthisprocedureuntilthebladeis
balanced.
InstallingtheBlades
ServiceInterval:Yearly
1.Inspectthebladeboltfordamagedthreads.
Replacetheboltandcurvedwasheras
necessary.
2.Installthebladeontothespindleshaft(Figure
73).
Important:Thecurvedpartoftheblade
mustbepointingupwardtowardtheinside
ofthedecktoensurepropercutting.
3.Installthecurvedwasherandbladebolt(Figure
73).
Note:Thecurvedwasherconemustbe
installedtowardthebolthead(Figure73).
4.Torquethebladeboltto115to150N∙m(85to
110ft-lb).
g004536
Figure73
1.Sailareaoftheblade3.Curvedwasher
2.Blade4.Bladebolt
LevelingtheMowerDeck
PreparingtheMachine
Ensurethatthemowerdeckislevelanytimeyou
installthemowerdeckorwhenyouseeanuneven
cutonyourlawn.
Levelthemowerdecksidetosidebeforeadjusting
thefront-to-rearslope.
1.Parkthemachineonalevelsurface,disengage
thePTO,andengagetheparkingbrake.
2.Shutofftheengine,removethekey,and
disconnectthespark-plugwiresfromthespark
plugs.
3.Checkthetirepressureofbothdrivetires;refer
toCheckingtheTirePressure(page34).
4.Checkthemowerdeckforbentblades;remove
andreplaceanybentblades;refertoServicing
theCuttingBlades(page46).
5.Lowerthemowerdecktothe76mm(3inch)
height-of-cutposition.
CheckingtheSide-to-SideLevel
1.Positionthebladessidetoside.
2.MeasureattheBandClocationsfromalevel
surfacetothecuttingedgeofbladetips(Figure
74).
48