DANGER
Openholesinthemowerdeckexposeyouand
otherstothrowndebris.Debristhrownoutof
theholesinthemowerdeckcancauseinjury.
•Neveroperatethemowerdeckwithout
hardwaremountedinallholesinthemower
deck.
•Installhardwareinthemountingholeswhen
youremovethebafe.
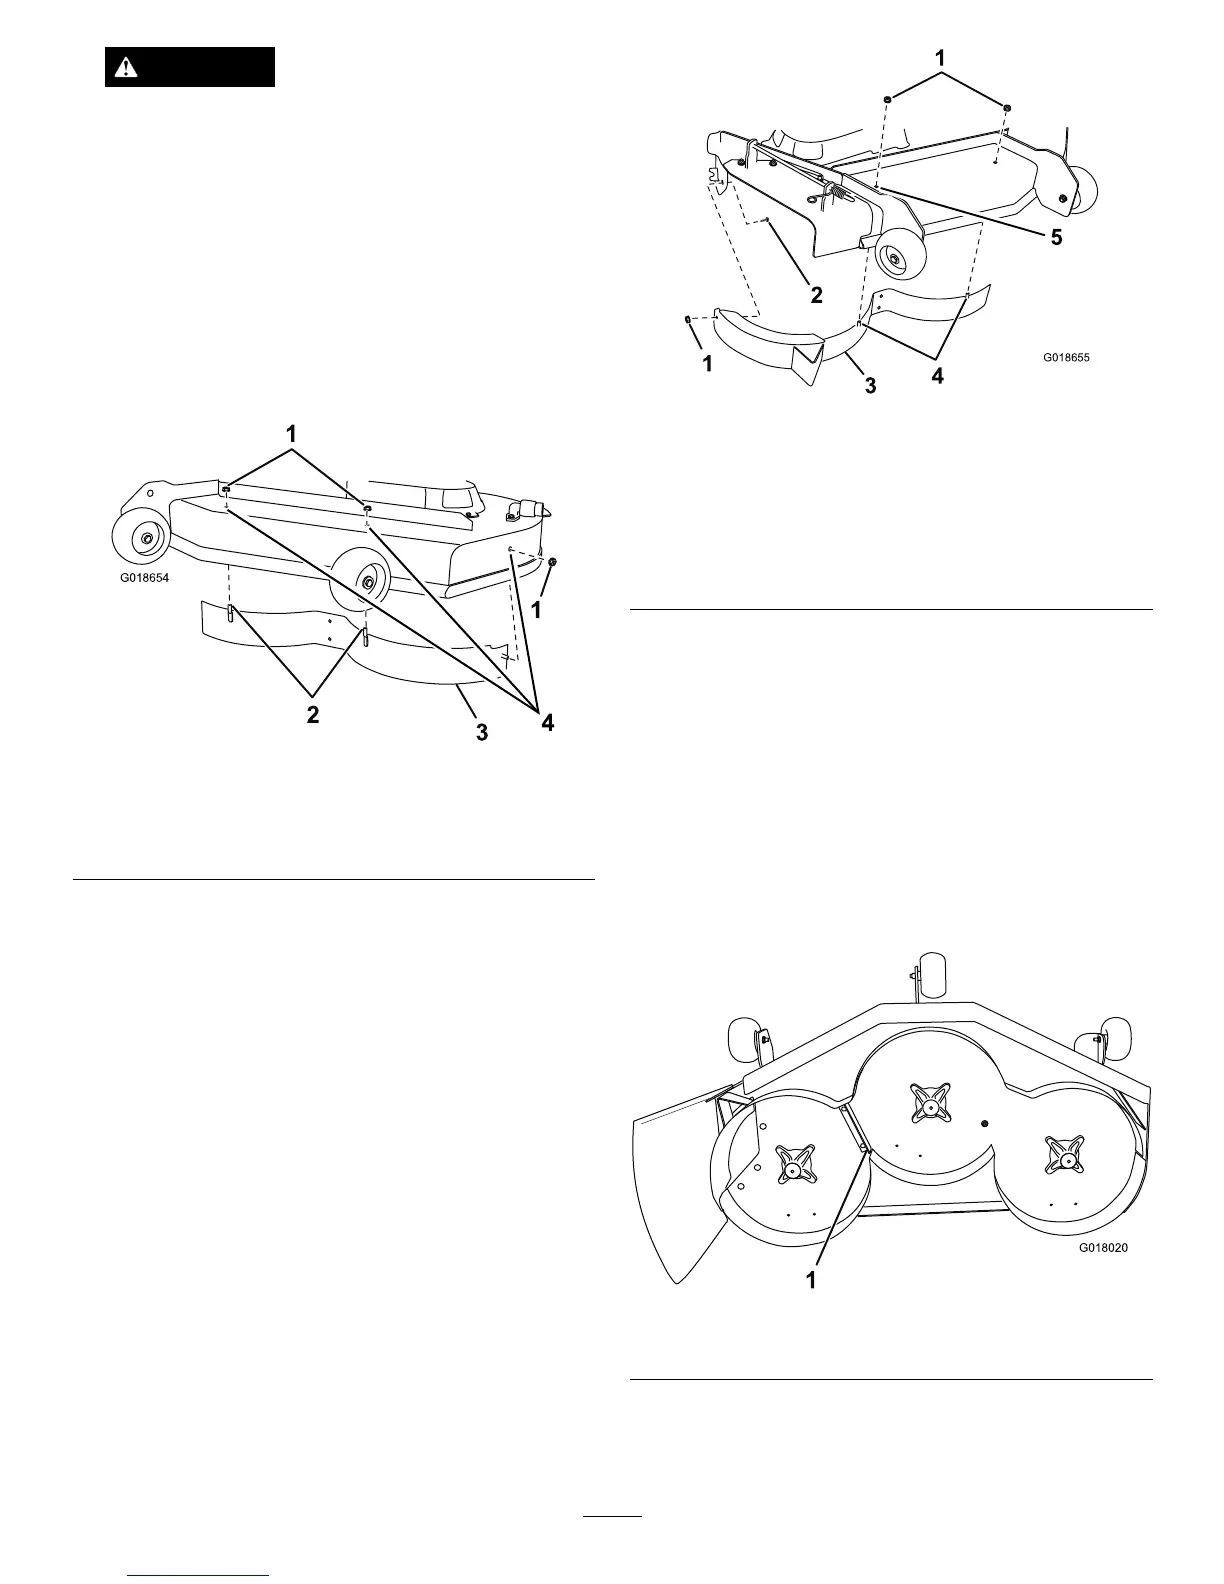
9.Removetheplugboltsandnutsatthelocations
showninFigure2.
Figure2
1.Locknut(5/16inch)3.Leftbafe
2.Carriagebolt(5/16x3/4
inch)
4.Removetheplugboltsand
nutshere.
10.Installtheleft-handbafetothemowerdeckusing3
locknuts(5/16inch)tosecuretheweldedpostsof
theleft-handbafetothetopofthemowerdeckat
thepositionsshownin
Figure2.
Note:Handtightenthefasteners.
11.Tightenallfastenerssecurely.
12.Installtheright-handbafetothemowerdeckas
shownin
Figure3.
Note:Removetheplugboltandnutshownin
Figure3beforeinstallingthebafe.
Figure3
Thedeectorhasbeenremovedforthepurposeofclarity.
1.Flangenut(5/16inch)
4.Weldedposts
2.Carriagebolt(5/16x3/4
inch)
5.Removetheplugandbolt
herebeforeinstallingthe
bafe.
3.Right-handbafe
Note:Use2locknuts(5/16inch)tosecurethe
weldedpostsoftherightbafetothetopofthe
mowerdeckatcenterandrightofcenterpositions.
Handtightenthefasteners.
13.Installacarriagebolt(5/16x3/4inch)andalocknut
(5/16inch)throughrearwallofthemowerdeck
andtheright-handbafetosecurethebafetothe
mowerdeck(
Figure3).
14.Tightenallfasteners.
15.InstalltheRecyclerbracketwith2self-tappingscrews
(5/16x3/4inch)atthelocationshowninFigure4.
Figure4
1.Recyclerbracket
16.Installthekickerstotheundersideofthemower
deckwith6self-tappingscrews(5/16x3/4inch)at
thelocationsshowninFigure5.
2
 Loading...