31
2. Raise the vehicle off the ground; see Jacking the
Vehicle, page 27.
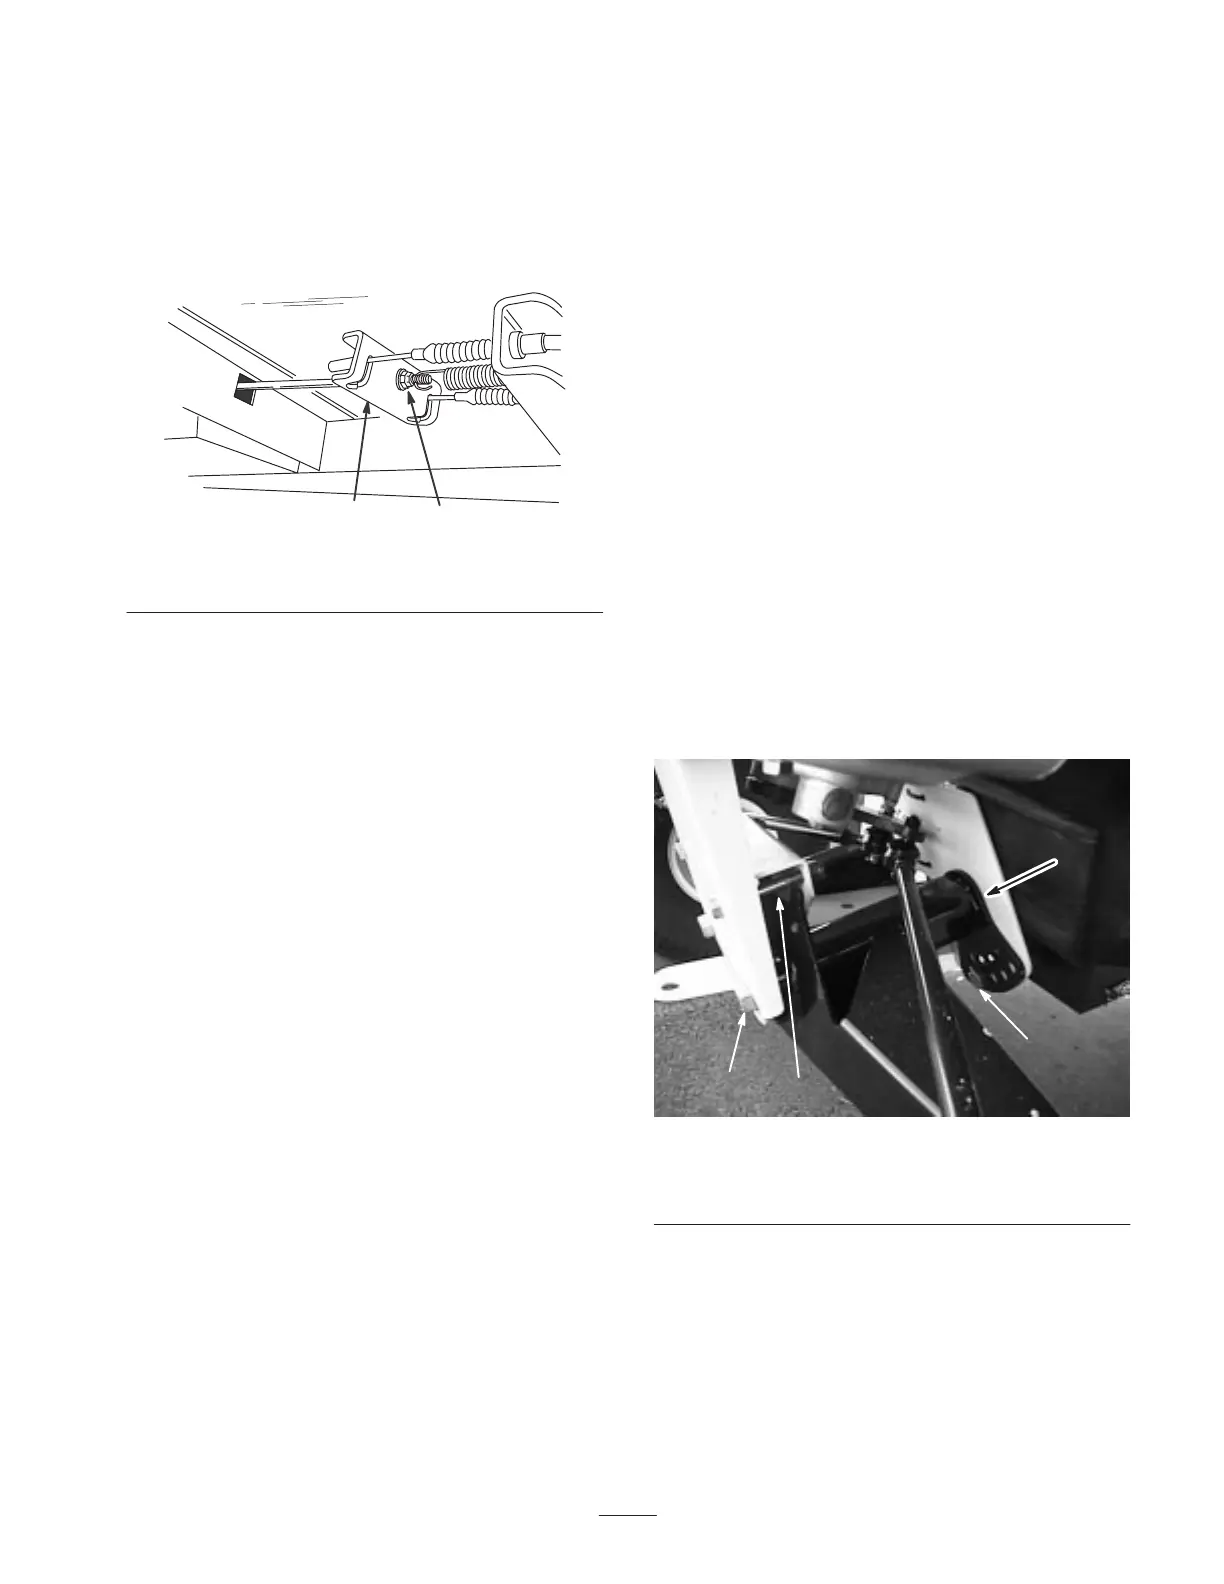
3. Tighten the cable adjusting screw, located beneath the
floor panel, until the cables are snug in the brake
equalizer (Fig. 32). Do not overtighten the screw. There
should be some free play in the brake pedal before the
brake engages.
1 m–4848
2
Figure 32
1. Cable adjusting screw 2. Brake equalizer
Inspecting the Tires
Check the tire condition at least every 100 hours of
operation. Operating accidents, such as hitting curbs, can
damage a tire or rim and also disrupt wheel alignment, so
inspect tire condition after an accident.
Check the wheels to ensure that they are mounted securely.
Torque the front bolts to 135–165 ft.-lb. (183–224 N⋅m)
and the rear lug nuts to 45–65 ft.-lb. (61–88 N⋅m).
Adjusting the Front
Suspension
The ride height of each side of the vehicle can be adjusted
separately. The ride height should be 7-1/2 to 8-1/4 in.
(19.1–21 cm) with the following parameters:
• The tire pressure should be at 12 psi (83 kPa).
• The vehicle should be driven back and forth a few times
to relax the A-arms.
• Measure the ride height with the wheels facing straight
ahead and a 175–225 lb. (79–102 kg) operator in the
driver’s seat.
Note: The driver should drive up to the measurement
area and stay seated in the vehicle while the
measurement is being taken.
• Measure the ride height on a flat surface, from the
bottom of the front tongue to the ground.
1. Jack the front end of the vehicle off of the ground; refer
to Jacking the Vehicle, page 27.
2. Remove the travel limiting bolt (Fig. 33).
3. Loosen the centering bolts in the front A-arm (Fig. 33).
4. Remove the ride height adjustment bolt (Fig. 33).
3
2
1
2
Figure 33
1. Travel limiting bolt
2. Centering bolt
3. Ride height adjustment
bolt
5. Rotate the front A-arm to the desired position (refer to
the note below) and replace the ride height adjustment
bolt (Fig. 33).
Note: The A-arms are made with rubber and have different
spring rates. Because of the different spring rates, the
A-arms come adjusted from the factory based on that
spring rate. Generally the adjustment bolts will be installed
in hole number 2, 3, or 4 (Fig. 34) and it may be different
from the left side (driver side) to the right side (passenger

 Loading...