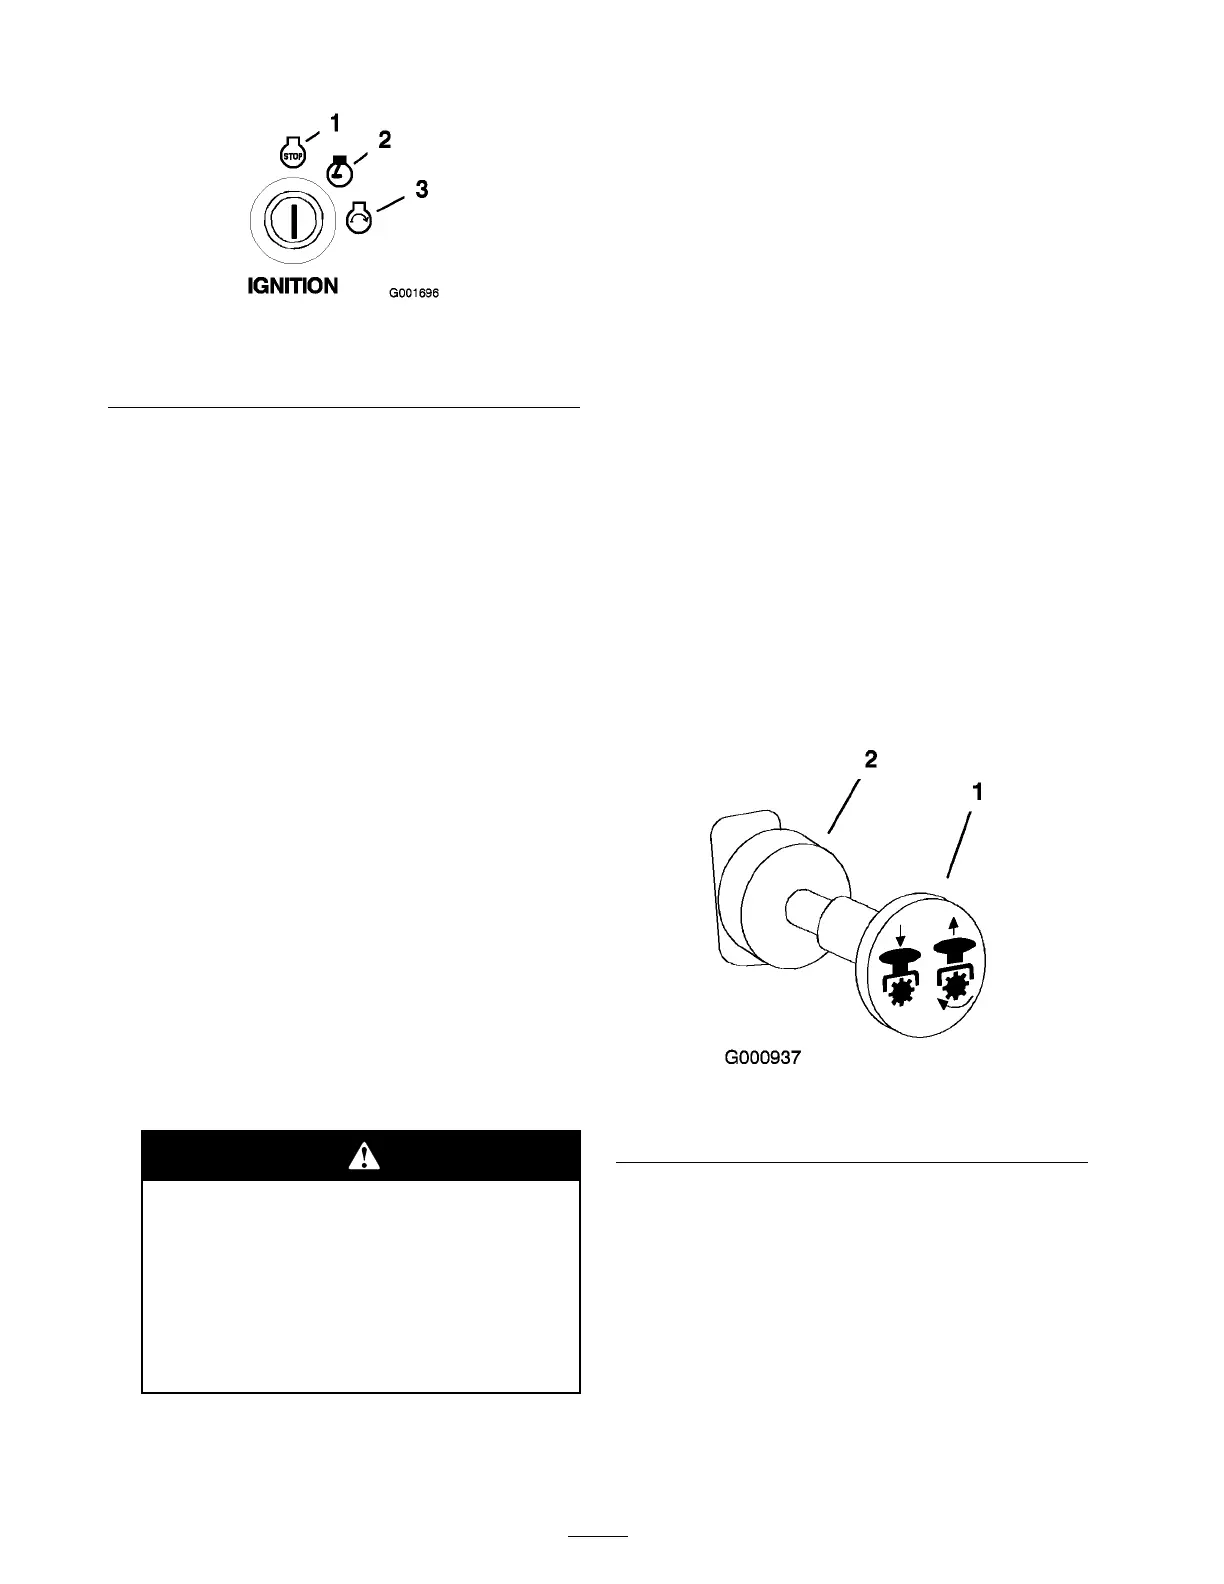
Figure 14
1. Off
3. Start
2. Run
7. After the engine star ts , mo v e the c hok e to off
( Figure 12 ). If the engine stalls or hesitates ,
mo v e the c hok e bac k to on for a few seconds ,
then mo v e the throttle lev er to desired setting .
R e peat this as required.
Stopping the Engine
1. Push the PTO to the off position ( Figure 15 ).
2. Mo v e the throttle lev er midw a y betw een the
slo w and fast positions ( Figure 13 ).
3. Let the engine idle for 60 seconds .
4. T ur n the ignition k ey to the off position and
remo v e the k ey ( Figure 14 ).
5. Close the fuel shut off v alv e before
transpor ting or storing the mac hine . R efer to
Fuel System Maintenance , pag e 36 .
Important: Mak e sur e that the fuel
shut of f v alv e is closed bef or e transpor ting
or storing the machine, as fuel leaka ge
may occur . Set the par king brak e bef or e
transpor ting . Mak e sur e to r emo v e the k ey
as the fuel pump may r un and cause the
batter y to lose charge.
Childr en or bystander s may be injur ed
if they mo v e or attempt to operate the
tractor while it is unattended.
Al w ays r emo v e the ignition k ey and
set the par king brak e when lea ving the
machine unattended, ev en if just f or a
few min utes.
Operating in Cool Weather
T he engine on this mac hine ma y tak e 5 to 15
min utes to reac h full operating temperature in cool
w eather conditions .
Operating the Power Take
Off (PTO)
T he po w er tak e off (PTO) switc h star ts and stops
the mo w er blades and any po w ered attac hments .
Engaging the PTO
1. W hile seated in the seat, release the pressure on
the traction control lev ers and place in neutral.
2. Place the throttle in the F ast position.
Note: Eng aging the PTO with the throttle
at the half or less position will cause ex cessi v e
w ear to the dri v e belts .
3. Pull out on the po w er tak e off (PTO) switc h to
eng ag e it ( Figure 15 ).
Figure 15
1. PTO-On
2. PTO-Off
Disengaging the PTO
T o diseng ag e , push the PTO switc h to the Off
position ( Figure 15 ).
20
 Loading...