65
The T-1 Notebook : Reference & Guide
64
The T-1 Notebook : Reference & Guide
NOTESNOTES
Rhythmic Patterns
3
Rhythmic Patterns
3
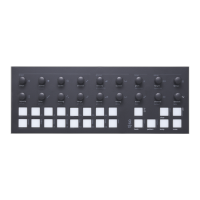
▌ MANUAL PER STEP SEQUENCING - PULSES
1. Display pulse step sequencing view on the value buttons by Double
Tapping (PULSES) knob. This will retain the pulse step sequence view.
Euclidean pulses will illuminate DULL ORANGE ⬛ to indicate a pulse is
present while manually entered per step pulses are ORANGE ⬛.
2. Add a pulse manually. Press [VBx] where ‘x’ is the value button
representing an empty step, shown as BLUE GREY ⬛. The pulse is
added to the selected step and will illuminate and ash ORANGE ⬛.
3. If required multiple steps can be selected to edit together.
Hold [VBx] + Press [VBx] where ‘x’ is each step to select.
4. The most recent entered step, ashes ORANGE ⬛ to indicate the step
is selected for editing. The [BANK] button ashes RED ⬛ to indicate per
step edit mode is active.
5. To step edit the selected, ashing pulse, Turn (Knob) for one or more
parameter to adjust. The parameter change is locked to the step. The
Step will illuminate RED ⬛ to indicate one or more parameters are
locked to the step. Ensure pulse view is locked to edit.
6. To remove a pulse manually, Press [VBx] or if the pulse has been
edited, Hold [CLEAR] + [VBx]. The ‘x’ is the value button representing
the step for an existing Euclidean or manually entered pulse. This will
remove it from the pattern.
7. Press [BANK] to exit per step edit mode. Pressing a [VBx] Value button
will re-enter per step edit mode. Outside of per-step editing mode,
parameters are changed globally on all steps.
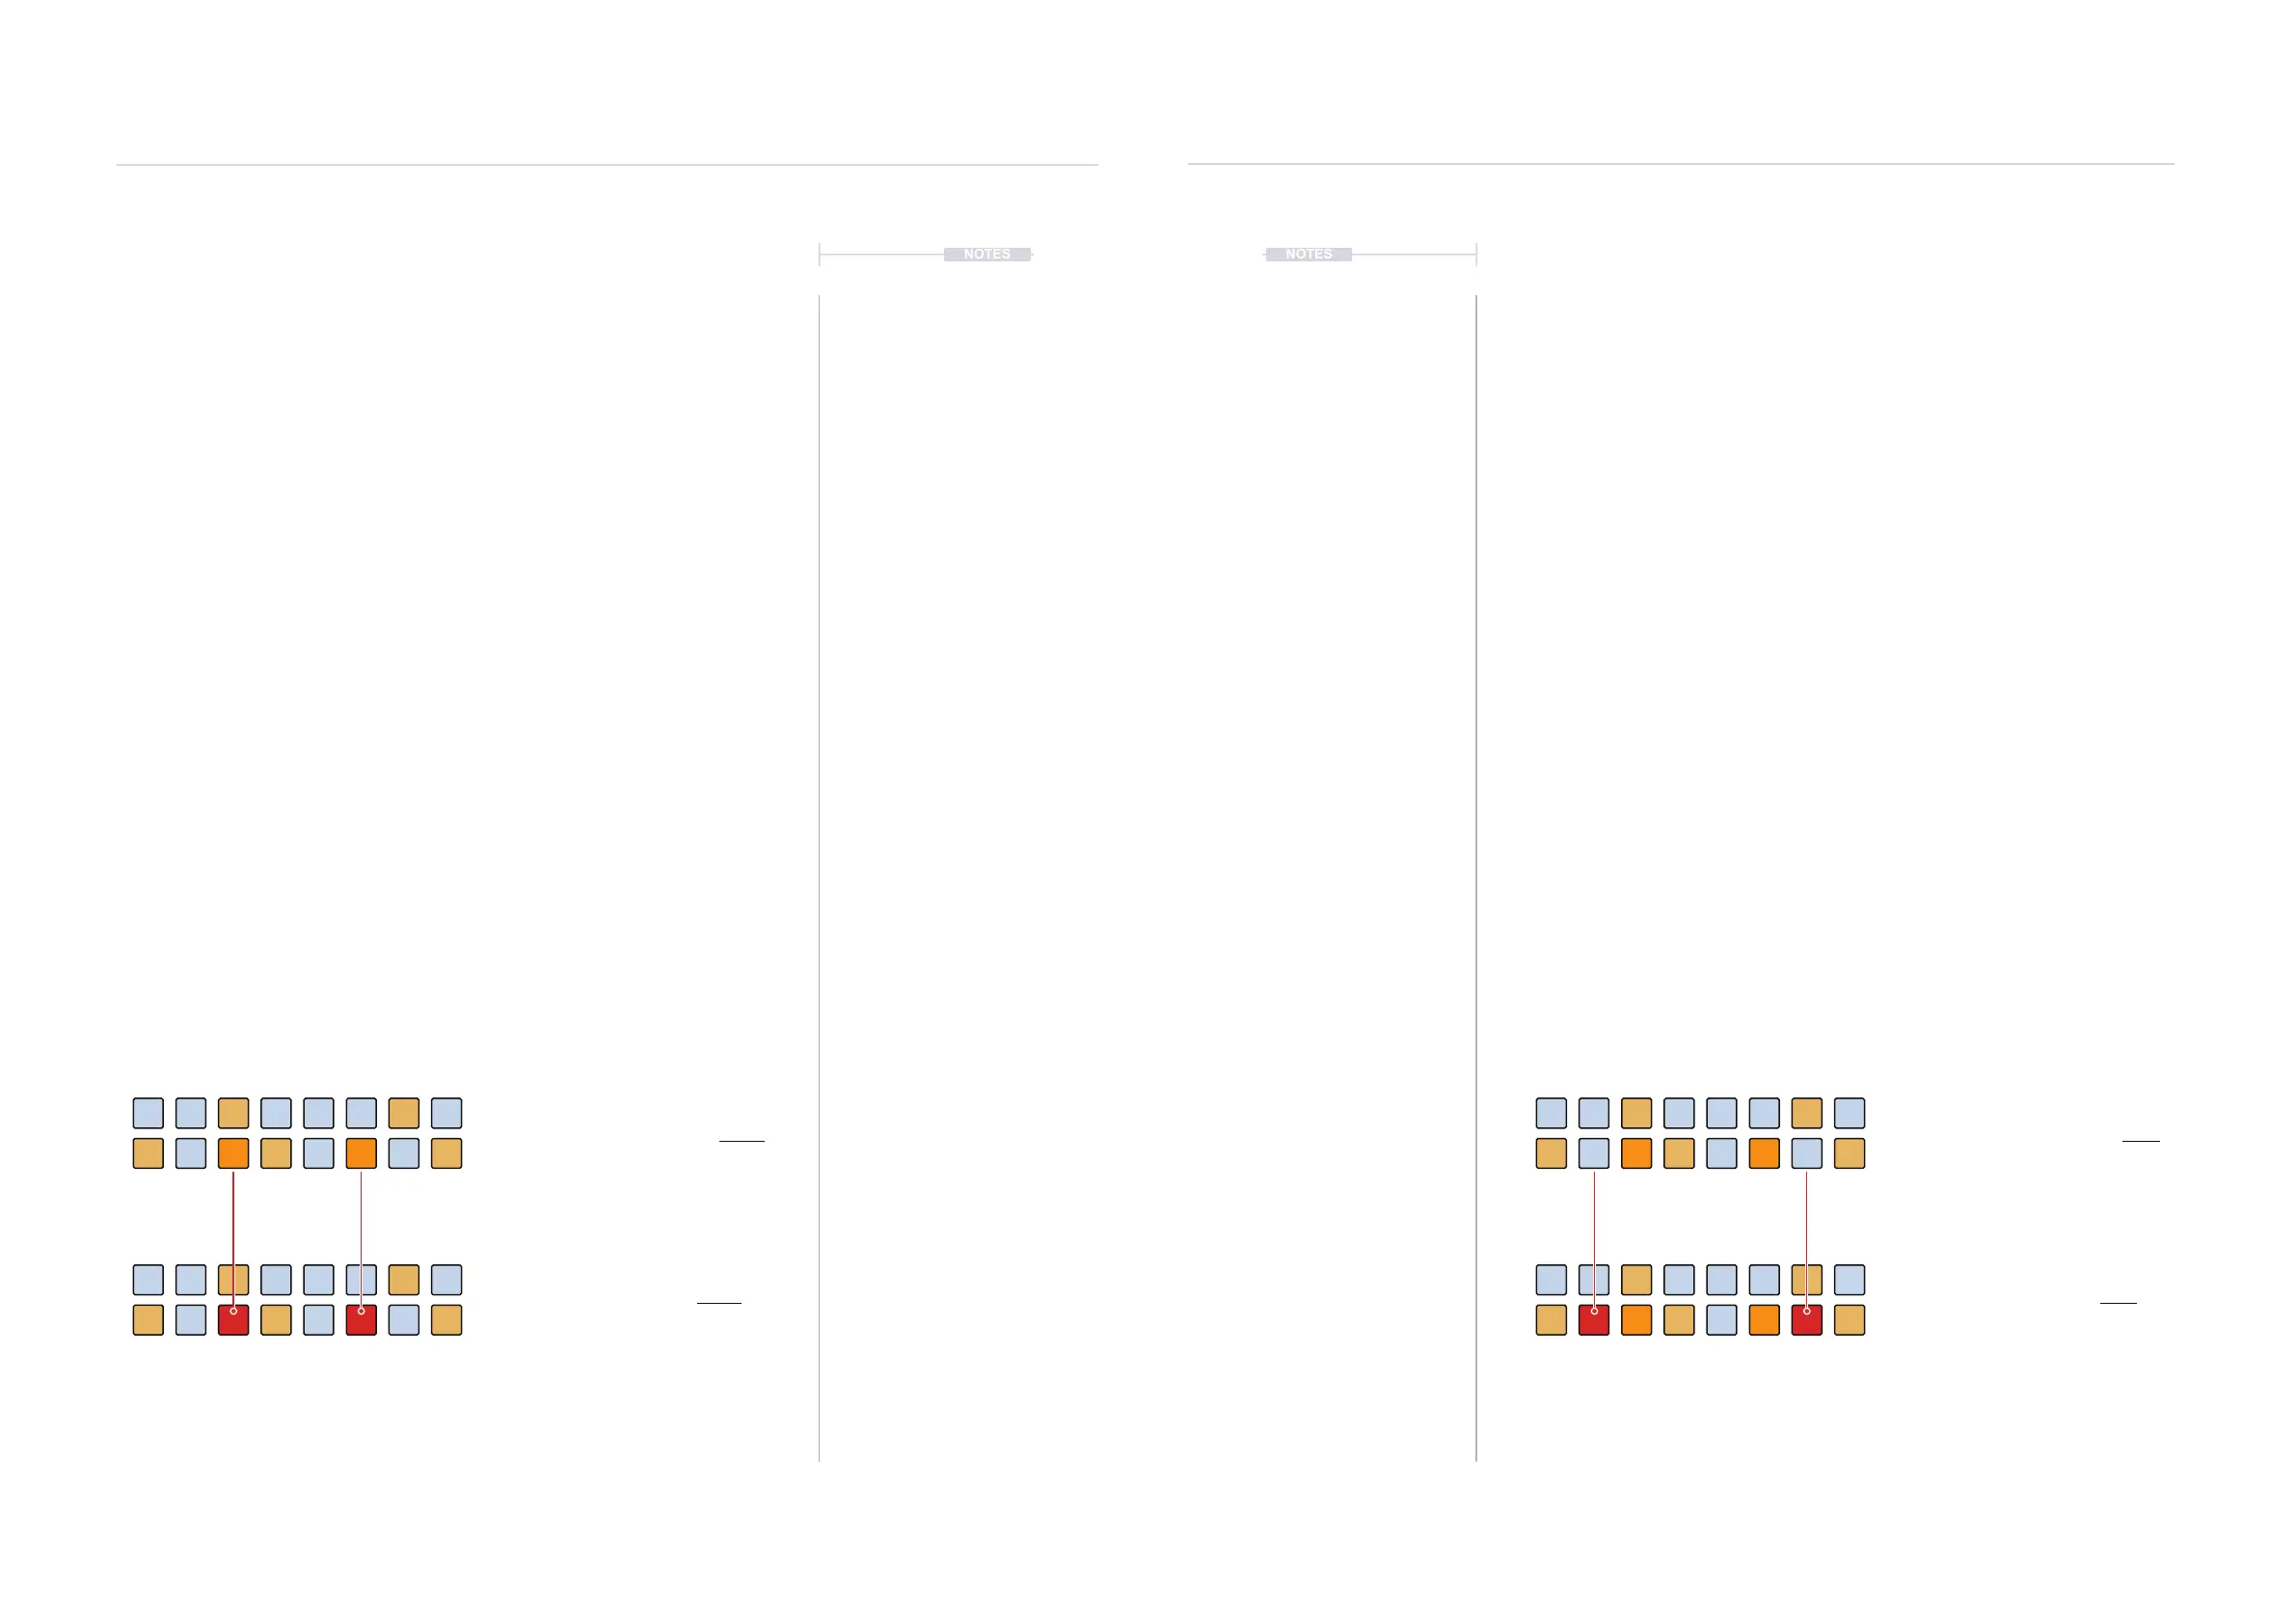
▌ MANUAL PER STEP SEQUENCING - PARAMETER STEPS
1. Display pulse step sequencing view on the value buttons by Double
Tapping (PULSES) knob. This will retain the pulse step sequence view.
Euclidean pulses will illuminate DULL ORANGE ⬛ to indicate a pulse is
present while manually entered per step pulses are ORANGE ⬛.
2. To select a step without adding a pulse, Hold [CTRL] + [VBx] where ‘x’
is the value button representing an empty step, shown as
BLUE GREY ⬛. The step will ash to indicate it is selected for editing.
3. If required multiple steps can be selected to edit together.
Hold [VBx] + Press [VBx] where ‘x’ is each step to select.
4. The most recent entered step, ashes BLUE GREY ⬛ to indicate the
step is selected for editing. The [BANK] button ashes RED ⬛ to
indicate per step edit mode is active.
5. To step edit the selected, ashing step, Turn (Knob) for one or more
parameter to adjust. The parameter change is locked to the step. The
Step will illuminate RED ⬛ to indicate one or more parameters are
locked to the step. Ensure pulse view is locked to edit.
6. To remove a parameter locked step edit manually, Hold [CLEAR] +
[VBx] where ‘x’ is the value button representing the step for an existing
Euclidean or manually selected step. This will remove the parameter
edits from the step.
7. Press [BANK] to exit per step edit mode. Pressing a [VBx] Value button
or [CTRL] + [VBx] will re-enter per step edit mode. Outside of per-step
editing mode, parameters are changed globally on all steps.
Per-step editing is possible with Note or CC Tracks, selected in the track view.
Pulse Mode. No parameter edited steps.
Hold [CTRL] + [VBx] to select step to edit.
Pulse Mode. Parameter edited steps.
Pulse Mode. No parameter edited pulses.
Tap [VBx] to add Pulse to edit.
Pulse Mode. Parameter edited pulses.
Per-step editing is possible with Note or CC Tracks, selected in the track view.
 Loading...
