161
The T-1 Notebook : Reference & Guide
160
The T-1 Notebook : Reference & Guide
NOTESNOTES
8.3 MIDI Channel
The MIDI Channel setting is directly accessible from T-1 front panel. It is
important that the receiving device is matched up with the T-1 MIDI
Channel. Multiple channels can be set per track. The Channel is set on T-1
per track enabling multiple devices to be controlled simultaneously. Default
channel matches track number.
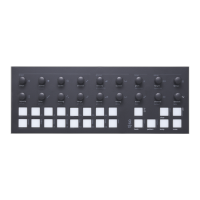
▌ ADJUSTING THE TRACK MIDI CHANNEL
1. Select the pattern and track. MIDI Channel is set per track.
2. To view the current MIDI channel, Hold or double tap (CHANNEL). The
WHITE ⬛ lit value button will indicate the currently selected channels.
Value buttons represent channels. [VB1] = Channel 1, [VB2] = Channel
2, up to [VB16] = Channel 16
3. To select a channel use one of the options:-
• While the channel page is on display, press one or more GREEN ⬛
value buttons to select a new channel. The currently selected
channels are displayed WHITE ⬛.
• Turn (CHANNEL) to change channel while visualising the setting on
the value buttons.
• Press & Turn (CHANNEL) to change channel.
Channel View per Track
Channel View
Hold (CHANNEL)
GREEN ⬛
Available Channels
WHITE ⬛
Selected Channel
1614 1513
86 751 432
1211109
8.4 MIDI Conguration Considerations
The global MIDI settings are accessible within T-1 using the T-1 Cong tool.
Most default settings should be good to get started but in some
circumstances these may need to be changed. The actual settings to use
are highly dependant on the hardware conguration applied. The main T-1
MIDI settings to consider are found in the MIDI I/O page.
T-1 Cong is a Mac/PC utility so standard mouse commands are used to
edit. More information on the general T-1 Cong tool is given later.
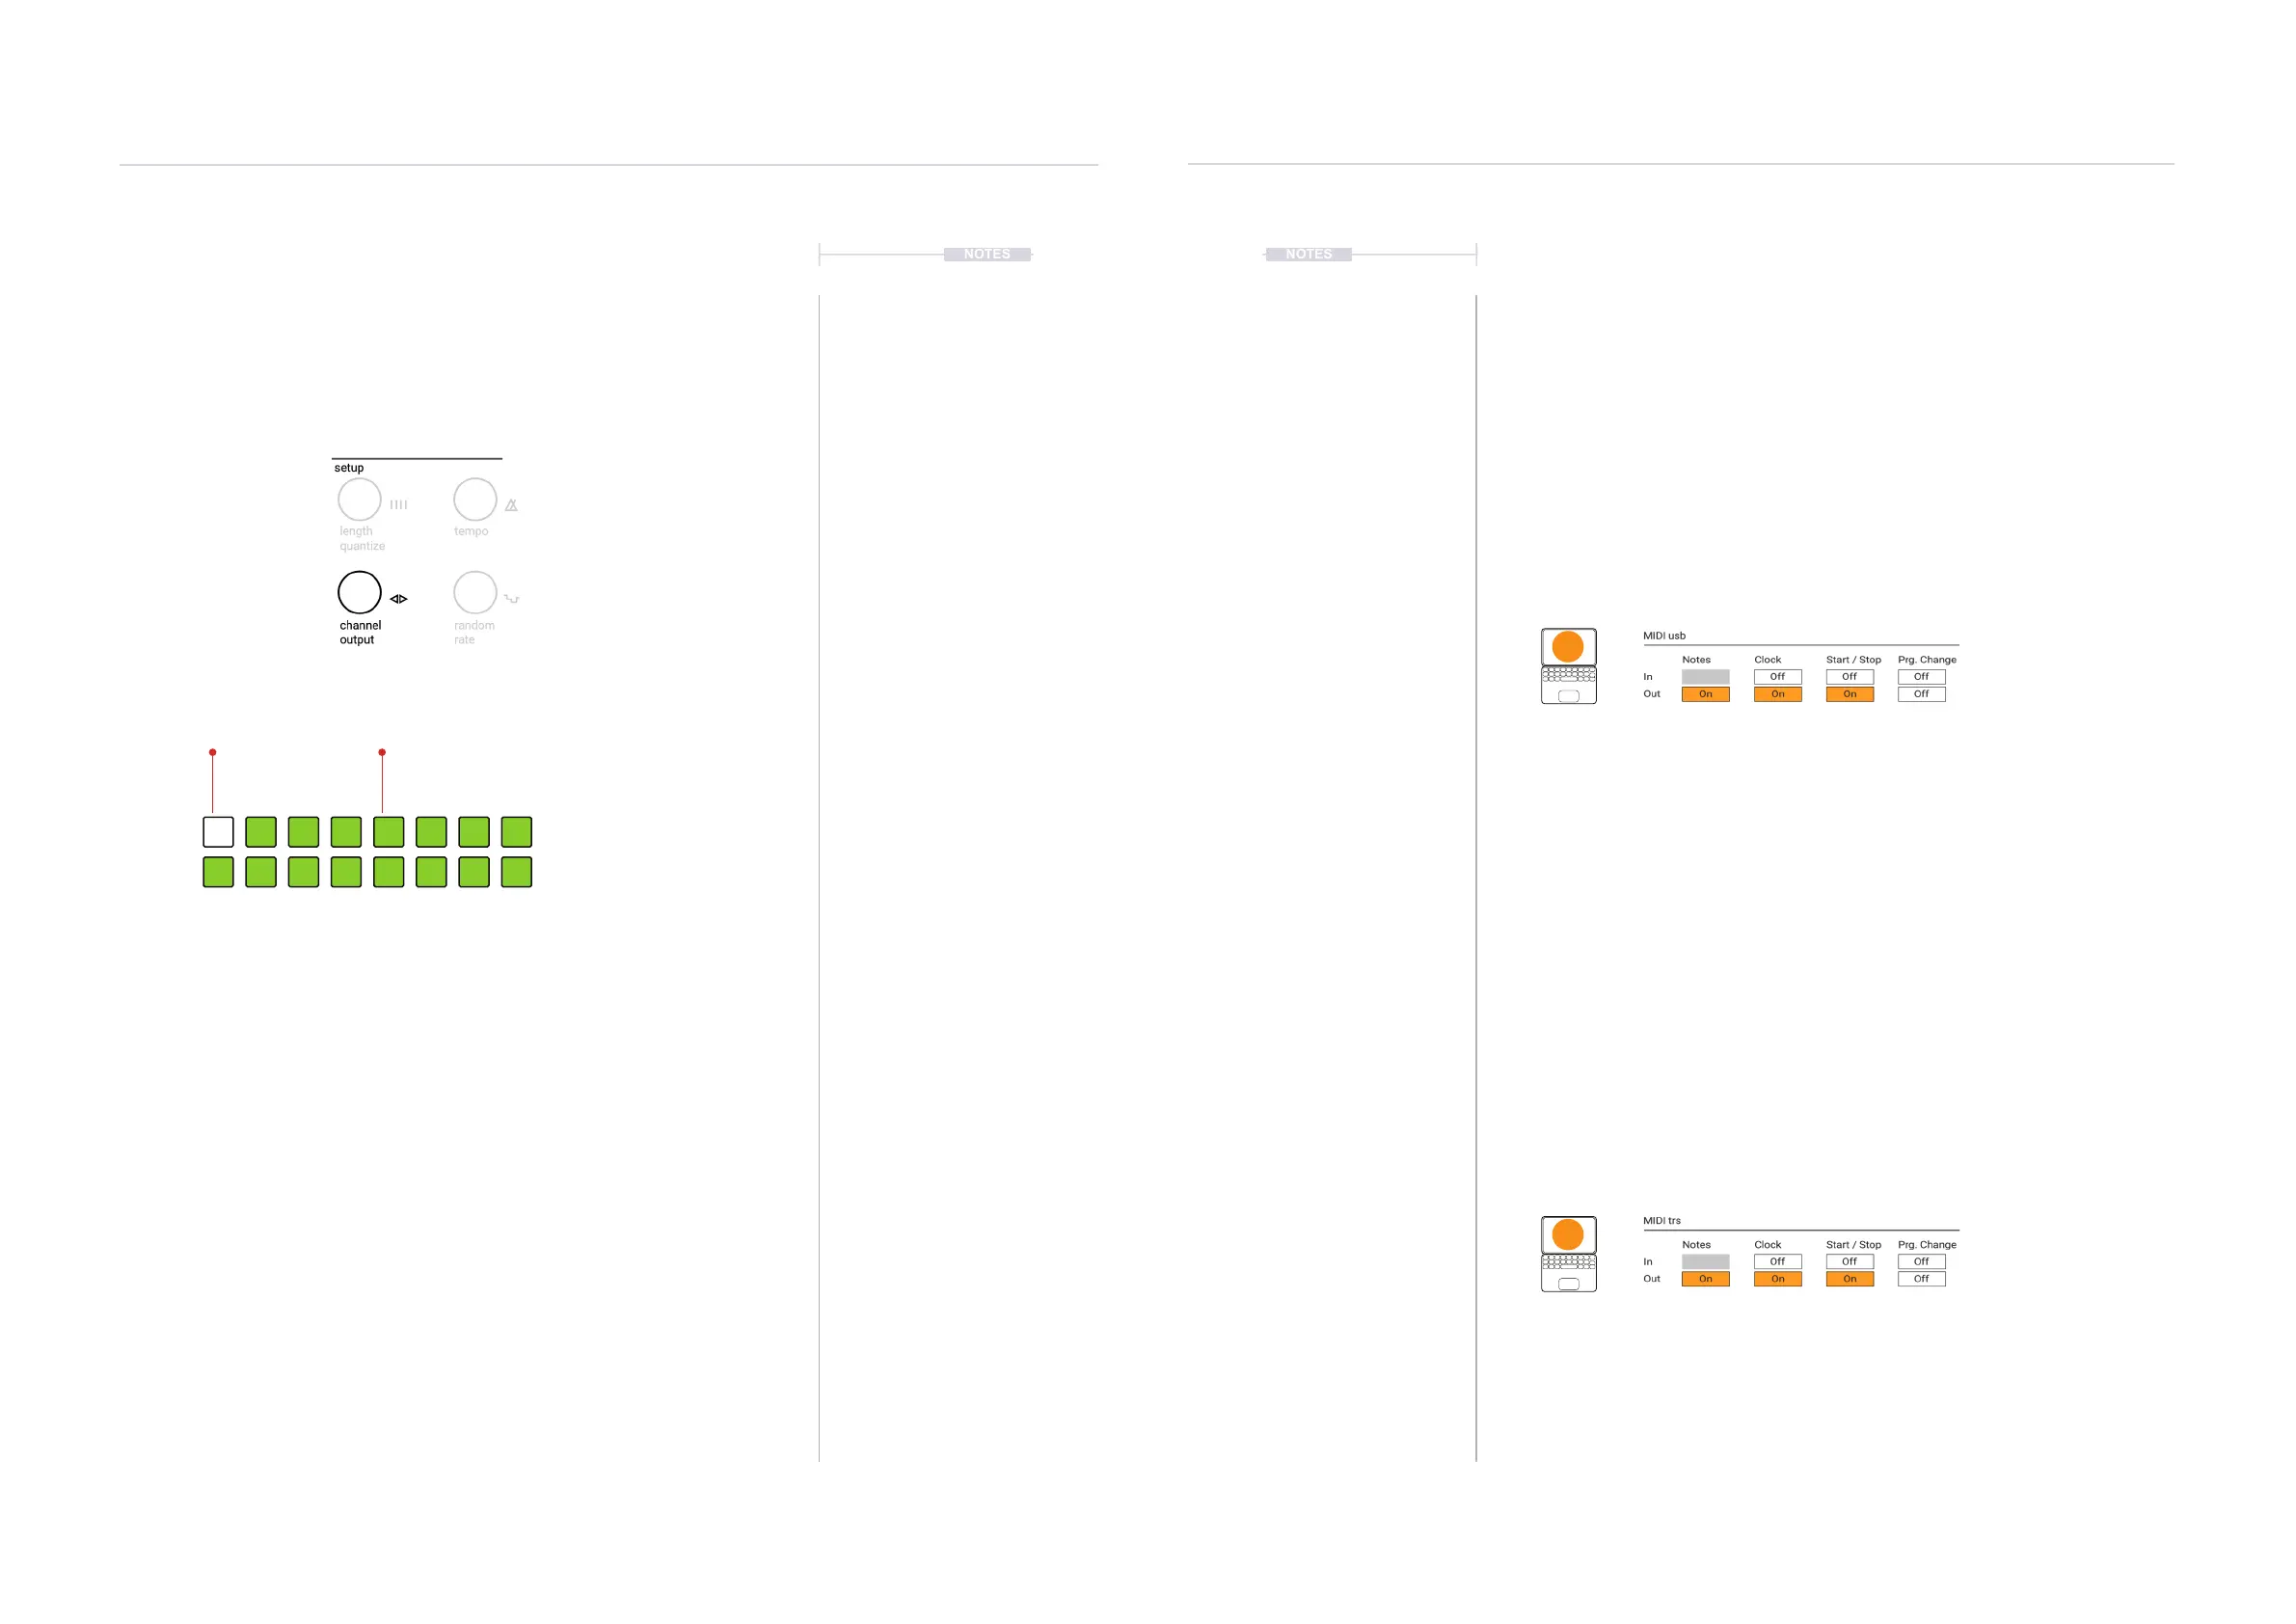
T-1 Cong - MIDI i/o Page
MIDI USB
MIDI trs
Controls the behaviour of the MIDI communications across the USB connection. USB
allows MIDI messages to be sent and received across the connection. Settings for In and
Out can be congured independently. Illustration shows defaults.
Notes: MIDI Note lter that, when ON, prevents notes being sent out of the T-1 USB port.
Clock: Normally this would be ON for messaging out. This will allow T-1 to be the primary
controller governing the clock timing of the setup. Connected follower devices should then
be set to receive an external clock. Typically only one device controls clock in a system.
The clock can also be set to on to receive clock signals in, thereby controlled externally. T-
1 Clock hierarchy is 1. Analog Clock, 2. MIDI Clock, 3. Link. Tempo is disabled when an
external MIDI clock is in control.
Start / Stop: The T-1 Start and Stop commands would be transmitted to other devices
when ON. Equally the Start and Stop messages from another device can be received by
T-1 when set to ON within the MIDI usb ‘in’ section.
Prg Change: MIDI Program change messages allow presets or patches to be changed on
the receiving device. When set to ON the T-1 can send ‘out’ or receive ‘in’ a program
change message. The actual behaviour is very much device dependant.
Controls the behaviour of the MIDI communications across the MIDI TRS connection. This
would be connected to the MIDI Type A dongle for 5-Pin MIDI connections. This allows
MIDI messages to be sent and received across the connection. Settings for In and Out
can be congured independently. Illustration shows defaults. The descriptions of each
function operate the same ways as the USB MIDI settings described above.
t|so
t|so
MIDI & WiFi Connectivity
8
MIDI & WiFi Connectivity
8
 Loading...
