45
EN
Introduction Connections Playback Editing OthersFunction SetupRecording VHS Functions
Basic Setup /
TV View Operation
1 In stop mode, plug your USB flash memory.
File type selection screen will appear.
2 Select the desired file type using [K \ L], then
press [ENTER\OK].
If you want to change the media type, press [0]. Select
the desired media type using [K \ L], then press
[ENTER\OK]. (You can also access the media type
selection screen from the “Title List” in the “Setup” menu
in stop mode.)
• Video Files: The DivX
®
File List will appear
(not guaranteed).
• Music: The MP3 File List will appear.
• Photo: The JPEG File List will appear.
3 Follow the step 4 in “Playing Back an Audio CD
or a Disc with MP3 / JPEG / DivX
®
Files” on page
44.
The subtitle created by the user can be displayed during
DivX
®
playback.
1 After the DivX
®
file is selected, “Subtitle List”
will appear.
2 Select the desired extension of the subtitle file
you want to display using [K \ L], then press
[ENTER\OK]. DivX
®
with the subtitle starts
playback. The subtitle cannot be displayed
when the setting is “OFF”.
• If there is more than one extension, the extension
selection will appear in “Subtitle List”.
Note
• “DivX Subtitle” must be activated in the DivX
®
menu. (Refer
to “DivX Subtitle” on page 68.)
• Playback file and the subtitle file must have the same name.
• Playback file and the subtitle file must locate in the same
folder.
• Only the subtitle files with the following extensions are
supported; .smi (.SMI), .srt (.SRT), .sub (.SUB), .ass (.ASS),
.ssa (.SSA), .txt (.TXT). (.sub (.SUB) and .txt (.TXT) files
may not be recognised.)
• The subtitles that exceed the playback time of the DivX
®
file
will not be displayed.
This unit allows you to play back the files purchased or rented
from DivX
®
Video-On-Demand (VOD) services. The files are
available on the Internet. When you purchase or rent
DivX
®
VOD files on the Internet, you will be asked to enter a
registration code and a deactivation code. This menu items
provide you with the both codes.
1 Press [SETUP].
2 Select “General Setting” using [K \ L], then
press [ENTER\OK].
3 Select “DivX” using [K \ L], then press
[ENTER\OK].
4 Select “DivX® VOD” using [K \ L], then press
[ENTER\OK].
DivX® VOD selection screen will appear.
5 Select “Registration Code” or “Deactivation
Code” using [K \ L], then press [ENTER\OK].
Your registration code or deactivation code will appear.
e.g.) Registration Code
To deactivate this unit:
You can register 6 devices (1PC and 5 devices) for an
account of DivX
®
. If you want to use more than 6 devices,
you must deactivate unnecessary one. If you want to
deactivate this unit, please follow the steps below.
At step
5, select “Deactivation” using [K \ L], then press
[ENTER\OK]. Confirmation screen will appear. Select
“Yes” using [K \ L], then press [ENTER\OK].
This unit is deactivated.
You can get the new registration code and deactivation
code.
You will be asked to enter the new codes when you
download a DivX
®
VOD file next time.
Note
• You must first download the file from the Internet and play it
back on this unit before you are able to get another code.
• Once you play back the DivX
®
VOD file, you will not be able
to select “Registration Code” and “Deactivation Code”
unless you deactivate the unit.
• You must follow this step every time you purchase or rent a
DivX
®
VOD file from the Internet for a deactivated unit.
It is recommended that files to be played back in this unit
are recorded under the following specifications:
[DivX
®
]
• Official DivX
®
Certified product
DivX
®
Subtitle
VCR DVD
PROGRAM
DUBBING
SELECT
DVD
VCR
USB
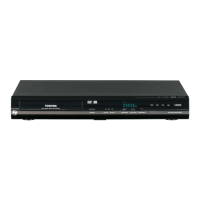
DV IN
front of this unit
DISC
USB
Title List
Video Files
Music
Photo
DivX
®
VOD
• Playable Codec of AVI files : DivX
®
3.x, DivX
®
4.x,
DivX
®
5.x, DivX
®
6.x
• Maximum size of image : 720 x 480 @30 fps
720 x 576 @25 fps
• Sampling frequency of audio : 16 kHz - 48 kHz
• Audio type : MPEG1 audio layer 3 (MP3),
MPEG1 audio layer 2,
Dolby Digital
DivX

 Loading...