3 SETTING OPTIONS
32 Setting up the N/W-Fax Driver Options
Setting up LDAP servers
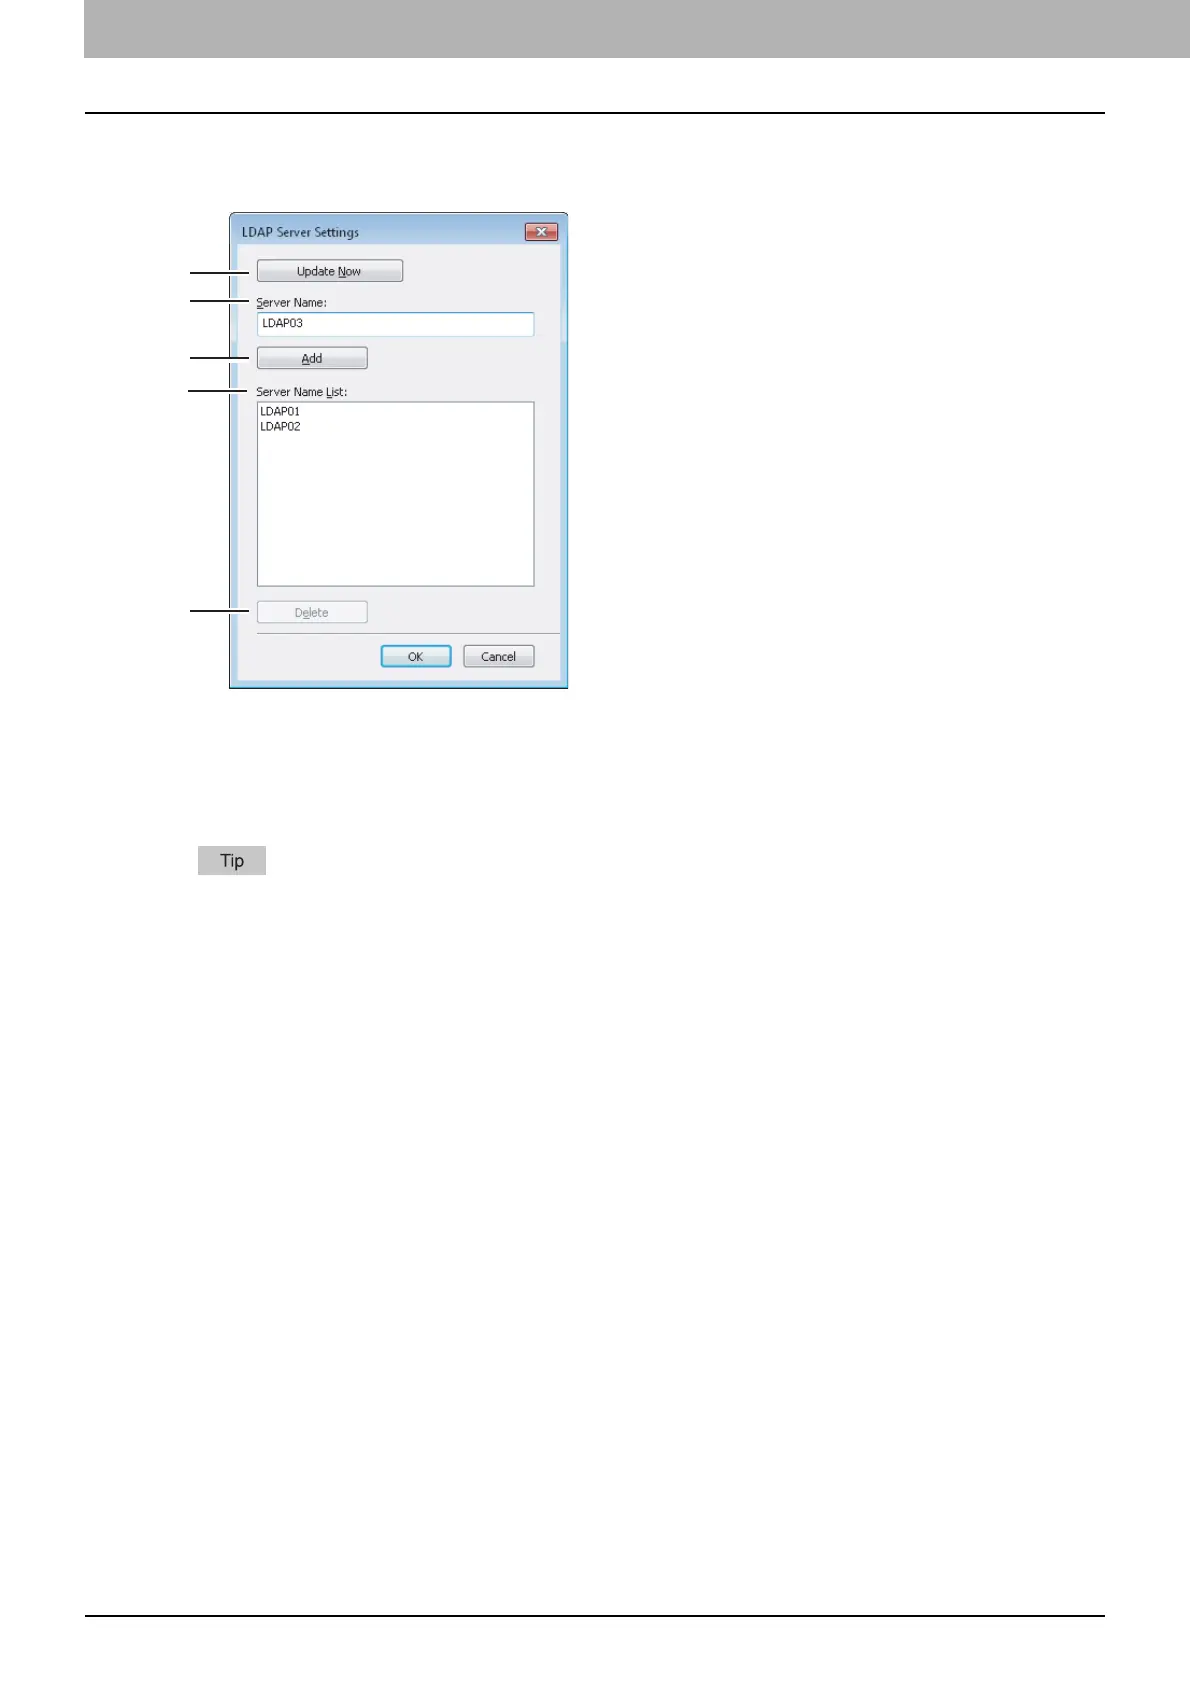
The [LDAP Server Settings] dialog box allows you to register LDAP servers.
1) [Update Now]
Click this button to obtain LDAP server information automatically from your TOSHIBA MFP, and register it in [Server
Name List].
2) Server Name
Enter the desired LDAP server in this box if needed.
Up to 64 characters (excluding # ; \ =) can be entered for the [Server Name] box.
3) [Add]
Click this button to register the LDAP server in the [Server Name List], which has been entered in the [Server Name]
box.
4) Server Name List
The registered LDAP servers are displayed in this list. Up to 8 LDAP servers can be registered.
5) [Delete]
Click this button to delete an LDAP server in [Server Name List]. Select the LDAP server that you want to delete in the
list, and click this button.
1
2
3
4
5

 Loading...


