1 TROUBLESHOOTING FOR THE HARDWARE
14 Clearing a Paper Jam
Clearing a Paper Jam
Locating a paper jam
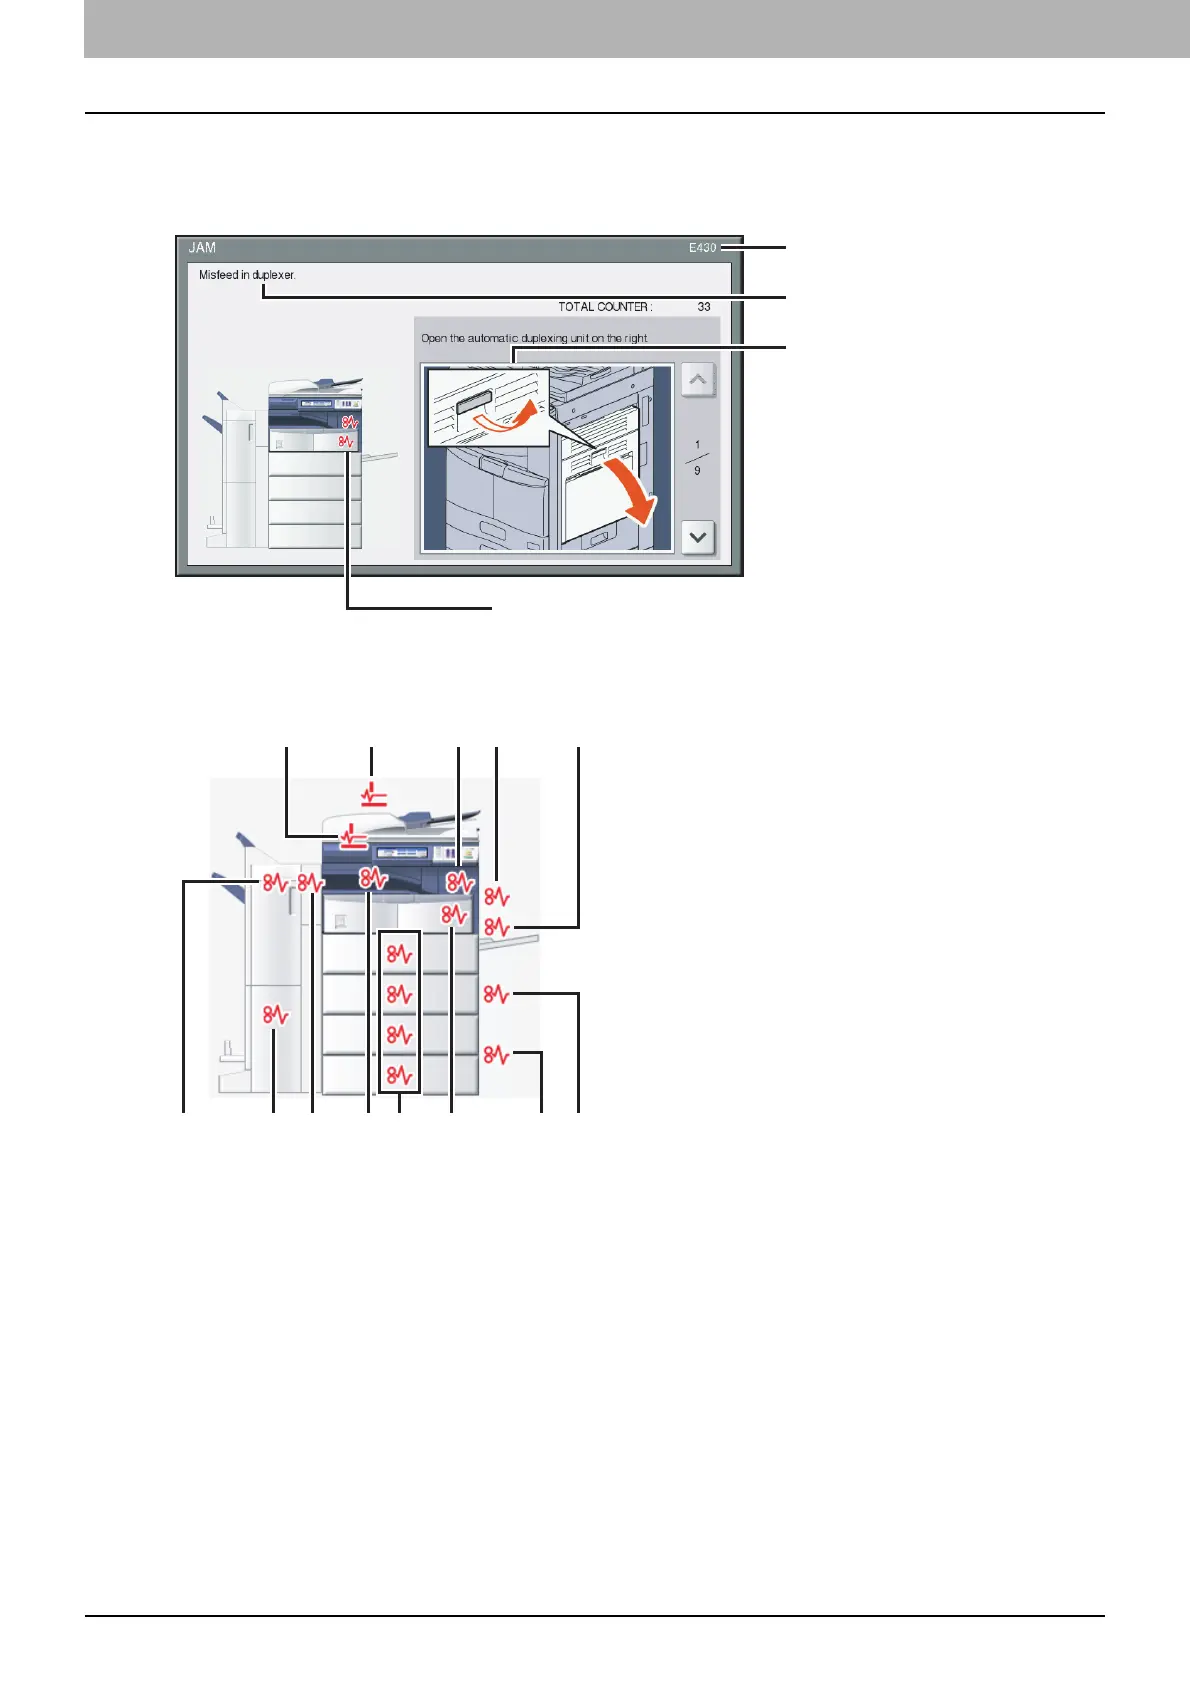
The equipment stops copying when the original or copy paper is jammed. Paper jams are notified on the touch panel as
follows:
The paper jam symbol helps you locate the paper jam.
1. Reversing Automatic Document Feeder (optional) (lower) ( P. 1 6)
2. Reversing Automatic Document Feeder (optional) (upper) ( P.17)
3. Fuser unit ( P.24)
4. Automatic duplexing unit ( P.21)
5. Bypass tray ( P. 2 1 )
6. Drawer feeding portion ( P. 1 8 )
7. Large Capacity Feeder ( P.19) or Paper Feed Pedestal (both optional) ( P. 1 9 )
8. Paper transport path ( P. 2 2 )
9. Drawers ( P.20) or drawer of the Large Capacity Feeder (optional) ( P. 2 0 )
10. Job Separator, Offset Tray or Bridge Kit (all optional) ( P.26, P.27)
11. Hole Punch Unit (optional) ( P. 2 7 , P.31, P.39, P. 4 2 )
12. Saddle stitch unit (optional) ( P.35, P. 4 4 )
13. Finisher (optional) ( P.27, P.31, P.35, P.39, P.42, P.44)
The picture of the hardware device shown on the touch panel differs depending on the finisher options installed.
Error code
Error message
Paper jam symbols
Guidance for
clearing paper jams
1213
1
810 67
2 3 4 5
9
11
 Loading...


