6
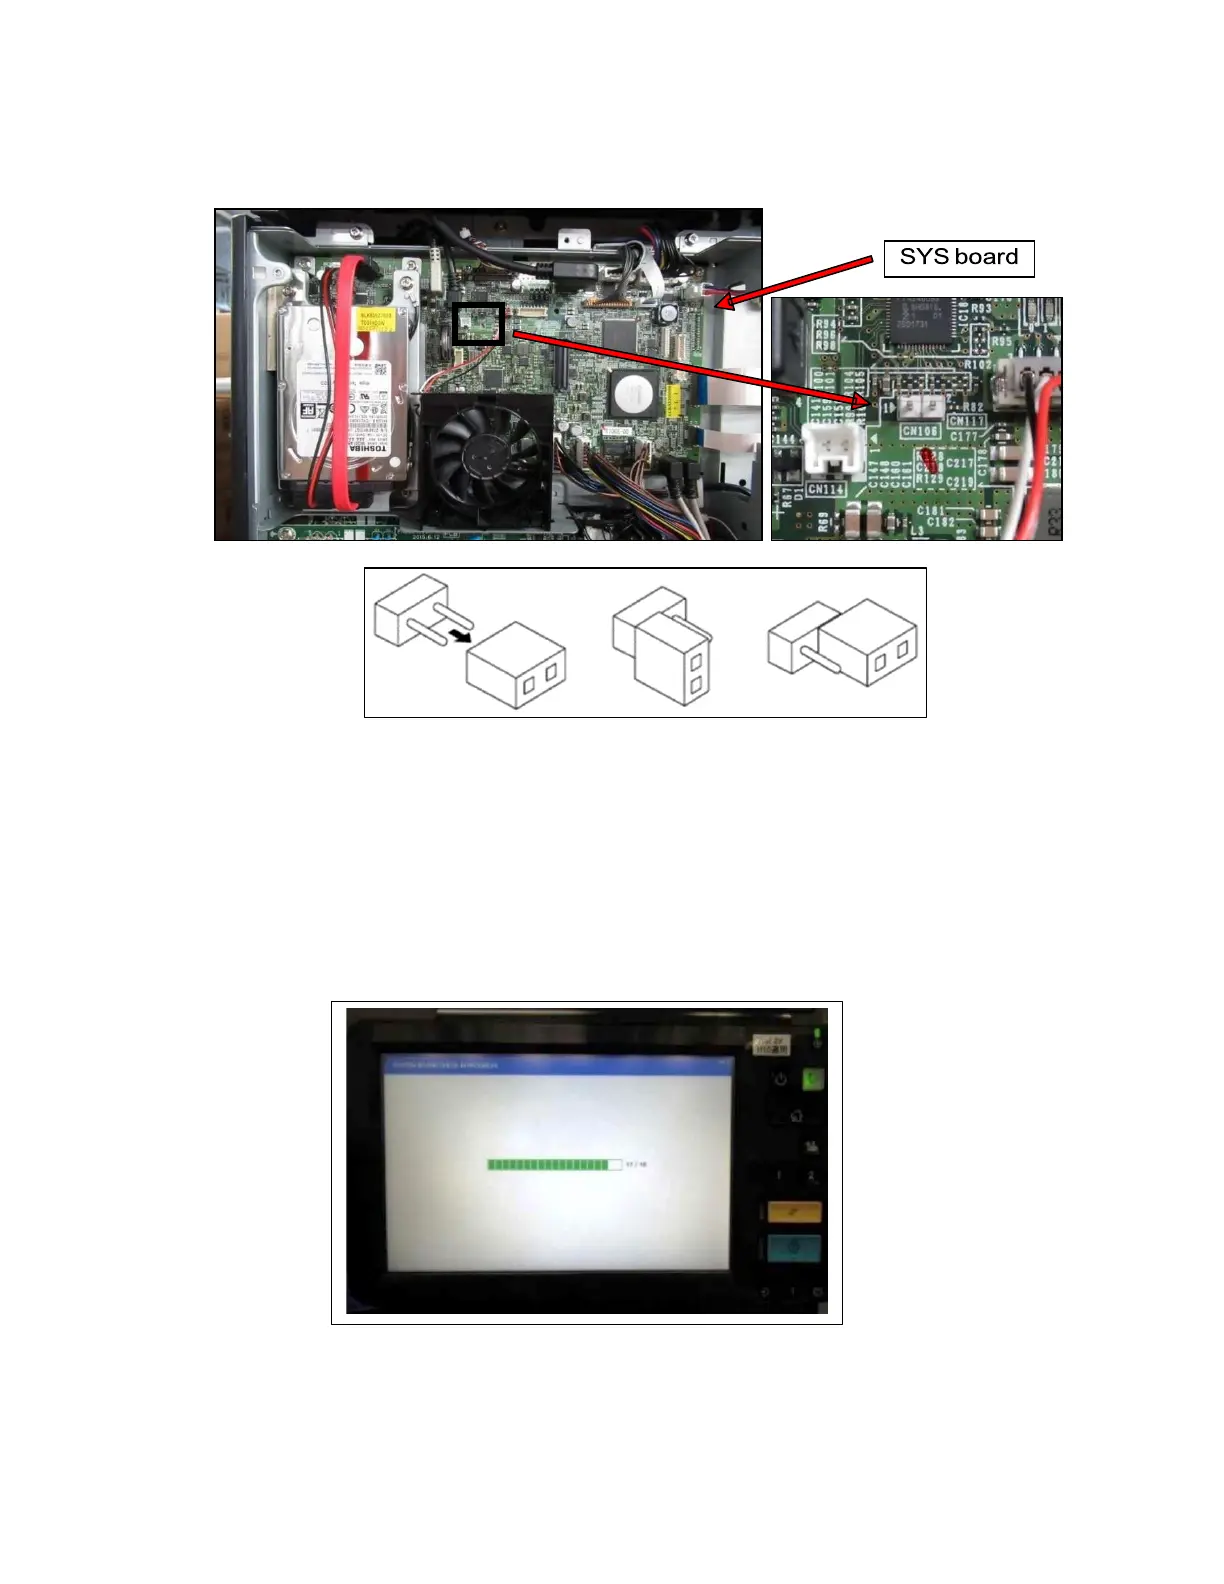
4. Remove the short pin attached to CN106 of the SYS Board and then insert the short
pin on one side of CN106 as shown in the figure below.
5. Insert the USB memory containing the Diagnostic tool into the usb port locate on the
left-side of Control Panel or the upper right side of the machine (the USB memory
insertion slot location differs depending on the model).
6. Insert the power cable into the MFP.
7. Turn on the Main power switch ON (all covers must be closed).
8. The following screen with a progress bar will be displayed and the automatic check
process is started.
 Loading...