Quick Reference Guide - Page 9
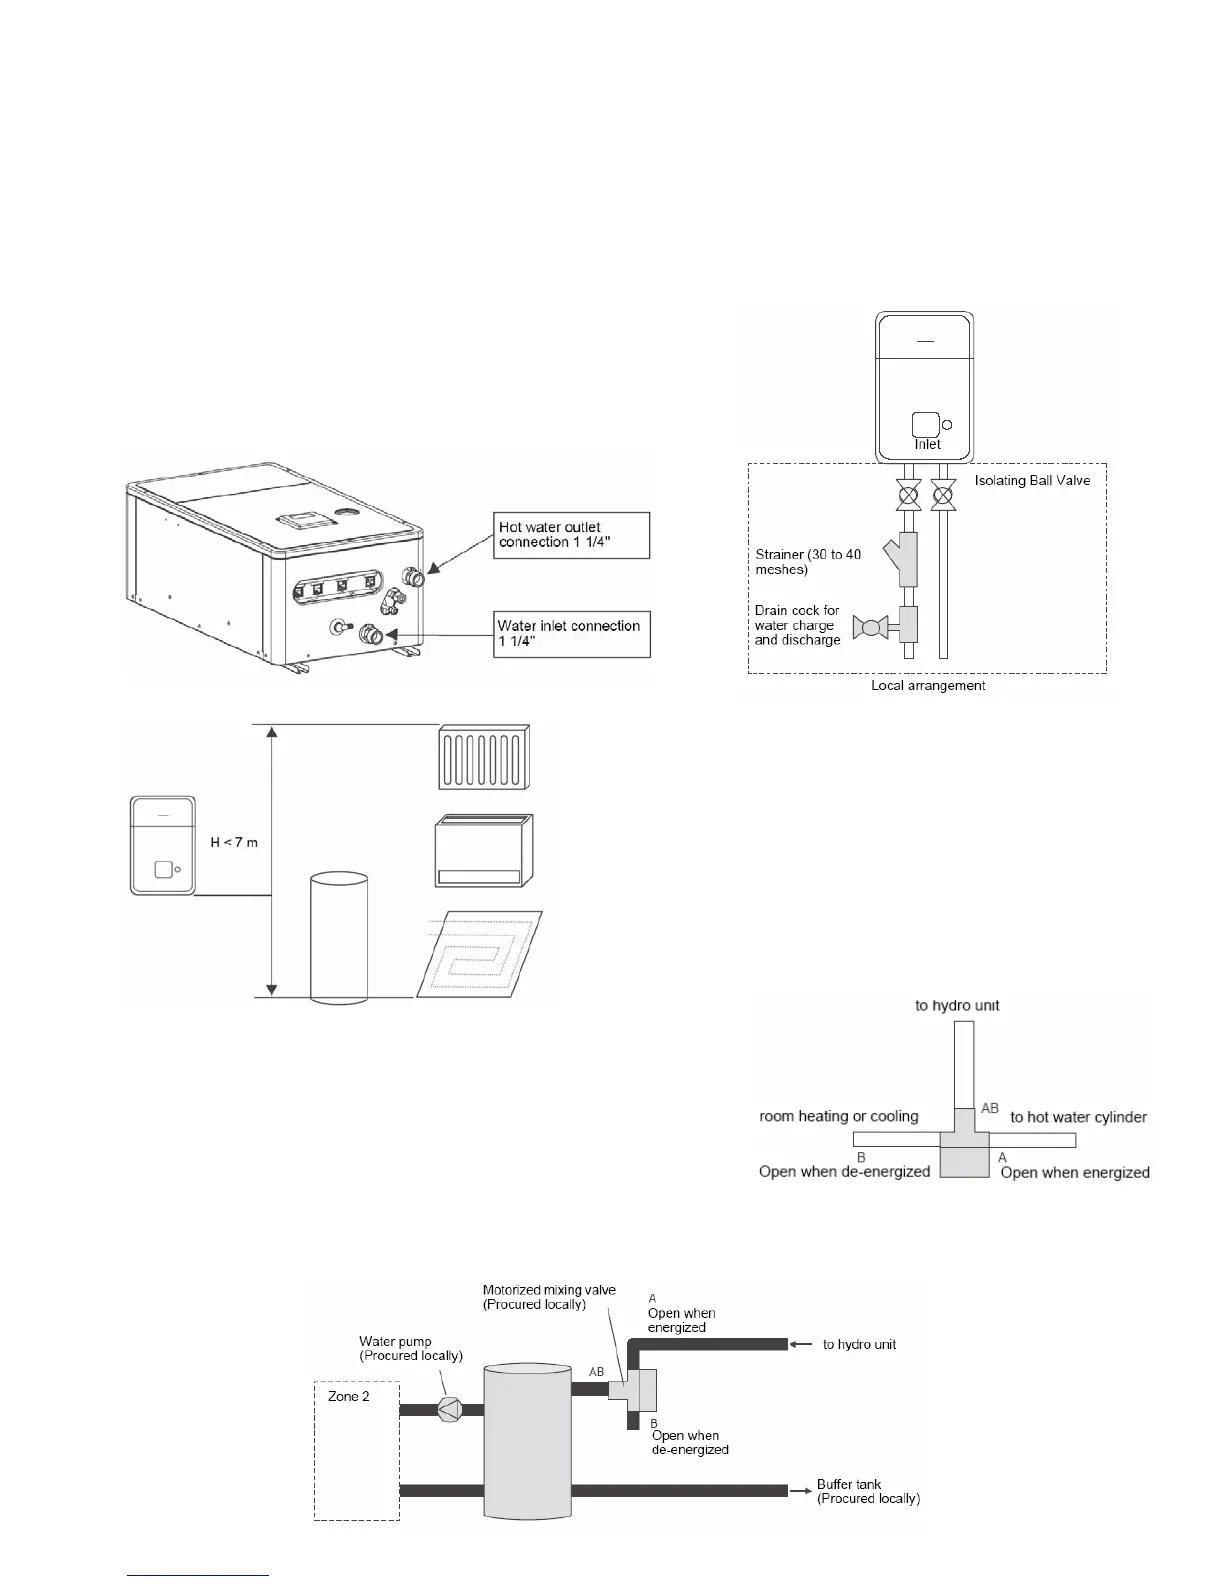
Water Piping
• Install water pipes according to the regulations of respective countries.
• Install water pipes in a freeze-free place.
• Make sure that water pipes have sufficient pressure resistance (The setting value of the pressure
relief valve is 0.3 MPa).
• Do not use zinc plated water pipes. When steel pipes are used, insulate both ends of the pipes.
Water Connections
• Install a strainer with 30 to 40 meshes (procure locally) at
the water inlet of the Hydro Unit.
• Install drain cocks (procure locally) for water charge and
discharge at the lower part of the Hydro Unit.
Water Piping Limitations
s
Design the water pipe length within the QH
characteristics of the pump (flow-rate and pump
head).
The maximum height difference for the water pipes i
7 metres.
Piping to hot water tank (option
)
Water supplied to the hot water cylinder is branched by a
motorized 3-way valve (procured locally).
Connect the hot water cylinder to port A (open when
energized) of the valve.
Piping to 2-zone operation (option)
To perform 2-zone temperature control circulate water using another pump (procured locally)
through a motorized mixing valve (procured locally) and a buffer tank (procured locally).
 Loading...