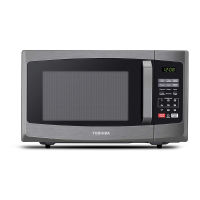
This document serves as an instruction manual for the Toshiba MM-EM25P(WH) microwave oven, providing comprehensive guidance on its safe operation, installation, usage, and maintenance.
Product Safety
The manual begins with crucial safety instructions to minimize risks such as fire, electric shock, injury, and exposure to excessive microwave energy. Users are advised to read and follow specific precautions regarding microwave energy exposure and to ensure the appliance is used safely, especially around children. It emphasizes that children should not play with the appliance and that cleaning and user maintenance should only be performed under supervision. The supply cord, if damaged, must be replaced by the manufacturer or a qualified service agent. A warning is issued regarding lamp replacement, stressing that the appliance must be switched off to avoid electric shock. Furthermore, it highlights the danger of anyone other than a competent person carrying out service or repair operations that involve removing covers that protect against microwave energy exposure.
Liquids and other foods should not be heated in sealed containers due to the risk of explosion. When heating food in plastic or paper containers, constant supervision is necessary to prevent ignition. Only microwave-safe utensils should be used. In case of smoke, the appliance must be switched off or unplugged, and the door kept closed to stifle flames. Microwave heating of beverages can lead to delayed eruptive boiling, requiring careful handling of containers. Contents of feeding bottles and baby food jars must be stirred or shaken, and their temperature checked before consumption to prevent burns. Eggs in their shell and whole hard-boiled eggs should not be heated in microwave ovens as they may explode. Regular cleaning of the oven and removal of food deposits are essential to prevent surface deterioration, which could adversely affect the appliance's lifespan and create hazardous situations. If a temperature probe is provided, only the recommended one should be used. The microwave oven should not be placed in a cabinet unless specifically tested for such installation.
The appliance is intended for household and similar applications, including staff kitchen areas, hotels, motels, farmhouses, and bed and breakfast environments. It is designed for heating food and beverages; drying food or clothing, or heating warming pads, slippers, sponges, and damp cloths can lead to injury, ignition, or fire. Metallic containers are not permitted during microwave cooking. The appliance should not be cleaned with a steam cleaner and is intended for freestanding use, with its rear surface placed against a wall. It is not designed to be operated by an external timer or separate remote-control system.
Product Introduction
The manual provides precautions to avoid possible exposure to excessive microwave energy. Users are warned against operating the oven with an open door, as this can result in harmful exposure. It is crucial not to break or tamper with safety interlocks. No objects should be placed between the oven front face and the door, and soil or cleaner residue should not accumulate on sealing surfaces. If the door or door seals are damaged, the oven must not be operated until repaired by a competent person. An addendum notes that failure to maintain cleanliness can degrade the apparatus's surface, affecting its lifespan and potentially leading to dangerous situations.
Grounding Installation
To reduce the risk of injury, proper grounding installation is emphasized. Touching internal components can cause serious injury or death, so users are warned not to disassemble the appliance. Improper use of grounding can result in electric shock, and the appliance should not be plugged into an outlet until properly installed and grounded. The appliance is equipped with a grounding wire and plug, which must be connected to a properly installed and grounded outlet. A qualified electrician or serviceman should be consulted if grounding instructions are unclear. If an extension cord is necessary, only a 3-wire grounding-type extension cord should be used, with an electrical rating at least as great as the appliance's. The cord should be arranged to prevent it from draping over countertops where it could be pulled by children or tripped over.
Cleaning
Cleaning instructions are provided to maintain the appliance. Users must unplug the appliance before cleaning. The oven cavity should be cleaned with a slightly damp cloth after each use. Accessories should be cleaned in soapy water. The door frame, seal, and surrounding parts require careful cleaning with a damp cloth. Harsh abrasive cleaners or sharp metal scrapers should not be used on the oven door glass to avoid scratching and shattering. A cleaning tip suggests placing half a lemon in a bowl with 300ml of water and heating it on 100% microwave power for 10 minutes to easily clean cavity walls, then wiping with a soft, dry cloth.
Utensils
The manual includes a section on suitable and unsuitable utensils for microwave use. A caution warns that only competent persons should perform service or repair operations involving the removal of covers that protect against microwave energy exposure. For non-metallic utensils, a test procedure is provided: fill a microwave-safe container with 1 cup (250ml) of cold water along with the utensil, cook on maximum power for 1 minute, and if the empty utensil feels warm, it is not safe for microwave cooking. The cooking time for this test should not exceed 1 minute.
A table lists materials that can be used in a microwave oven:
- Browning dish: Follow manufacturer's instructions; the bottom must be at least 3/16 inch (5mm) above the turntable.
- Dinnerware: Microwave-safe only; do not use cracked or chipped dishes.
- Glass jars: Remove lids; use only to heat food until warm, as most are not heat resistant.
- Glassware: Heat-resistant oven glassware only; ensure no metallic trim and no cracked or chipped dishes.
- Oven cooking bags: Follow manufacturer's instructions; do not close with metal ties; make slits for steam.
- Paper plates and cups: For short-term cooking/warming only; do not leave unattended.
- Paper towels: Use to cover food for reheating and absorbing fat; use with supervision for short-term cooking.
- Parchment paper: Use as a cover to prevent splattering or a wrap for steaming.
- Plastic: Microwave-safe only; follow manufacturer's instructions; "Microwave Safe" label recommended. Some plastic containers may soften; "boiling bags" and tightly closed plastic bags should be slit, pierced, or vented.
- Plastic wrap: Microwave-safe only; use to cover food to retain moisture; do not allow it to touch food.
- Wax paper: Use as a cover to prevent splattering and retain moisture.
Materials to be avoided in a microwave oven include:
- Aluminum tray: May cause arcing; transfer food to a microwave-safe dish.
- Food carton with metal handle: May cause arcing; transfer food to a microwave-safe dish.
- Metal or metal-trimmed utensils: Metal shields food from microwave energy and metal trim may cause arcing.
- Metal twist ties: May cause arcing and fire.
- Paper bags: May cause fire.
- Plastic foam: May melt or contaminate liquid when exposed to high temperature.
- Wood: Will dry out, split, or crack.
Setting Up Your Oven
The manual details how to set up the oven. Users should remove the oven and all packing materials from the carton and oven cavity. The oven comes with a glass tray, turntable ring assembly, turntable shaft, and instruction manual.
Turntable Installation:
- Never place the glass tray upside down or restrict it.
- Both the glass tray and turntable ring assembly must always be used during cooking.
- All food and containers should be placed on the glass tray.
- If the glass tray or turntable ring assembly cracks or breaks, contact an authorized service center.
Countertop Installation:
- Remove all packing material and accessories. Inspect for damage like dents or a broken door; do not install if damaged.
- Remove any protective film from the cabinet surface. Do not remove the light brown Mica cover inside the oven cavity, which protects the magnetron.
Installation Requirements:
- Select a level surface with enough open space for intake and/or outlet vents.
- Minimum installation height is 85cm.
- The rear surface must be placed against a wall.
- A minimum clearance of 30cm above the oven and 20cm from adjacent walls is required.
- Do not remove the legs from the bottom.
- Blocking intake/outlet openings can damage the oven.
- Place the oven away from radios and TVs to avoid interference.
- Plug into a standard household outlet with matching voltage and frequency as on the rating label.
- A warning states not to install the oven over a range cooktop or other heat-producing appliances, as heat sources can damage the oven and void the warranty.
- An accessible surface may become hot during operation.
Control Panel and Operation
The control panel features a digital display, buttons for Time Cook, Time Defrost, Weight Defrost, Power, Clock, Kitchen Timer, and various auto menu functions (Popcorn, Potato, Pizza, Frozen Vegetable, Beverage, Dinner Plate). It also includes number pads (1-9, 0), Express Cook 1-6 MIN, Stop/Cancel, and Start/+30SEC.
1. Microwave Power Level:
- 11 power levels are available (PL0 to PL10). PL10 is 100% power, and PL0 means no power, only the fan operates to remove odor.
- Power level can only be set after setting the cooking time.
2. Clock Setting:
- The clock system is 12-hour.
- Press "CLOCK," enter the current time using number keys, then press "CLOCK" again to confirm.
- If input numbers are outside 1:00-12:59, the setting is invalid.
- If no operation for 1 minute or "STOP/CANCEL" is pressed during setting, it reverts to the former setting.
3. Kitchen Timer:
- Press "KITCHEN TIMER," enter the desired time (max 99 minutes 99 seconds) using number keys, then press "START/+30SEC." to confirm.
- The buzzer rings 5 times when the timer finishes.
- The kitchen timer is for countdown when the oven is not cooking and cannot be set during other programs.
4. Microwave Cook:
- Press "TIME COOK," enter cooking time (max 99 minutes 99 seconds).
- Press "POWER," then use number keys to adjust the power level (default is 100%).
- Press "START/+30SEC." to start.
- During setting, "STOP/CANCEL" or 1 minute of inactivity reverts the oven.
- PL0 operates the fan to remove odor.
- Power level can be changed during cooking by pressing "POWER" and then a number key.
5. Express Cook:
- In waiting state, press number pads 1-6 for instant cooking at 100% power for 1-6 minutes.
- Pressing "START/+30SEC." starts instant cooking at 100% power for 30 seconds, and each subsequent press adds 30 seconds (max 99 minutes 99 seconds).
- Time can be added during microwave cooking and time defrost by pressing "START/+30SEC."
6. Weight Defrost Function:
- Press "WEIGHT DEFROST," screen displays "dEF1."
- Input weight (100-2000g) using numerical buttons. Invalid input outside this range.
- Press "START/+30SEC." to start defrosting.
7. Time Defrost Function:
- Press "TIME DEFROST," screen displays "dEF2."
- Input defrosting time (00:01-99:99) using number pads.
- Default power is level 3; can be changed by pressing "POWER" then a number key.
- Press "START/+30SEC." to start defrosting.
8. Auto Menu Function:
- Popcorn: Press "POPCORN" repeatedly to select 50g or 100g. Press "START/+30 SEC." to cook. For 100g, fold down a triangle on each corner of the bag. If the bag expands and stops rotating, adjust its position.
- Potato: Press "POTATO" repeatedly to select 1, 2, or 3 potatoes (approx. 230g, 460g, 690g). Press "START/+30 SEC." to cook.
- Frozen Vegetable: Press "FROZEN VEGETABLE" repeatedly to select 150g, 350g, or 500g. Press "START/+30 SEC." to cook.
- Beverage: Press "BEVERAGE" repeatedly to select 1, 2, or 3 cups (approx. 120ml per cup). Press "START/+30 SEC." to cook.
- Dinner Plate: Press "DINNER PLATE" repeatedly to select 250g, 350g, or 500g. Press "START/+30 SEC." to cook.
- Pizza: Press "PIZZA" repeatedly to select 100g, 200g, or 400g. Press "START/+30 SEC." to cook.
9. Multi-Stage Cooking:
- Up to 2 stages can be set. If one stage is defrosting, it must be the first stage.
- Auto cooking cannot be used in multi-stage cooking.
- Example: To cook with 80% microwave power for 5 minutes + 60% microwave power for 10 minutes, set the first stage time and power, then the second stage time and power, and finally press "START/+30 SEC."
10. Lock Function for Children:
- Lock: In waiting state, press "STOP/CANCEL" for 3 seconds until a long "beep" sounds and the screen displays "[]".
- Lock quitting: In locked state, press "STOP/CANCEL" for 3 seconds until a long "beep" sounds, indicating the lock is released.
11. Memory Function:
- Press "0(Memory)" to choose memory 1-3.
- If a procedure is already set, press "START/+30 SEC." to use it. Otherwise, set the procedure (up to two stages).
- After setting, press "START/+30 SEC." once to save. Pressing it again will start cooking.
- The procedure is saved unless electricity is cut off.
12. Inquiring Function:
- In cooking state, press "CLOCK" to display the clock for three seconds.
- In microwave cooking state, press "POWER" to display the current microwave power level for three seconds. This also applies to multi-stage cooking.
13. Cooking End Reminding Function:
- The buzzer sounds 5 "beeps" when cooking is finished.
14. Other Specifications:
- In standby, the clock icon ":" flashes if the clock is set; otherwise, it shows "0:00".
- The screen displays corresponding settings in function setting state.
- In working or pause state, the screen displays surplus cooking time.
Trouble Shooting
The manual includes a troubleshooting guide for common issues:
- Microwave oven interfering with TV reception: Normal, similar to other small electrical appliances.
- Dim oven light: Normal during low-power microwave cooking.
- Steam accumulating on door, hot air out of vents: Normal during cooking, most steam exits vents.
- Oven started accidentally with no food in: Forbidden and dangerous.
Trouble: Oven cannot be started.
- Possible Cause: Power cord not plugged in tightly, fuse blowing or circuit breaker works, trouble with outlet.
- Remedy: Unplug and replug after 10 seconds, replace fuse/reset circuit breaker (by professional), test outlet with other appliances.
Trouble: Oven does not heat.
- Possible Cause: Door not closed well.
- Remedy: Close door well.
The manual concludes with a note on Waste of Electrical and Electronic Equipment (WEEE) directive, stating that the product should be separately collected and treated and not disposed of with household waste.