54
6-5. 1-Way Air Discharge Cassette Type
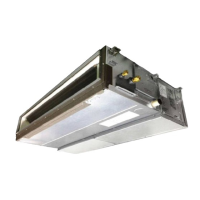
200mm
or more
Ceiling
Ceiling inside height :
245mm or more
100mm
and more
100mm
and more
Refrigerant piping port
Ceiling
200mm
and
more
(Piping side)
(Discharge port)
1000mm
and more
Obstacle
1000mm
and more
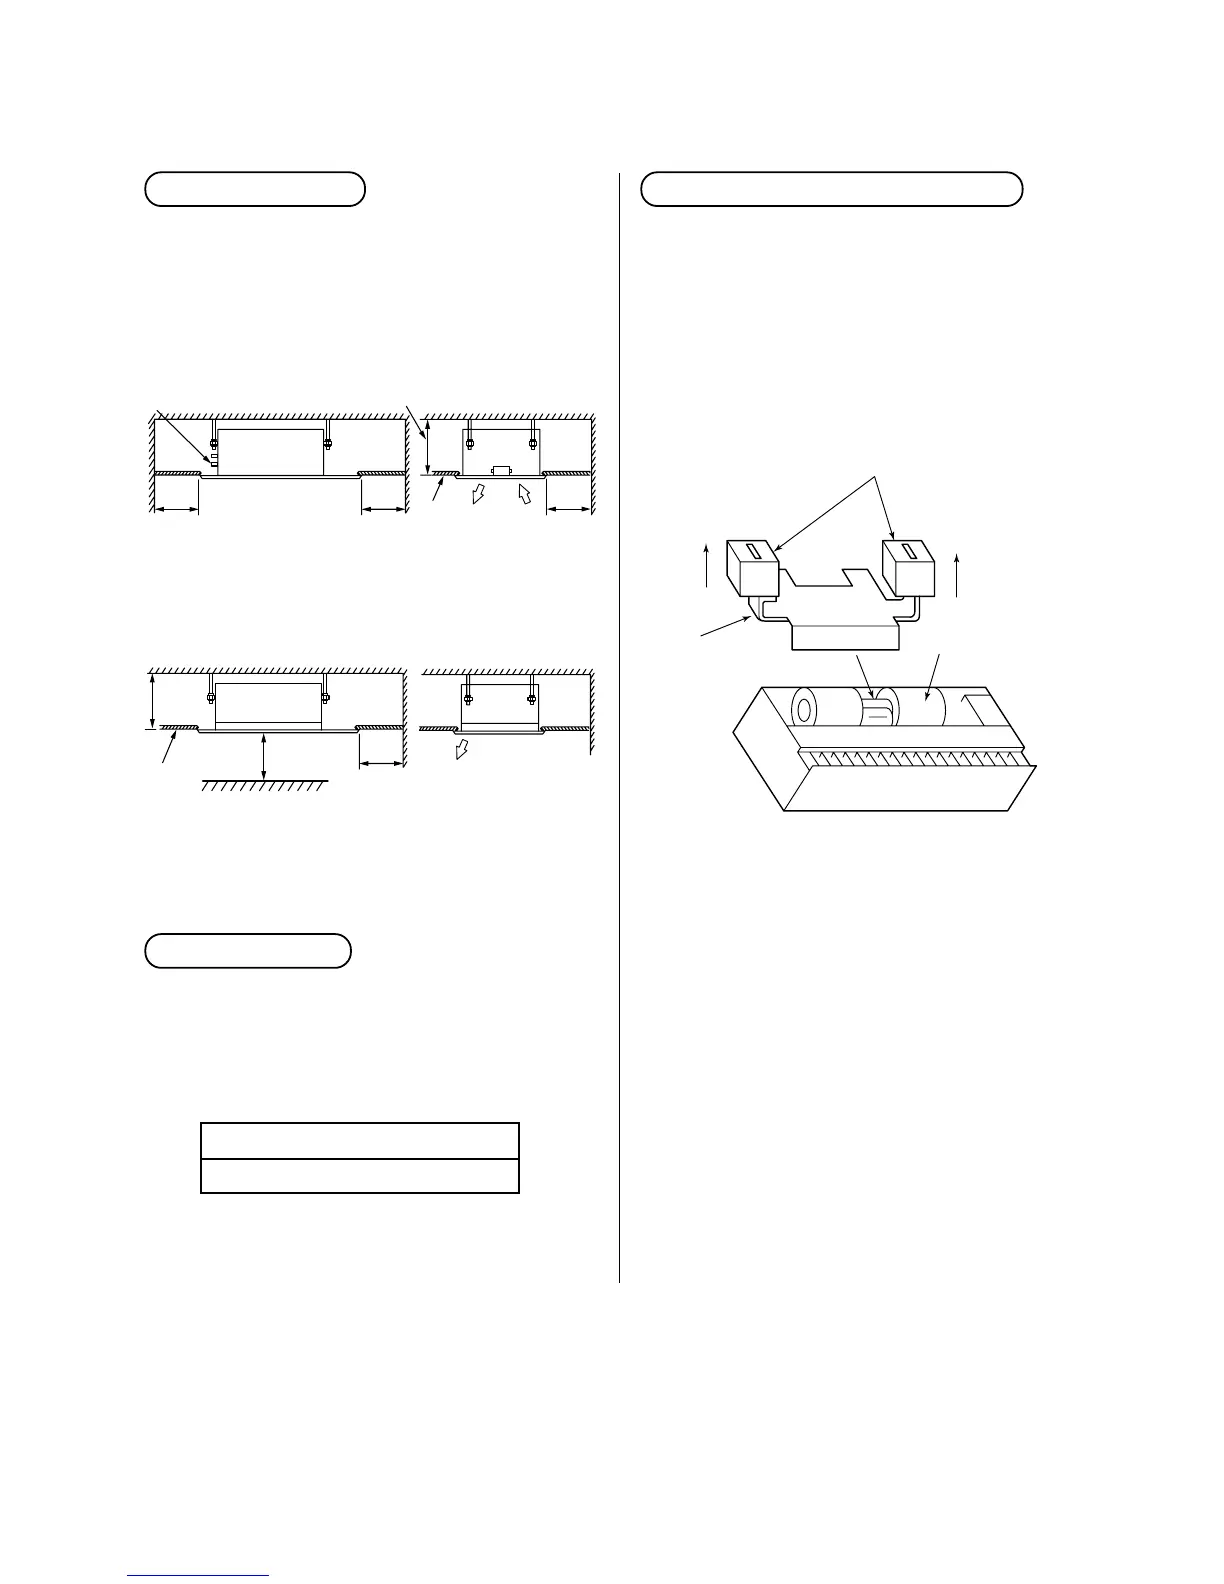
Protective rubbers for transportation
(remove)
Reinforcing bracket
Pull upward to
remove.
Casing
Installation space
Secure the space required to installation and servicing.
Keep 5mm or more for clearance between top plate of
the indoor unit and the ceiling surface.
<MMU-AP0071YH to AP0121YH>
<MMU-AP0151SH to AP0241SH>
Removal of transporting rubbers
<MMU-AP0071YH to AP0121YH>
• Before installation of the indoor unit, remove the
two protective rubbers for transportation which are
inserted between the reinforcing bracket for the fan
motor and the casing.
(Hand over the protective rubbers for
transportation to the customers and ask to keep
them because they are used for transportation
such as reinstallation.)
Height of ceiling
When height of the ceiling exceeds 3.0m, it is difficult
that the hot air reaches up to the floor surface. In this
case, it is necessary to exchange the motor speed-up
by using a connector, which is attached to the air
conditioner unit.
Installable height of ceiling
Up to 3.0m
Considering cabling and cable connecting works in
the ceiling after hanging the indoor unit, select an
installation place and determine drawing direction of
the cables.
• In a case that the ceiling has been already existed,
draw refrigerant cable, drain cable, indoor
connecting cable and remote controller cord up to
the position where pipes and cables are to be
connected in advance when hanging the indoor
unit.
• Check dimension of the indoor unit, determine size
of the indoor unit itself and the ceiling opening and
perform positioning, using the attached installation
pattern.
(The pattern is attached to bottom surface with five
M5 x 20 screws.)
 Loading...