– 63 –
2
2
3
2
2
4-Screws
2
3
Screw
Drain guide
6
Screw
4
2-Connectors
5 TC Sensor
6
Screw
3
Left shaft
2
Center shaft
11. HOW TO REPLACE THE MAIN PARTS
11-1. Indoor Unit
No.
Part name
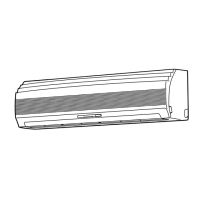
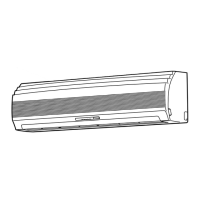
Front panel
Procedures
How to remove the front panel
1) Stop the operation of the air conditioner and
turn off its main power supply.
2) Pull the air inlet grille toward you to open it and
remove the air inlet grille.
Then remove 4 screws fixing the front panel.
3) Open the horizontal louver, and then remove the
front panel from the back body by pulling it
toward you.
How to mount the front panel
Mount the front panel in position and make sure
all hooks are locked.
Remarks
How to remove the electrical part
1) Remove the front panel with the procedure
.
2) Remove the screw holding the electrical part
cover.
3) Remove the drain guide.
4) Disconnect connector (6P) for the fan motor and
the connector (5P) for the louver motor from the
P.C. board assembly.
5) Pull out the TC sensor from the sensor holder.
6) Remove each screw for the ground wire, the
electrical part box and the LED unit.
Then remove the LED unit and the electrical
part box from the main unit.
How to mount the electrical part
1) Fix the electrical part box by the upper hook of
the back body.
2) Tighten 2 screws of the electrical part box.
3) Connect 3 connectors and arrange the wiring
same as original condition and then tighten the
screw to fix the LED unit to the back body.
4) Attach the TC sensor to the holder.
5) Tighten the screw for the ground wire.
6) Mount the drain guide (the TC sensor wire
should be covered with the drain guide).
7) Tighten the screw of the electrical part cover.
1) Remove the front panel and the electrical part
with the procedure
.
2) Remove the center shaft of the horizontal louver
from the back body.
3) Remove the left shaft from the back body.
4) Remove the horizontal louver from the back
body.
Electrical part
Horizontal
louver
 Loading...