Do you have a question about the Toshiba RAS-M10NKCV-E and is the answer not in the manual?
Wiring diagram for 10k and 13k indoor unit models.
Wiring diagram for 16k indoor unit models.
Details the control block diagram specifically for the indoor unit.
Provides an overview of how the air conditioner's control system functions.
Explains the operational circuits and their functions for different modes.
Describes special temporary operating modes and their settings.
Explains the automatic restart feature and its setup.
Information about the filter check indicator and its reset procedure.
Important safety warnings and precautions for installation.
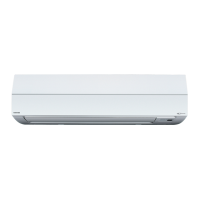
General procedures and diagrams for mounting and connecting the indoor unit.
Key procedures for electrical wiring and refrigerant piping connections.
Final verification steps to ensure correct installation and operation.
Initial checks to confirm basic power and operation status.
Interpreting error codes indicated by blinking LEDs on the indoor unit.
Using the remote control's service mode for detailed self-diagnosis.
Troubleshooting guide based on specific operational symptoms and failures.
Procedure for replacing the microcomputer unit.
Exploded view and parts list for the indoor unit's electrical and structural assemblies.
Exploded view and parts list for the main mechanical and cosmetic components of the indoor unit.
| Brand | Toshiba |
|---|---|
| Model | RAS-M10NKCV-E |
| Category | Air Conditioner |
| Language | English |