Do you have a question about the Toshiba RAS-M10UKCV-E and is the answer not in the manual?
Detailed specifications for indoor and outdoor units, including electrical characteristics and dimensions.
Performance specifications for various indoor unit combinations with the outdoor unit.
Graph showing the operation characteristic curve of the air conditioner.
Graphs illustrating how cooling capacity varies with indoor and outdoor temperatures.
Safety precautions for installation and servicing of R410A refrigerant systems.
Details on approved piping materials and joint types for refrigerant installation.
Procedures for cutting and processing piping materials for installation.
Procedures and precautions for connecting flare joints, including torque specifications.
List of required tools for R410A installation and servicing, with compatibility notes.
Diagram and step-by-step guide for recharging the air conditioner with refrigerant.
Information on various brazing filler materials and their applications.
Explanation of flux usage, characteristics, and types for brazing.
Method for brazing pipes while preventing oxidation using nitrogen gas.
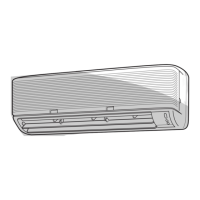
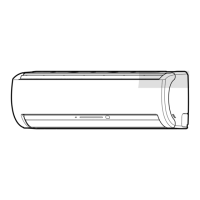
Exploded view and dimensional drawings of the indoor unit.
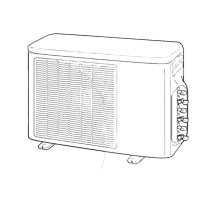
Exploded view and dimensional drawings of the outdoor unit.
Wiring diagram for the indoor unit, including color codes and basic troubleshooting.
Wiring diagram for the outdoor unit, showing electrical connections.
List of electrical components for the indoor unit with their specifications.
List of electrical components for the outdoor unit with their specifications.
Diagram illustrating the refrigerant flow within the air conditioning system.
Block diagram showing the control logic and components of the indoor unit.
Block diagram illustrating the control system of the outdoor unit's inverter assembly.
General overview of the air conditioner's control system and capacity variable features.
Explanation of how cooling capacity is controlled by adjusting compressor motor speed.
Description of the control mechanism to prevent overcurrent by reducing motor speed.
Explanation of power factor improvement control for reducing power consumption.
How the system prevents freezing of the indoor heat exchanger.
Function of the Pulse Modulating Valve in controlling refrigerant flow.
How the vertical air flow louvers are controlled and set.
Explanation of the indoor fan motor control system and speed settings.
Control of the outdoor fan motor speed and protection mechanisms.
Explanation of operational circuits and modes.
How the unit operates in DRY mode, prioritizing dehumidifying.
How the operation mode is selected automatically based on outdoor temperature.
How to start and manage temporary auto operation mode.
How to start and manage temporary cooling operation mode.
Step-by-step instructions on how to enable the auto restart function.
Step-by-step instructions on how to disable the auto restart function.
How power failures affect ON/OFF timer reservations.
Overview of the remote control buttons and their associated functions.
Explanation of the symbols and indicators displayed on the remote control.
General safety precautions and warnings for installing the air conditioner.
List of tools and their compatibility for R410A installation and servicing.
List of accessories and installation parts included with the indoor unit.
Guidelines for selecting the appropriate installation place for the indoor unit.
Steps for cutting wall holes and mounting the indoor unit installation plate.
Requirements for electrical work, including power supply and wiring.
Procedure for connecting the cable between indoor and outdoor units.
Instructions for installing piping and drain hoses, including drain cap procedures.
Steps for securely fixing the indoor unit onto the installation plate.
Guidelines for ensuring proper drainage and preventing water leakage.
Procedure for setting the remote controller selector switch for multi-room setups.
Procedures for checking and testing the unit after installation, including a cooling operation test.
List of accessories and installation manuals for the outdoor unit.
Specifics on using copper pipes and differences in flare nuts for refrigerant piping.
Guidelines for selecting a suitable installation location for the outdoor unit.
List of optional installation parts available locally.
List of optional installation parts sold separately.
Detailed steps for connecting refrigerant piping, including flaring and sizes.
Installation guidelines regarding clearances and securing the outdoor unit.
Procedure and torque values for tightening pipe connections.
Procedure for evacuating air from the system using a vacuum pump.
Electrical work procedures for connecting power supply and wiring.
Procedures for checking connections and performing a test operation.
How to use LED indications for self-diagnosis of the outdoor unit.
Procedure to check for miswiring and mispiping in multi-room installations.
Initial checks for power supply, voltage, and normal operation status.
Methods for diagnosing troubles: LED indication, remote control, and symptoms.
Interpreting indoor unit LED flashes for self-diagnosis of faults.
How to use the remote control in service mode to perform self-diagnosis.
How the unit operates at rated frequency in service mode for testing.
Important cautions to follow after performing servicing.
Flowcharts for diagnosing specific indoor unit operational problems.
Troubleshooting wiring failures causing outdoor unit non-operation.
Diagnosing why the outdoor unit stops after initial operation.
Diagnosing outdoor unit faults using LED indicators and their codes.
Flowchart for summarizing the inner diagnosis of the inverter assembly.
Procedures and precautions for checking the indoor unit's P.C. board.
Step-by-step procedures for checking various components.
Layout diagrams of the indoor unit's P.C. board (top and bottom views).
Procedures for checking indoor unit parts like sensors, remote control, and motors.
Procedures for checking outdoor unit components like compressor and fan motor.
Methods for checking capacitors, converter, and IGBT modules.
How to determine if the outdoor fan motor is functioning correctly.
Procedures for removing and mounting the indoor unit's front panel.
Procedures for removing and mounting the indoor unit's electrical part.
Procedures for removing the indoor unit's horizontal louver.
Procedures for removing the indoor unit's heat exchanger.
Procedures for removing the indoor unit's cross flow fan.
Procedures for removing the indoor unit's base bearing.
Procedure for replacing the microcomputer.
General procedures for detaching and attaching the outdoor unit's parts.
Procedures for removing and attaching the outdoor unit's front cabinet.
Procedures for removing and discharging the inverter assembly.
Procedures for removing and replacing control board assemblies.
Procedures for removing the outdoor unit's rear cabinet.
Procedures for replacing the outdoor unit's fan motor.
Procedures for replacing the outdoor unit's compressor.
Procedures for replacing the outdoor unit's reactor.
Procedures for replacing the pulse modulating valve coil.
Procedures for removing and attaching the fan guard.
Procedure for replacing temperature sensors for servicing.
Exploded view and parts list for the indoor unit.
Exploded view and parts list for the outdoor unit.
Layout diagrams for the MCC-758 and MCC-775 P.C. boards.
| Cooling Capacity | 2.5 kW |
|---|---|
| Heating Capacity | 3.2 kW |
| Energy Efficiency Class (Cooling) | A++ |
| Energy Efficiency Class (Heating) | A+ |
| Refrigerant | R32 |
| SEER | 6.1 |
| SCOP | 4.0 |
| Power Supply | 220-240V, 50Hz |
| Coefficient of Performance (COP) | 4.0 |
| Indoor Unit Weight | 8 kg |
| Type | Split Type |
| Dimensions (Outdoor Unit) | 660 x 240 x 530 mm |