- 21-
CALIBRATION PROCEDURE
1) Check for repeatability
A) Run a fast (high gallons per minute) test in your prover and record how much the meter is over or under
registering. Do NOT change the meter's calibration.
B) Run a slow (low gallons per minute) test and again record how much the meter is over or under registration.
If the results from the fast and the slow test are the same or close to the same, the meter can be successfully calibrated.
If the test results differ beyond the rated tolerance of the meter, then repairs are necessary before the meter can be
calibrated.
2) A valve or nozzle must be at the end of the delivery hose (at the prover).
3) Turn on the pump and purge the system of air. Leave the pump on.
4) Shut off the valve at the end of the delivery hose and let the system pressurize.
5) Wet the prover and empty it, letting it drip for 30 seconds.
6) Reset the register on the meter to "0".
7) Fill the prover to the line marked "0".
8) Calculate the percentage increase or decrease of registration required. For example, if a 50-gallon test prover indicates
exactly 50 gallons have been run through the meter against a meter registration of 49.7 gallons, the percentage increase
of registration would be 0.6%. (3/10’s in 50 gallons is 0.6%). If meter registration is less than the test prover measured
volume, an increase adjustment is required. If meter registration is greater than the test prover measured volume, a
decrease adjustment is required.
9) Remove the seal and seal wire.
10) Remove the front cover plate.
11) Loosen the screw on the clamping ring. The adjuster barrel will now be free to rotate.
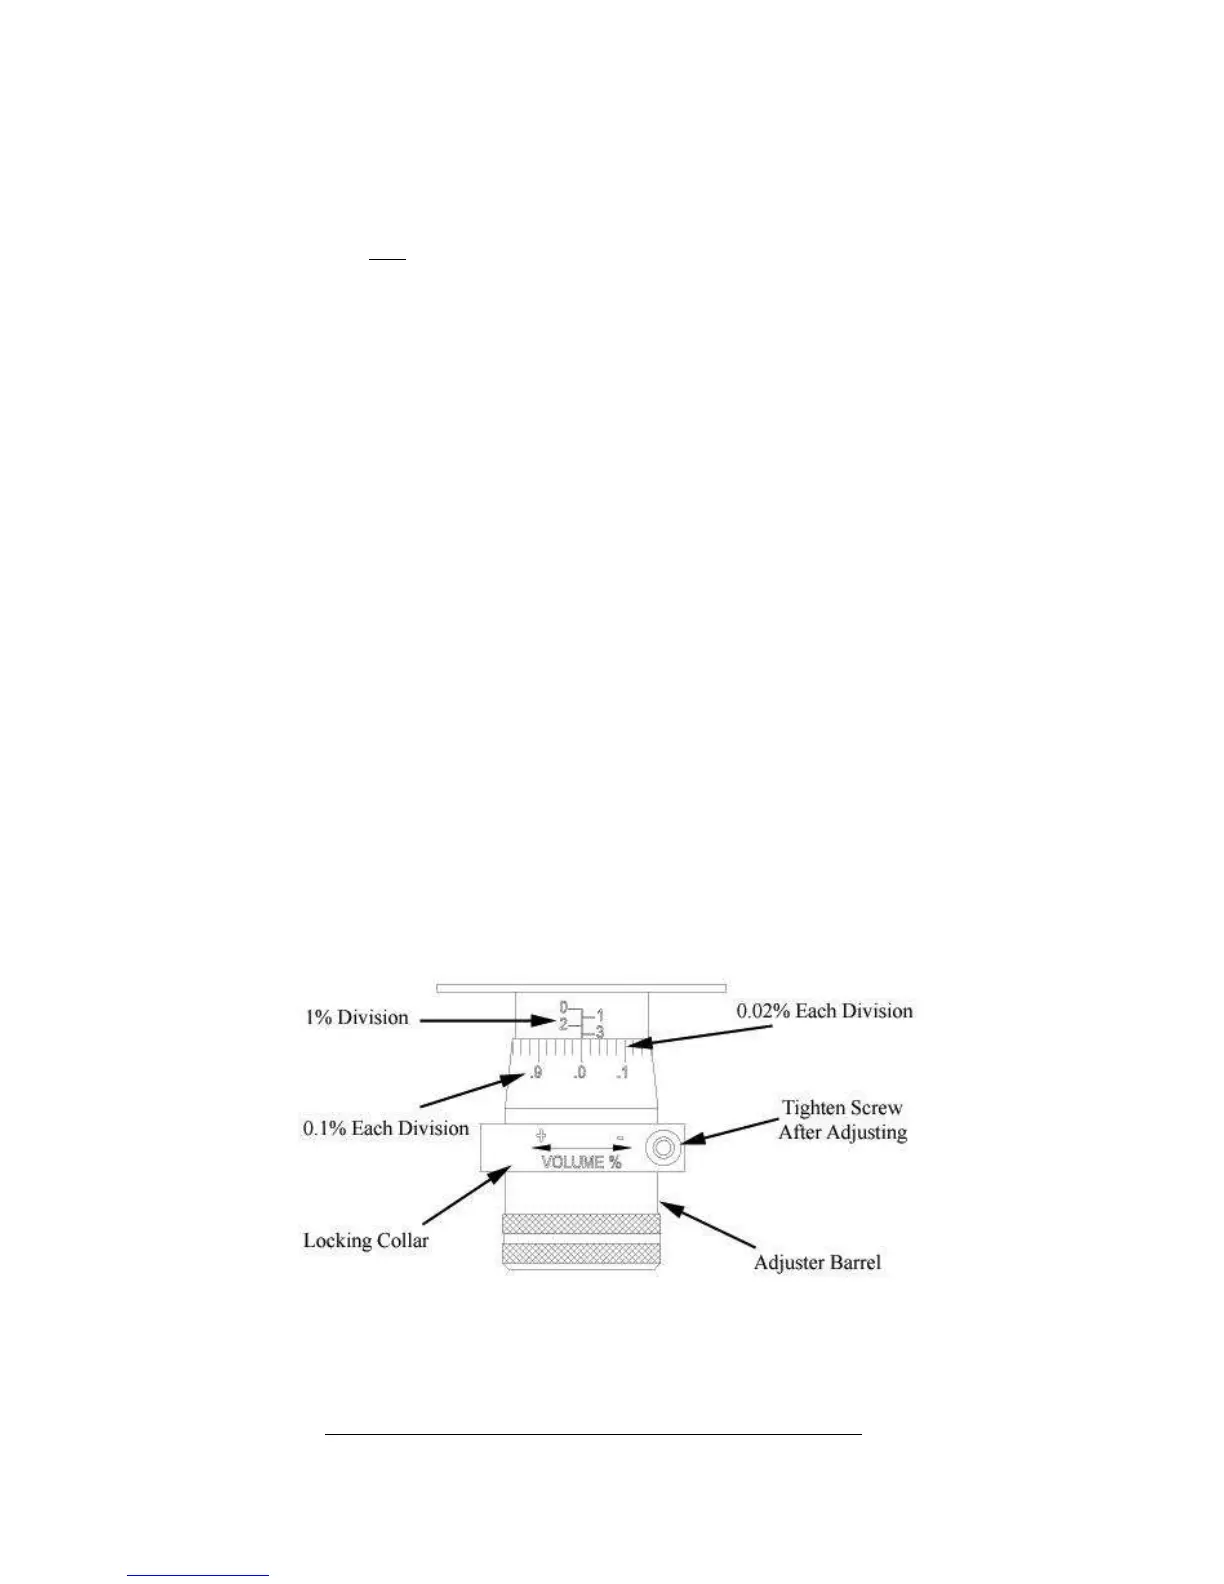
12) Each small hash mark corresponds to 0.02% adjustment. Each of the larger numbers on the rotating barrel corresponds
to 0.1%. The large numbers engraved into the adjuster body correspond to 1%. The entire range of adjustment is 5%,
with the meter being set at the factory very close to the middle of this range.
13) To increase the registered volume, rotate the adjuster barrel to the left by the percentage increase desired. It is
recommended that the barrel be rotated 0.02% more than the desired amount and then backed down to the desired
figure. This accounts for any slack present in the adjuster mechanism. In the example above, the barrel would be
rotated 16 tick marks on the barrel (15 tick marks x 0.02 =0.3 = 3/10’s plus the one tick mark for slack). With the slack
removed, the barrel would then be rotated one tick mark back to the right to achieve the final adjustment.
14) To decrease the registered volume, the adjuster barrel is rotated to the right.
15) Tighten the screw and clamping ring.
16) Run another test and adjust if necessary.
17) When calibration is achieved, ensure that the screw and clamping ring are tight, and then replace the cover plate.
One complete turn of the adjuster barrel is equal to 1 gallon in 100 gallons or
1% of delivered volume. The adjuster body will show divisions of 1%, while
the adjuster barrel has divisions of 0.02%.
For volumes other than 100 gallons, the following formula may
be used to calculate the Adjuster percent to increase or decrease
prover volume.
Volume on Prover minus Volume on the Meter Counter
Volume on the Meter Counter