3 of 12
2. Using the included template, mark the position for the
chassis on the wall where you intend to install
Playdium, ensuring that the template is leveled.
3. Mark where the screws will be inserted. The top two
holes should be aligned with the top part of the
mounting slot in the chassis, so that the chassis will
“hang” from those two screws, while the bottom two
holes should be aligned with the bottom of the
mounting slots, to make it harder to pull Playdium up
and off its screws without first removing the bottom
screws.
4. Partially install the top two screws on the markings
you just made. You will soon be hanging Playdium on
those two screws.
If installing on drywall or concrete, use wall anchors
designed to support at least 50lbs each, then fasten
the chassis to the wall by inserting the screws through
the holes in the chassis, and into the anchors.
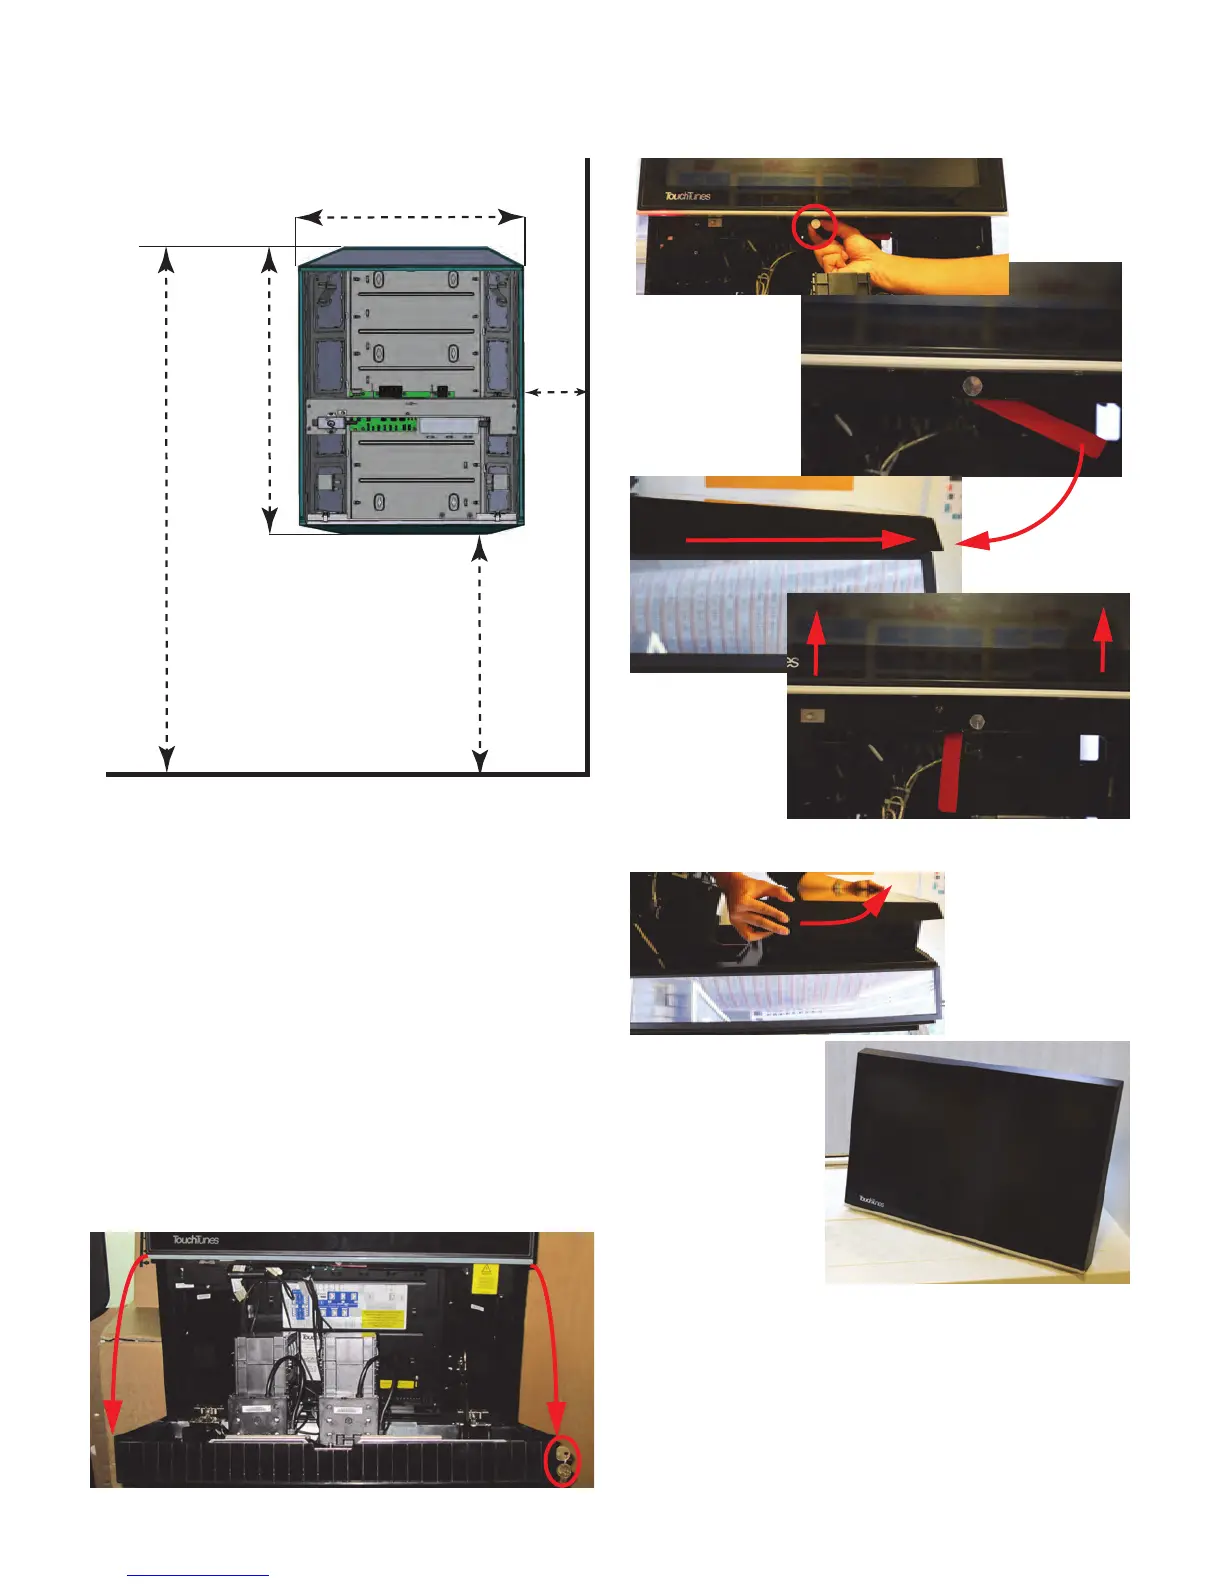
5. With the Playdium lying on its back, and using the
provided key, unlock the payment panel and open it to
reach the lever below the core.
6. Pull the pin that keeps the lever from moving (A).
Then, while still pulling on the pin, pull the lever down
(B) to pop the core out of its connectors (C).
7. Lift the core, and carefully set it aside (on a table or
counter) in the orientation shown below.
8. Lift the chassis and bring it up to the wall, hanging it
on the two screws you just installed.
Note: Playdium MUST be mounted vertically when
docking the core. Do not attempt to dock the core while
the chassis is not mounted vertically. Failure to do so
could damage the core or the chassis.
Minimum 10”
from wall
37.5”
from oor
30.5”
23.5”
Floor
68”
Key
A
B
C