4 of 12
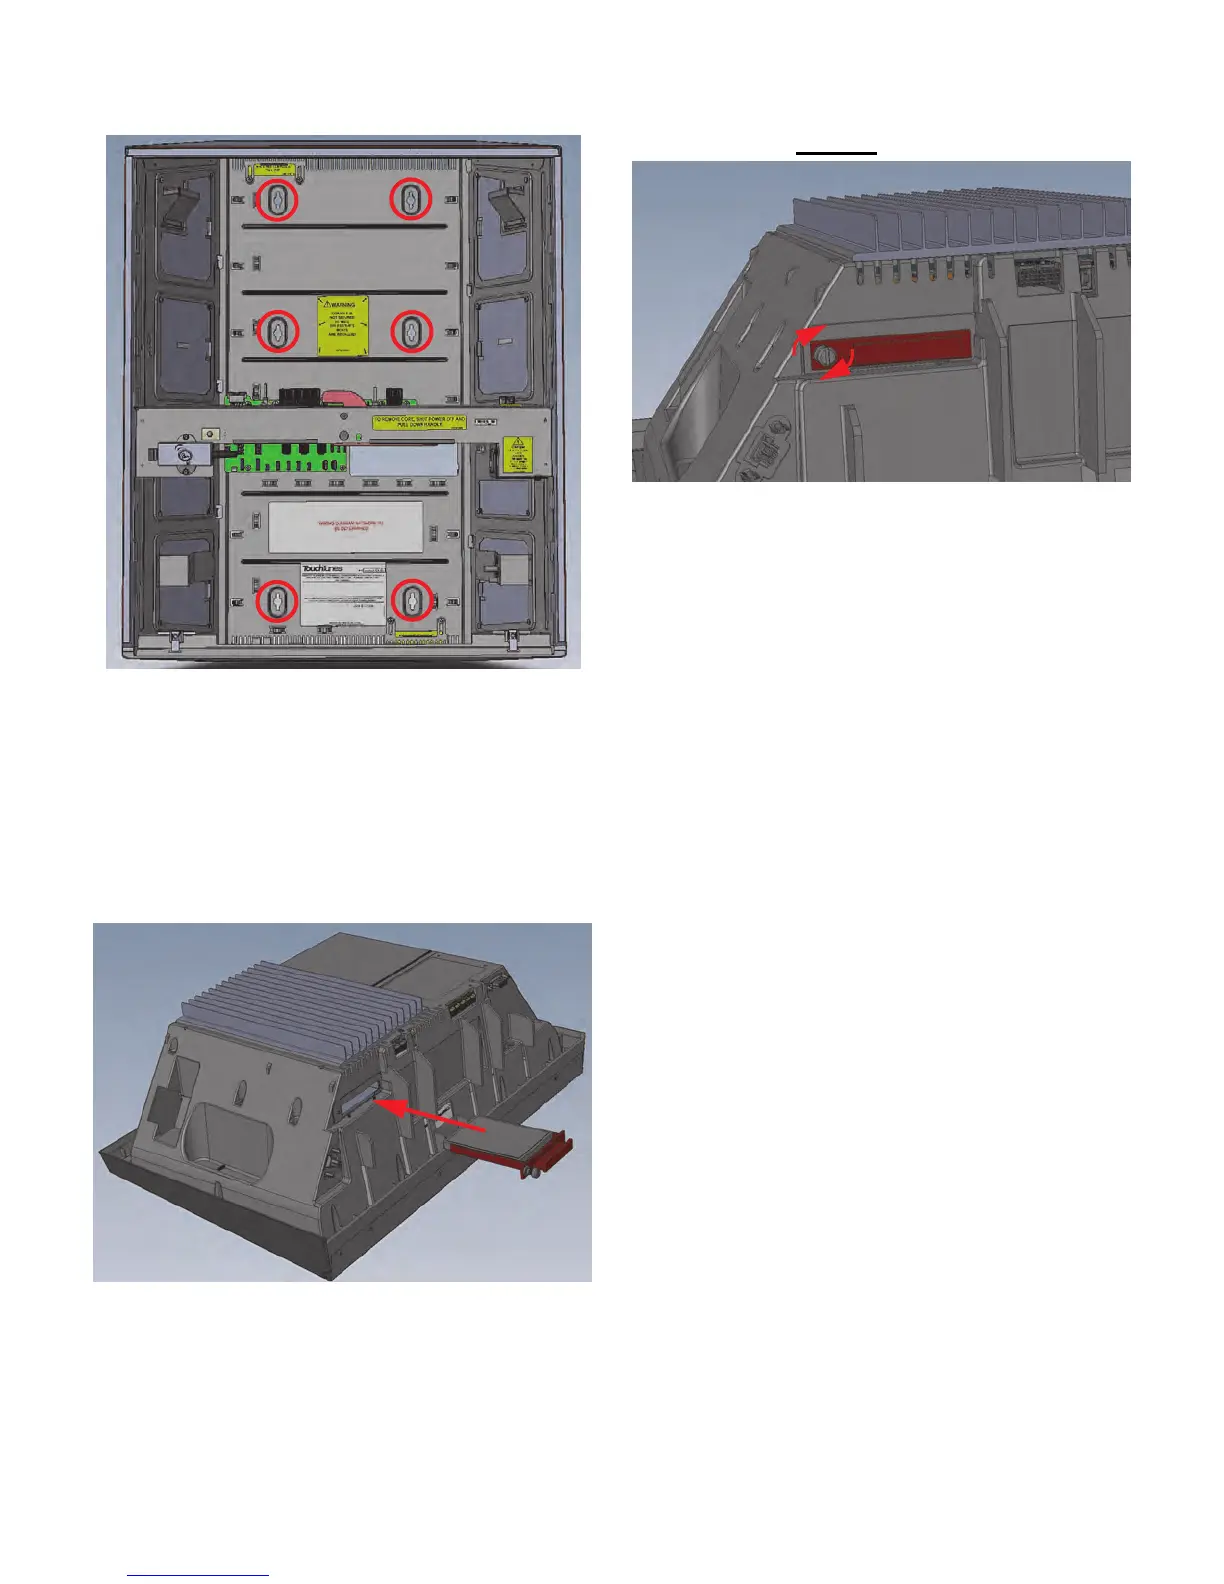
9. Fully fasten the chassis to the wall using four (4) extra
screws, and tighten the two screws already installed.
Step 4: Install the Hard Drive
10.Follow proper grounding procedure before handling
the hard drive. Failure to do so could lead to static
discharge and damage to the hard drive.
11.Locate the hard drive.
The hard drive and its enclosure are shipped
separately from the main Playdium hardware.
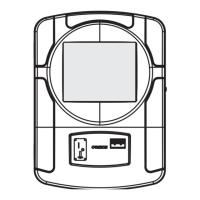
12.Align the hard drive enclosure with its slot on the
underside of the core.
13.Insert the hard drive enclosure in the slot and then
gently push the enclosure in until it is completely
seated.
14.Using your fingers, push in and then tighten the thumb
screw (clockwise) on the hard drive tray until the
thumb screw is securely tightened.
15.Test whether the hard drive is firmly seated by pulling
out firmly on the handle of the hard drive tray.
The hard drive is secured properly when:
• The spring on the thumb screw is completely
compressed and covered by the cowl head of the
thumb screw.
• There is no gap between the edge of the hard drive
tray and the computer.
• There is no play between the hard drive and the
computer when you pull outward on the handle of the
hard drive tray.