12
BUILD THE FUSELAGE
❍ 1. Cover the fuselage top view on the plans with waxed
paper. Designate a right and left die-cut balsa fuselage side. If
you look at the rear end of the fuse sides you will see three
die-cut lines. These lines designate the pushrod exits. Use a
hobby knife to cut between the top and middle lines on the
right fuse side to open an exit slot 1-1/4" long for the elevator
pushrod. Do the same between the middle and bottom lines
on the left fuse side for the rudder pushrod exit.
★★★★ Pro Tip: If you have chosen the colors for your trim
scheme, cut the film for the two fuselage sides using the
die-cut side pieces as your pattern. Cut the outside edges
about 1" oversize but cut the wing opening to the exact
size. Be sure to cut a left and right side. Save these pieces
for use during final covering.
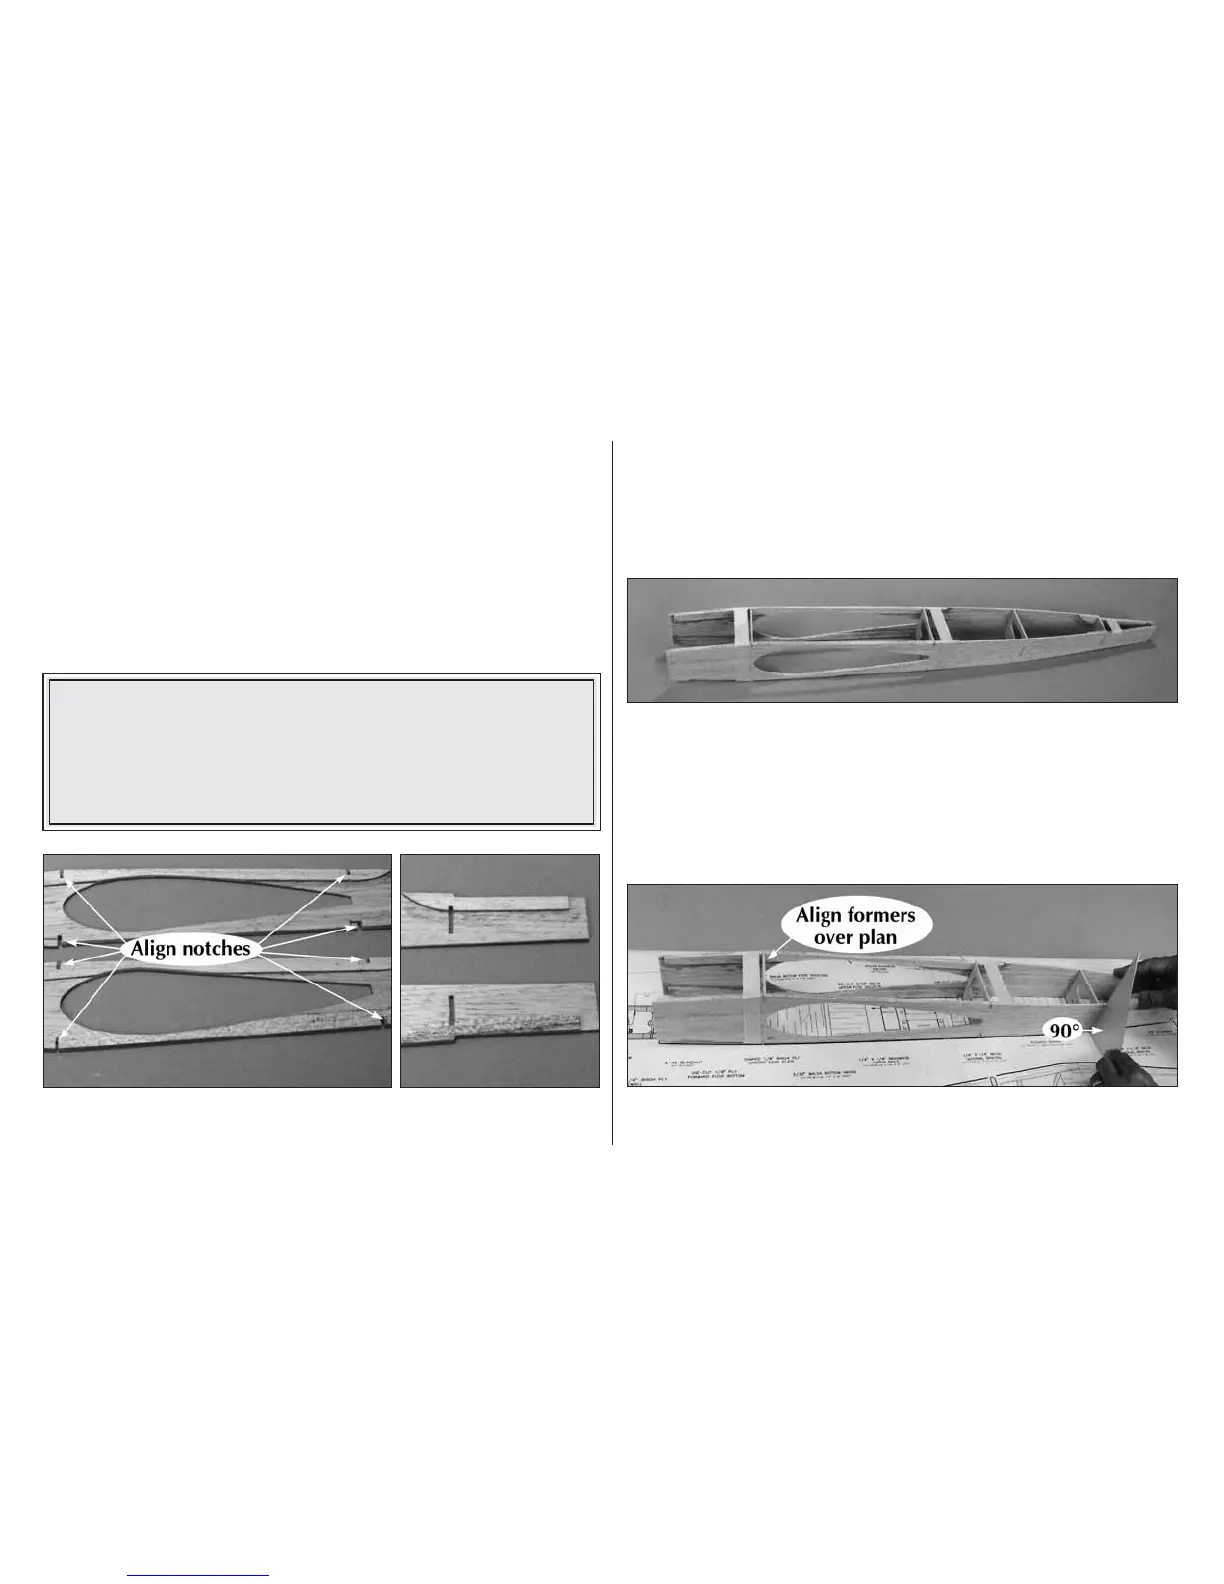
❍ 2. Align and glue the top, bottom and aft die-cut balsa
doublers to the die-cut balsa right fuse side as shown. Be sure
the notches on the doublers match the fuse sides perfectly.
Repeat this operation for the left fuse side but be sure to
check your work before using any glue so that you don’t make
two right sides! The doublers must face toward the inside of
the model.
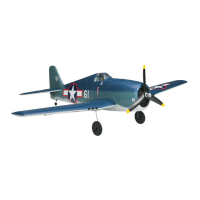
❍ 3. Drill a 3/16" pushrod hole through each of the punch
marks on die-cut ply formers, F2 through F5. Without using
any glue, insert the formers into the notches in the fuse sides
with the die-stamped numbers facing the front of the model and
all of the 3/16" pushrod holes toward the bottom of the
fuselage. Use masking tape to hold the assembly together.
❍ 4. Position F2 over its location on the plans, then pin the
fuse sides to the building surface. Carefully align the length of