11
ATTENTION!!! The motor battery should never be plugged
in without the transmitter switch being on. Otherwise, the
receiver could pick up errant signals, inadvertently causing
the servos to move or the motor to activate. Always turn on
the transmitter fi rst and unplug the motor battery fi rst.
Check the Control Directions
❏
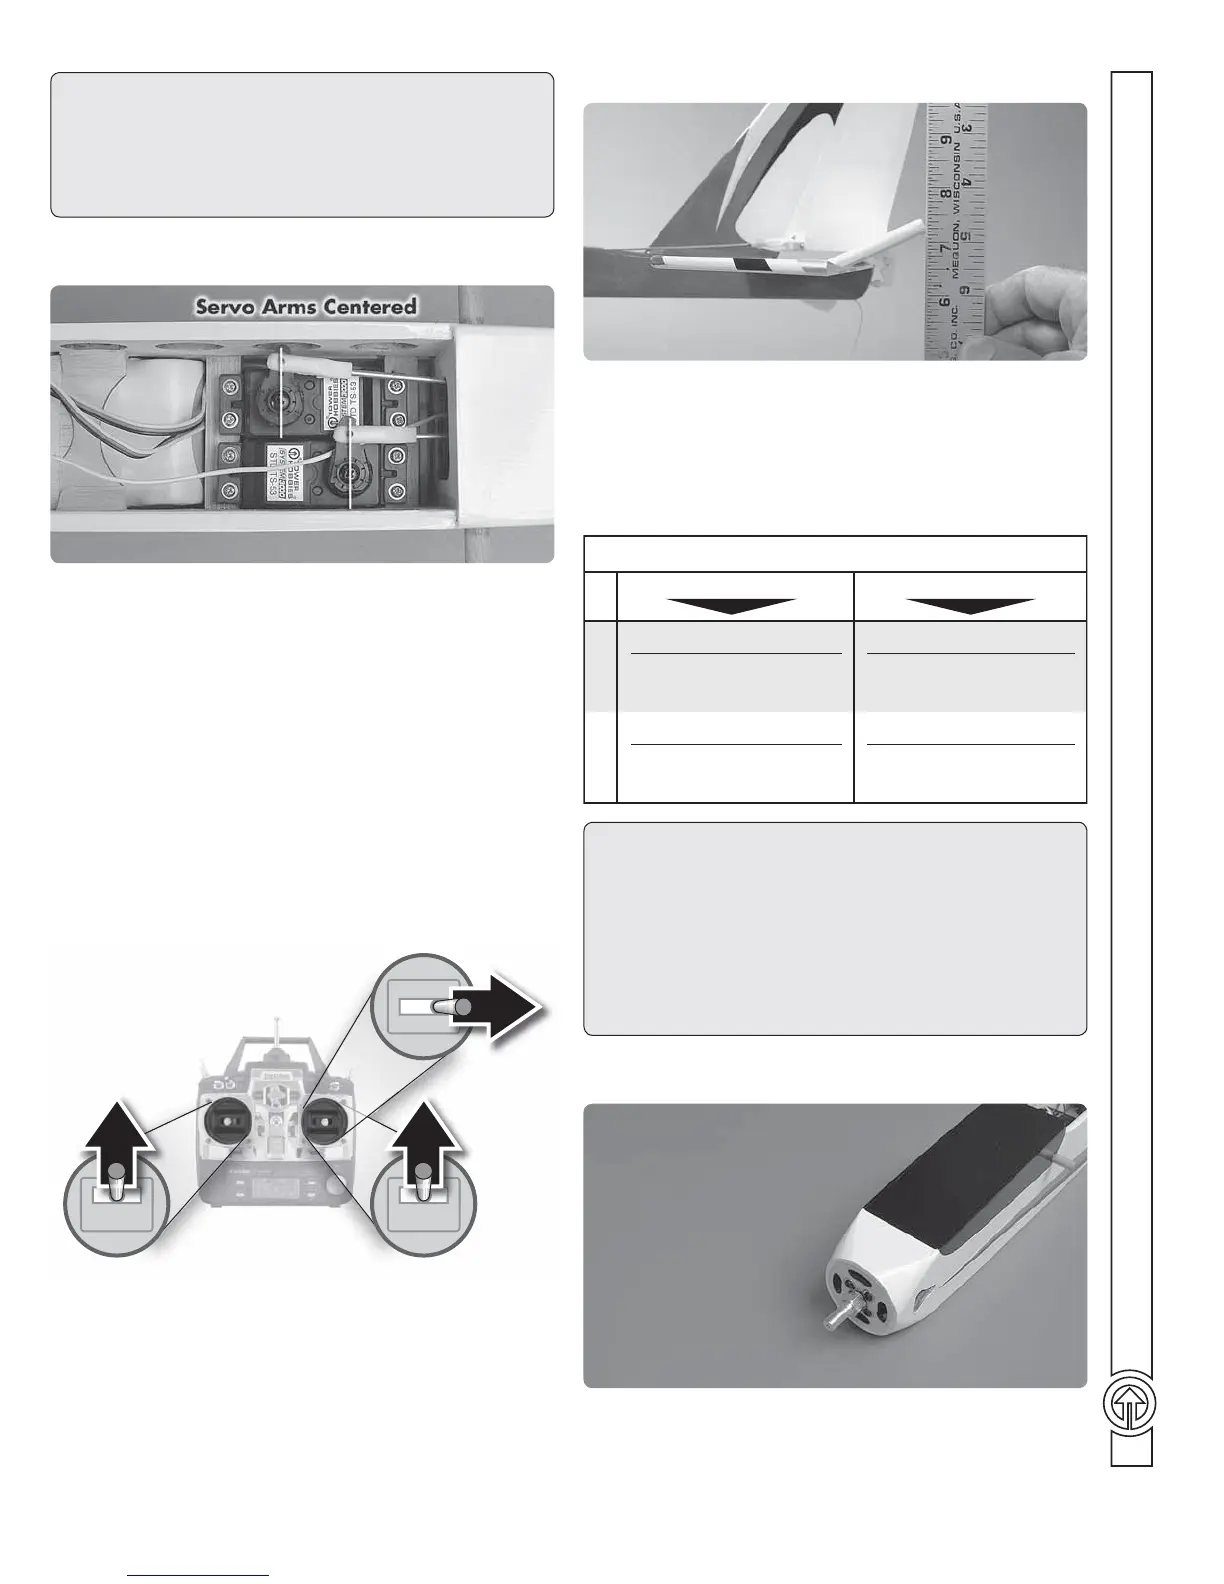
1. With the transmitter and receiver on and the trims centered,
make sure the elevator and rudder servo arms are centered, or
perpendicular to the servos. If necessary, remove the arms from
the servos and reinstall them so they will be perpendicular to
the servos. Install the screws that hold on the servo arms.
❏
2. With the transmitter and receiver still on, observe the
rudder and elevator to see if they are still centered. If necessary,
remove the clevises from the control horns and adjust the length
of the pushrods and reconnect the clevises to the horns so the
rudder and elevator are centered.
FULL
THROTTLE
ELEVATOR
MOVES DOWN
3-CHANNEL
RADIO SET UP
(STANDARD MODE 2)
RUDDER
MOVES
RIGHT
❏
3. Make certain the elevator, rudder and motor respond in
the correct direction as shown in the diagram. If necessary, use
the servo reversing function in your transmitter to reverse the
direction of the elevator and rudder.
Set the Control Throws
Use a ruler to measure and set the control throw of the elevator
and rudder as indicated in the chart that follows. If your radio
does not have dual rates, we recommend setting the throws at
the low rate setting.
Note: The rudder throw is measured at the bottom of the rudder.
THESE ARE THE RECOMMENDED CONTROL SURFACE THROWS:
ELEVATORRUDDER
5/8"
[16 mm]
UP DOWN
1-1/2"
[38 mm]
RIGHT LEFT
3/8"
[9.5 mm]
UP DOWN
1"
[25 mm]
RIGHT LEFT
5/8"
[16 mm]
1-1/2"
[38 mm]
3/8"
[9.5 mm]
1"
[25 mm]
HIGH RATE
LOW RATE
IMPORTANT: The Vista BL EP ARF has been extensively
fl own and tested to arrive at the throws at which it fl ies best.
Flying your model at these throws will provide you with the
greatest chance for successful fi rst fl ights. If, after you have
become accustomed to the way the Vista BL EP ARF fl ies,
you would like to change the throws to suit your taste that is
fi ne. However, too much control throw could make the model
diffi cult to control, so remember, “more is not always better.”
Install the Propeller
❏
1. Slide the aluminum collet type prop adapter onto the
motor shaft.