12
❏
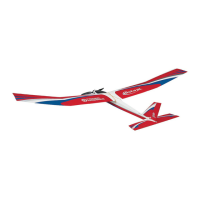
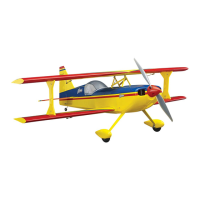
2. Install the propeller and propeller backplate on the prop
adapter. Make sure the hex on the prop adapter keys into the
hex on the back of the backplate. Secure the prop to the adapter
with the plastic washer and aluminum hex nut, making sure to
leave a 1/16" [1.5mm] gap between the backplate and front of
the fuselage.
❏
3. Install and secure the spinner cone to the prop adapter
with the included screw.
Apply the Decals
❏
1. The decals are die-cut from the factory.
❏
2. Be certain the model is clean and free from oily fi ngerprints
and dust. Prepare a dishpan or small bucket with a mixture of
liquid dish soap and warm water—about 1/2 teaspoon of soap per
gallon of water. Submerse one of the decals in the solution and
peel off the paper backing. Note: Even though the decals have
a “sticky-back” and are not the water transfer type, submersing
them in soap & water allows accurate positioning and reduces
air bubbles underneath.
❏
3. Position decal on the model where desired. Holding the
decal down, use a paper towel to wipe most of the water away.
❏
4. Use a piece of soft balsa or something similar to squeegee
remaining water from under the decal. Apply the rest of the
decals the same way.
Balance the Model (C.G.)
More than any other factor, the C.G. (balance point) can have
the greatest effect on how a model fl ies, and may determine
whether or not your fi rst fl ight will be successful. If you
value this model and wish to enjoy it for many fl ights, DO
NOT OVERLOOK THIS IMPORTANT PROCEDURE.
A model that is not properly balanced will be unstable and
possibly unfl yable.
At this stage the model should be in ready-to-fl y condition with
all of the systems in place including the servos, battery (not
plugged in), propeller assembly and receiver.