9
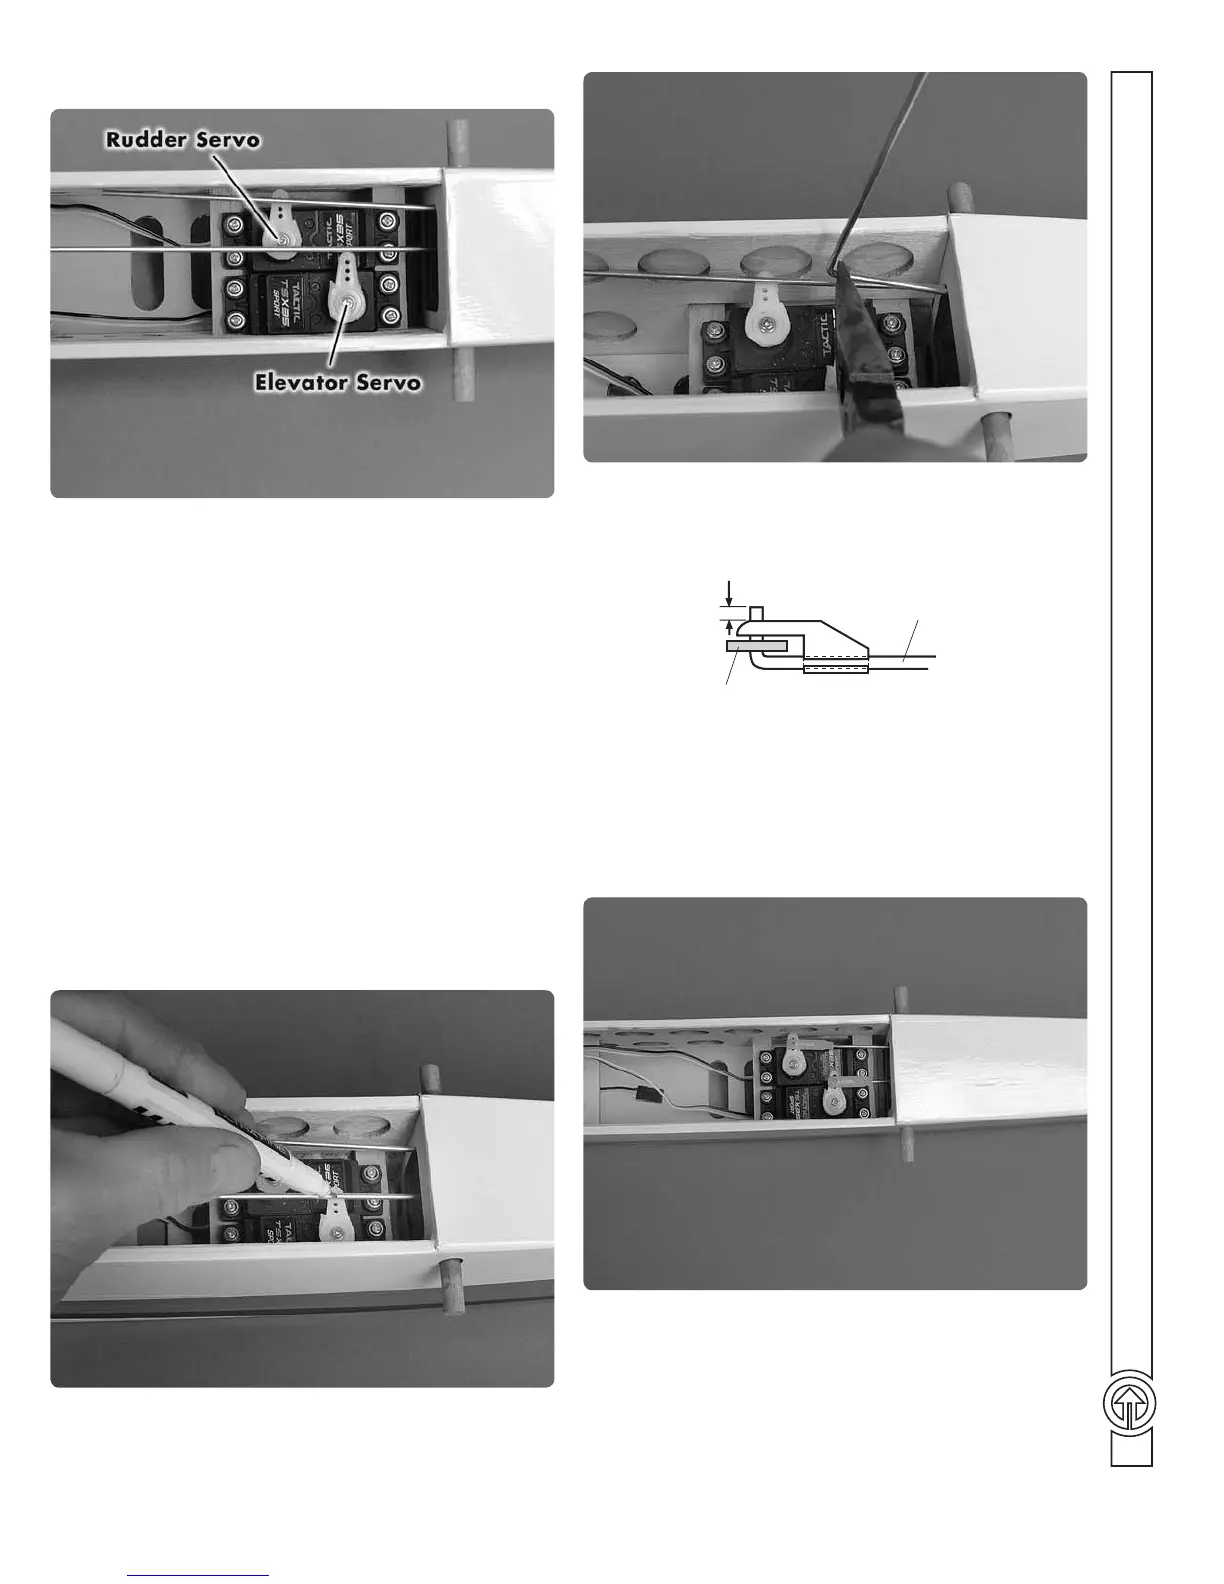
Refer to this photo for the following four steps.
❏
3. Position the servos on the rails and slide them forward
against the forward rail. Note the position of the splined output
shaft on the servos (the elevator servo is facing aft and the
rudder servo is facing forward). Space the rail approximately
3/32" [3mm] aft of the servos, and then securely glue the rail
into position.
❏
4. Place the servo arms on the servos–if your servos came
with a selection of servo arms, use ones that will not interfere
with the other servo or the fuselage sides. For Futaba
®
and Tactic
servos, use the six-arm servo arms and cut off the unused arms.
❏
5. Position the left servo all the way over to the left side of
the fuselage. Drill 1/16" [1.6 mm] holes through the rails for the
servo mounting screws. Mount the servo with the screws that
came with it.
❏
6. Move the rudder servo all the way over to the elevator
servo. Drill 1/16" [1.6mm] holes through the rails and mount
the rudder servo with the screws that came with it.
❏
7. Center the servo arms as shown, holding the elevator
pushrod so the elevator is centered. Mark the pushrod where it
crosses the holes in the elevator servo arm.
❏
8. Use pliers to make a 90° bend in the pushrod at the mark
you made.
Pushrod Wire
Servo Horn
1/16”
❏
9. Take the servo arm off the servo. Enlarge the holes in the
servo arms with a servo horn drill (HCAR0698), a 5/64" [2mm]
drill bit or a hobby knife. Connect the pushrod to the outer hole
in the elevator servo using a 90° pushrod connector. Cut the
pushrod 1/16" [1.6mm] from the connector. Then replace the
servo arm on the servo.
❏
10. Connect the rudder pushrod to the rudder servo the
same way.